

 Q2
Q2
 QIDI Box
 Plus 4
 Q1 Pro
 X-Max 3


3D Printer Nozzle Maintenance: A Comprehensive Cleaning Guide

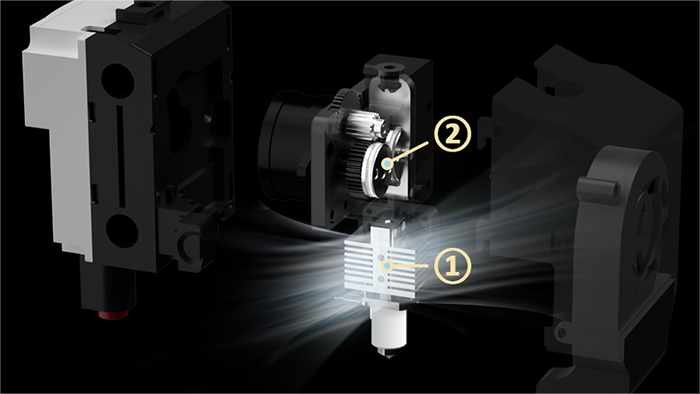
Clean the outside of your nozzle with a brass brush every few prints, and run a cold pull roughly once a month or whenever you change material family. On a QIDI Q2, Plus 5 or Max4, that means heating the bimetal nozzle to 250 °C, feeding PLA through, cooling to 90 °C and pulling. Everything else is inspection.
Nozzle maintenance is the cheapest reliability upgrade there is. It costs a few minutes, needs no parts, and prevents the two failures that waste the most filament: a clog that kills a print at hour six, and a slow drift in extrusion width that quietly ruins dimensional parts. This guide covers what to do, how often, and the specific numbers for current QIDI machines.
How Often Should You Clean a 3D Printer Nozzle?
There is no single interval, because the tasks have different clocks. Use this schedule as a baseline and tighten it if you print abrasive composites.
| Task | How often | Time needed | Why it matters |
|---|---|---|---|
| Brass-brush the nozzle exterior while hot | Every 2–3 prints | Under a minute | Stops baked-on residue dropping onto the part mid-print |
| Visual check of the tip and orifice | Weekly, or before any dimensional job | 1 minute | Catches rounding and out-of-round wear before it shows in parts |
| Cold pull | Monthly, or on any material-family change | 10 minutes | Clears degraded residue from inside the melt zone |
| Clean the hotend cooling fan and heat sink fins | Monthly | 5 minutes | Dust in the fins causes heat creep, the top cause of repeat clogs |
| Inspect the silicone sock | Monthly | 2 minutes | A torn sock lets plastic pack around the heater block |
| Remove and deep-clean or replace the nozzle | When clogs recur after a proper clean | 20–30 minutes | A scored bore keeps catching residue no matter how often you clean it |
| Purge with cleaning filament | Switching to or from high-temp materials | 5 minutes | Prevents charred high-temp residue seeding clogs in low-temp prints |
If you print carbon-fibre or glass-fibre filled filament regularly, halve the inspection intervals. Abrasives change the orifice faster than residue blocks it.
Getting to Know Your 3D Printer Nozzle
The nozzle is the calibrated tip that melts filament and meters it onto the plate. Every flow calculation your slicer makes assumes that orifice is still the diameter your profile says it is, which is why maintenance is really about preserving a dimension, not just clearing plastic.
Nozzles are made from brass, stainless steel, hardened steel and bimetal combinations, and each trades heat conduction against wear resistance. Every current QIDI machine — Q2C, Q2, Plus 5 and Max4 — ships with a 0.4 mm bimetal nozzle rated to 370 °C, fed by a direct-drive extruder with hardened-steel dual gears. Optional 0.2, 0.6 and 0.8 mm nozzles are available for detail or throughput work; the full figures are on the Q2 tech specs page.
As you print, filament residue accumulates inside the bore and causes clogs and inconsistent extrusion. Signs that your nozzle needs attention include reduced print quality, under-extrusion, stringing or oozing, and poor first-layer adhesion.

How to Prepare for Cleaning
Before you start, take a few preparatory steps for safety and effectiveness.
Protect yourself first: wear heat-resistant gloves and work in a well-ventilated area, especially with solvents. For any work that involves removing parts rather than just wiping the tip, disconnect the printer from power once it has cooled.
Then collect your tools: a brass brush, a cleaning needle matched to the orifice, pliers, the correct nozzle wrench, solvent, and lint-free cloths. A tidy bench matters more than it sounds — a dropped silicone sock or a lost sock retaining clip will cost you more time than the whole job.
Finally, preheat. Softened residue releases; cold residue does not. Set the temperature according to the material you have been running, since different filaments need different temperatures to soften cleanly.
How to Clean a 3D Printer Nozzle
There are five methods, in ascending order of invasiveness. Escalate only when the gentler one fails.
1. Brass Brush (Exterior)
Heat the nozzle to printing temperature and brush the outside firmly. This removes the burnt skin of plastic that otherwise flakes onto your print. Never brush across the orifice itself.
2. Cold Pull (Interior)
A cold pull melts filament inside the nozzle, cools it until it is firm but still gripping, then extracts it so it carries the blockage out with it. This is the workhorse technique and the one worth learning properly.
3. Cleaning Needle
With the nozzle hot, insert a needle sized to the orifice and work it gently in and out. Use 0.35 mm for a 0.4 mm nozzle. Anything larger, and certainly a drill bit, will widen the hole and permanently change your extrusion width — a much worse problem than the clog you started with.
4. Solvent Soak (Nozzle Removed)
For stubborn residue, acetone dissolves ABS and ASA; isopropyl alcohol handles surface grime but not PLA or PETG, which resist both. For those, warm the removed nozzle with a heat gun instead. Rinse and dry thoroughly before refitting.
5. Ultrasonic Cleaner
Place the removed nozzle in the basket with a suitable solution and run it for the recommended time. Effective on complex internal geometry, but it needs the nozzle off the machine.
Cold Pull on a QIDI Q2, Plus 5 or Max4
Because all four current machines share the same 370 °C bimetal hotend and direct-drive extruder, the procedure and the numbers are identical across the range.
- Unload the current filament and take the spool off so nothing feeds in behind you.
- Set the nozzle temperature manually to 250 °C from the printer's temperature control. Do not start a print.
- Hand-feed about 30 cm of PLA until a clean strand extrudes. This fills the melt chamber, which is what gives the pull something to grip.
- Drop the target to 90 °C and wait until the display actually reads 90 °C.
- Grip the filament close to the extruder inlet with pliers and pull straight up in one fast motion.
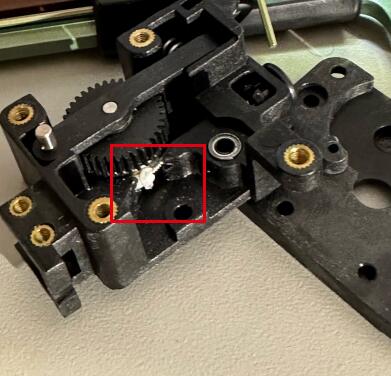
- Inspect the tip: a good pull shows a moulded cone of the nozzle interior, usually with a dark speck of carbonised plastic embedded in it.
- Repeat until the tip comes out clean and glossy.
| Pull material | Heat to | Cool to before pulling |
|---|---|---|
| PLA | 220–250 °C | 90–100 °C |
| PETG | 240 °C | 120 °C |
| ABS / ASA | 250 °C | 140 °C |
| Nylon (PA) | 260 °C | 140–150 °C |
One practical note: on the Q2, Plus 5 and Max4 the build chamber heats to 65 °C, so leave the door open during a cold pull or the cool-down drags. The Q2C has no chamber heater, so it makes no difference there. If a cold pull will not clear it, work through our full nozzle jam procedure, and see the official troubleshooting notes for the disassembly sequence.
Machine-Specific Maintenance Items
Beyond the nozzle itself, three consumables sit close enough to affect it directly:
- Nozzle wiper: the wiper pad scrubs the tip at the start of each job. When it packs solid it stops wiping and starts smearing. Replacements are stocked as the Q2 nozzle wiper.
- Silicone sock: it insulates the heater block and keeps stray plastic off it. A torn sock lets a small ooze become a plastic blob welded around the block. Spares are the Q2 hotend silicone sock protectors.
- Hotend cooling fan: the single most common cause of repeat clogs is a fan that has slowed or stopped. Confirm it spins whenever the nozzle is hot. Other model-specific parts live in Q2 accessories and Max4 accessories.
Reassemble and Test
After cleaning, refit carefully: the nozzle must be hot-tightened against the heater block, and the thermistor and heater cartridge must be properly seated and connected.
Then run three checks in order. First, a nozzle height or Z-offset calibration, since removing the nozzle almost always shifts it. Second, a flow rate check — print a hollow single-wall cube and measure the wall with calipers. Third, a short test print, watching the first layer closely. Your printer's documentation gives the exact calibration routines for your model.
How to Prevent Clogs in the First Place
Proper filament storage does more for nozzle health than any cleaning routine. Keep spools cool, dry and out of sunlight, in airtight containers with desiccant. Hygroscopic materials like PLA, PETG and nylon absorb enough moisture in a humid week to flash to steam inside the melt zone, which blows voids into the flow and leaves residue behind. A filament dryer restores a spool that has already gone wet; our guide on drying filament covers times and temperatures by material.
Make the visual check a habit, not a project. Ten seconds looking at the tip after a print tells you more than an hour of slicer tuning later.
Stay inside the recommended temperature range for each filament type. Running hot degrades material in the melt zone and leaves carbonised residue that seeds the next clog; running cold builds a plug directly.
Match the nozzle to the material. If you print composites, move to a hardened or tungsten carbide bimetal nozzle rather than cleaning a soft nozzle more often. And consider diameter deliberately: a 0.6 or 0.8 mm nozzle clogs noticeably less on filled filaments simply because the passage is wider.
Troubleshooting After Cleaning
If quality is still off after a clean, here is how to troubleshoot the common cases:
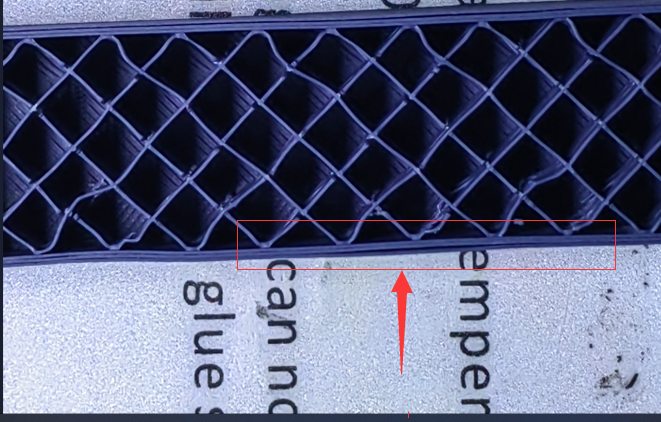
- Under-extrusion or weak infill: check for a remaining partial clog, confirm extruder tension is correct and the filament feeds smoothly, then recalibrate flow rate.
- Stringing or oozing: adjust retraction in your slicer and lower the temperature slightly. Confirm no residue is left on the tip — a dirty exterior oozes long after the interior is clear.
- Poor adhesion and warping: re-level and re-check Z-offset, since removing a nozzle changes it. Clean the print bed and keep the machine out of drafts.
- Leaking around the threads: the nozzle was not hot-tightened. Reheat, seat by hand, back off a quarter turn, then torque while bracing the heater block.
FAQ
How often should you clean the nozzle on a 3D printer?
Brush the outside every two or three prints while it is hot, inspect the tip weekly, and run a cold pull about once a month or whenever you switch material family. Deep-clean or replace only when clogs return after a proper clean.
How do I clean a clogged nozzle on a QIDI Q2?
Run a cold pull: nozzle to 250 °C, hand-feed PLA until it extrudes cleanly, cool to 90 °C, then pull firmly with pliers. Repeat until the tip comes out clean. If three pulls make no difference, remove the nozzle hot and clean it with a 0.35 mm needle.
What maintenance does a QIDI Q2 need?
Nozzle brushing and inspection on the schedule above, monthly hotend fan and heat sink cleaning, periodic wiper pad and silicone sock replacement, plate cleaning with isopropyl alcohol, and a re-level after any hotend work. The chamber and filtration hardware need nothing beyond keeping the filter media fresh.
Can I clean the nozzle without removing it?
Yes, and you usually should. A brass brush plus a cold pull handles the large majority of maintenance without a single tool. Removing the nozzle is for deep cleaning, solvent soaks and replacement only.
Does cleaning filament work as well as a cold pull?
Cleaning filament is good at purging colour and material carryover between jobs, which is the job it is designed for. A cold pull is better at extracting a physical deposit, because it grips the debris and pulls it out rather than trying to push it through the orifice.
Why does my nozzle clog again a day after cleaning?
Three usual causes: wet filament, a hotend cooling fan that is no longer moving enough air, or a bore that has been scored and now catches residue. Check the first two before assuming the nozzle is finished.
Keep the Routine Small and It Will Stick
A maintained nozzle is the difference between a printer you trust with a 20-hour job and one you watch nervously. The routine that works is the one that is short enough to actually do: brush it hot, look at it weekly, cold pull it monthly, and keep a spare nozzle and a fresh wiper on the shelf. If you are choosing a machine to build that habit around, the current QIDI 3D printer range and filament range are the place to start.
Read More
- How Often Should You Clean a 3D Printer Nozzle?
- Getting to Know Your 3D Printer Nozzle
- How to Prepare for Cleaning
- How to Clean a 3D Printer Nozzle
- 1. Brass Brush (Exterior)
- 2. Cold Pull (Interior)
- 3. Cleaning Needle
- 4. Solvent Soak (Nozzle Removed)
- 5. Ultrasonic Cleaner
- Cold Pull on a QIDI Q2, Plus 5 or Max4
- Machine-Specific Maintenance Items
- Reassemble and Test
- How to Prevent Clogs in the First Place
- Troubleshooting After Cleaning
- FAQ
- How often should you clean the nozzle on a 3D printer?
- How do I clean a clogged nozzle on a QIDI Q2?
- What maintenance does a QIDI Q2 need?
- Can I clean the nozzle without removing it?
- Does cleaning filament work as well as a cold pull?
- Why does my nozzle clog again a day after cleaning?
- Keep the Routine Small and It Will Stick
- Read More
Recommended products






