3D Printing Troubleshooting: 15 Most Common Problems & Solutions

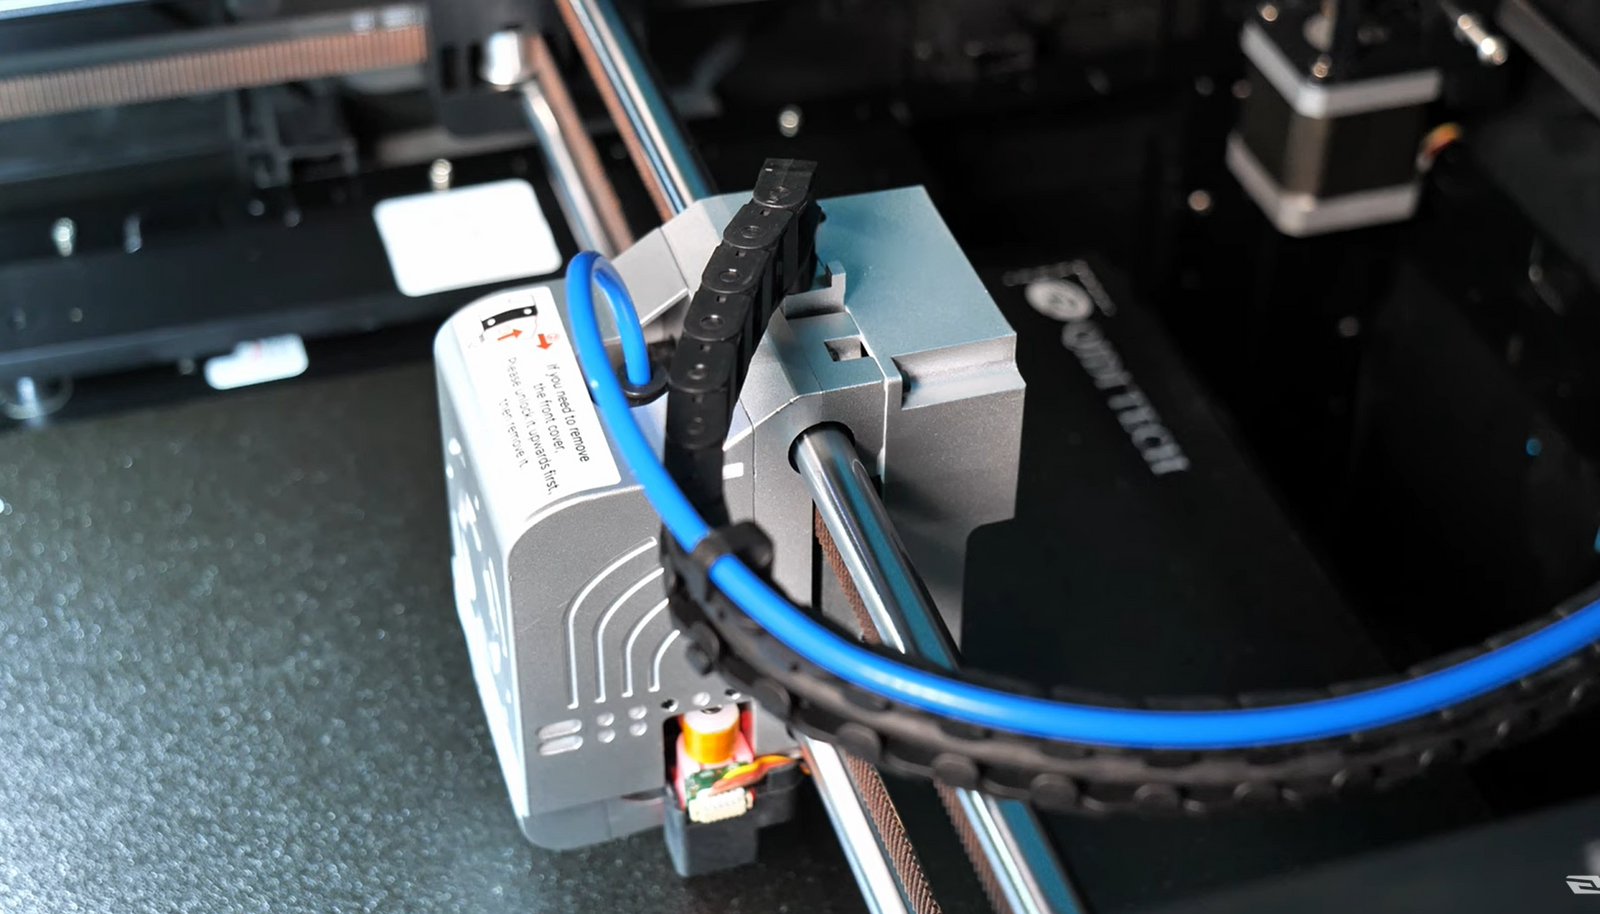
3D printing technology allows people to create prototypes and manufacture parts innovatively. However, like any complicated system working across software, hardware, materials, and device settings, problems can happen that lower print quality and make printing fail. It is important for 3D printing fans to learn structured troubleshooting skills. That way they can get the most benefit from the technology and consistently print high-quality objects. Even though troubleshooting seems hard at first, it builds logic skills, helps understand how printers work, and boosts confidence to fix issues on your own.
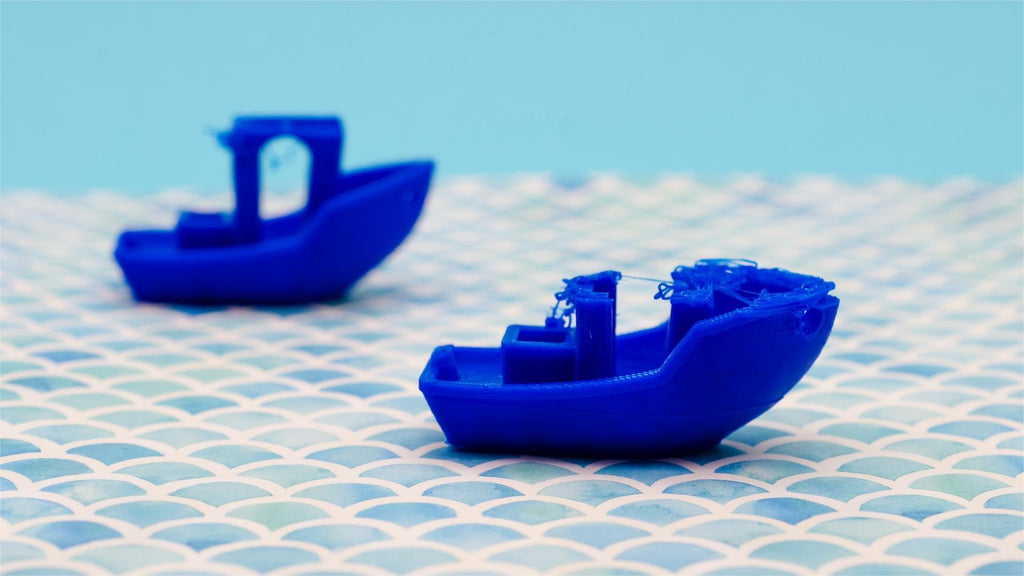
Problem 1: Warping
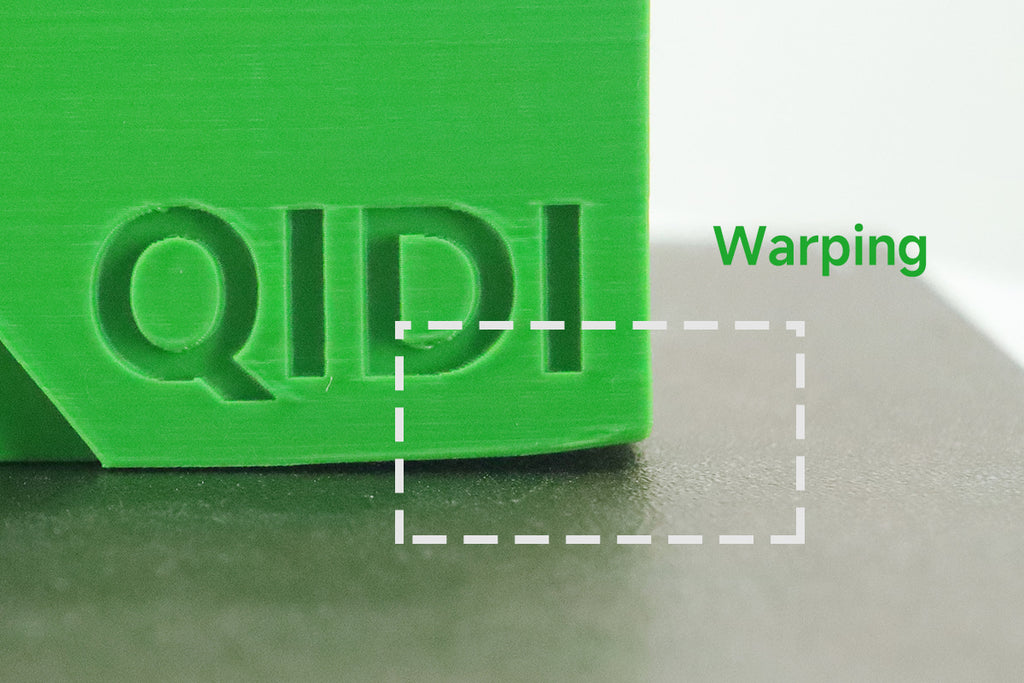
What is warping and why does it happen?
Warping is when the corners and edges of 3D-printed objects bend upwards and deform. It happens because some areas of the part cool and shrink faster than others as each layer is printed. This causes uneven tightening and stress. Large flat surface areas, sharp corners, and small contact points touching the print bed make warping worse. Things that add too much internal stress are poor bed sticking, print bed temperature being too low, nozzle height not set right, no cooling fans, and extreme room temperatures.
How to prevent warping
Thankfully, straightforward adjustments can practically eliminate warping:
- Enable cooling fans to maintain uniform temperatures.
- Use a heated print bed and experiment with higher temperatures.
- Try other build surface coatings like glue, hairspray, or specialty adhesives to maximize bed adhesion.
- Optimize print bed leveling and nozzle height for proper first-layer squish.
- Slow down outer shell print speed to allow layers time to cool evenly.
- Avoid ambient drafts and temperature swings around the 3D printer. Advanced 3D printers like the QiDi X-Max 3 also use Active Chamber Heating technology, maintaining a stable 65°C internal temperature to prevent part warping.
With some calibration, warping can become a non-issue allowing users to unlock larger and more ambitious print jobs.
Problem 2: Layer Shifting
What is layer shifting and why does it happen?
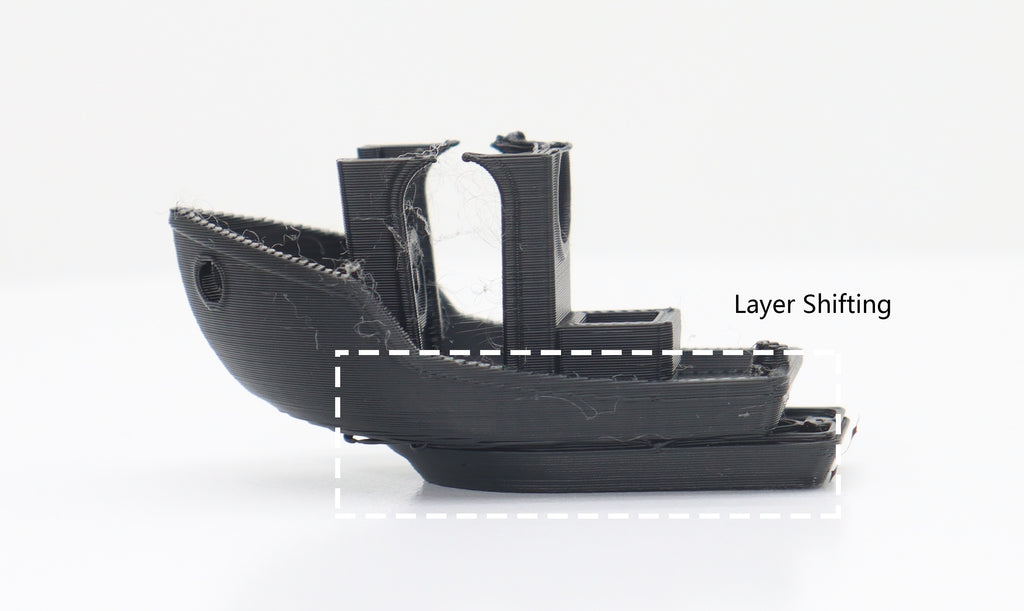
The precise stacking of layers is fundamental to 3D printing. Layer shifting refers to an alignment problem where layers are displaced horizontally and no longer aligned with the rest of the print. This can cause anything from subtle surface issues to completely collapsed models.
Layer shifts show up as stair-step patterns, most visible on taller vertical surfaces. Shifting happens when the print nozzle forcefully bumps already deposited material, knocking layers away from their programmed position. Too much vibration can also throw off the printer's tracking, contributing to shifts.
How to prevent layer shifting.
- Securely mount and reinforce key printer components.
- Enable acceleration and jerk control for gentler direction changes.
- Calibrate stepper motor driver currents and feed rate limits.
- Verify guide rails or belts have no excessive looseness.
- Place the printer on a rigid surface in a low-vibration environment.
- Add resilience features like brims for better stability.
With attentiveness to potential vibration sources and printer mechanics, users can steer clear of troubling layer shifts.
Problem 3: Prints Not Sticking to the Print Bed
Why does bed adhesion matter?
Getting the first layer to stick tightly to the print bed is key for 3D printing success. That first layer needs to fully grip the bed so the next layers can stick firmly to it as they print. Bed stickness depends a lot on the melted filament being thick and sticky enough to hold onto the bed surface.
If fresh layers separate easily instead of sticking tight, you get issues like bent corners, collapsed prints, and clumpy, messy layers. Poor first-layer stickness ruins prints. But great bed adhesion sets up the rest of the printing so layers bond together right. Achieving excellent first-layer stickness makes it easier to print tall, reliable structures.
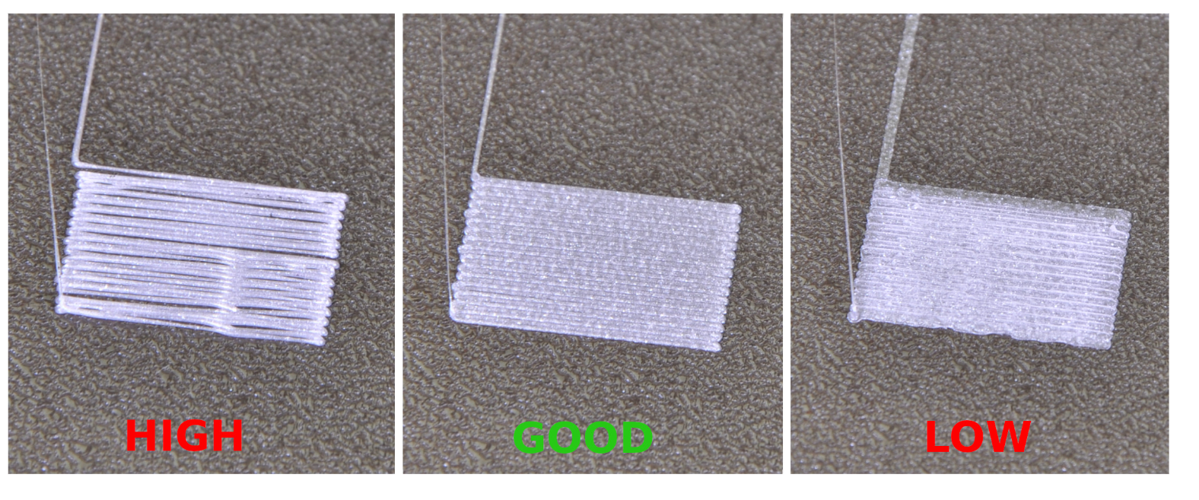
Why don't prints stick to the bed?
- Causes of poor first-layer adhesion include:
- Inadequate cleaning leaving residual dust, grease, or oils.
- Improper print bed leveling and nozzle height.
- Low bed temperature cooling plastic too fast.
- Incompatible build surface for chosen filament.
- Initial layer height set too high.
- First layer printing too fast before bonding.
Read this guide to Learn more: Why Is My 3D Print Not Sticking to Bed?
How to improve bed & interlayer adhesion
Users can improve bed and interlayer adhesion through these key strategies:
- Clean print surfaces thoroughly with isopropyl alcohol.
- Use specialized adhesion solutions like glues, tapes, or ABS/Acetone slurry.
- Optimize leveling to achieve proper first-layer squish.
- Adjust temperatures and enclosure conditions for better bonding.
- Slow down critical print moves to allow contacts time to fuse.
- Modify slicing settings like increasing extrusion width.
With appropriate troubleshooting and adjustments to the printer, software, and environmental factors, users can establish the essential adhesion required for 3D printing success.
Problem 4: Stringing or Oozing
What are stringing and oozing?
Stringing manifests as bothersome wisps and strands of plastic protruding across printed areas. The thin strings may droop down ruining fine details and overhangs. In severe cases, accumulation causes jamming or entirely blocks the nozzle. Beyond the marring appearance, strings also hint at oozing. Oozing refers to leaked and unintended extrusion depositing where it shouldn't. The excess plastic leads to bulges, zits, and bumps, which are especially detrimental on visible surfaces. Both stringing and oozing originate from similar root causes.

Why they happen
The main factors posing stringing and oozing include:
- High temperature increasing filament viscosity and fluidity.
- Insufficient retraction settings failing to fully counteract oozing.
- Slow travel moves to allow molten material to dribble out nozzles.
- Wet filament creating bubbles and spitballs when heated.
How to prevent stringing and oozing
- Lower nozzle temperatures but remain in filament guidelines.
- Increase retraction lengths to prevent oozing.
- Accelerate non-print travel moves between sections.
- Dry moist filament and use storage precautions.
- Switch to upgraded extruder mechanisms or anti-ooze nozzles.
With well-tuned settings and extra diligence in preparing filament, stringing can no longer impede flawless finishes.
Problem 5: Over-Extrusion
What is over-extrusion?
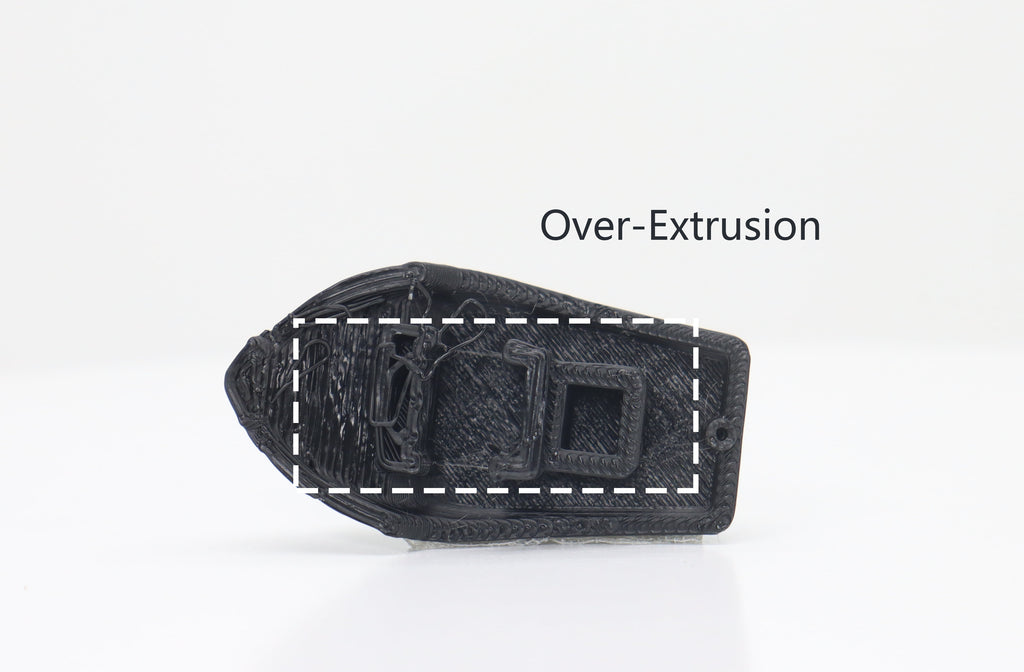
Over-extrusion in 3D printing is when a printer dispenses too much filament, causing excess material to accumulate and often resulting in blobs, zits, or rough surfaces on the printed object.
Detecting and resolving over-extrusion early is crucial for prints requiring precision dimensions, attractive visual quality, and functional performance.
Symptoms of excess material output relative to programmed toolpaths include:
- Dimensions of the print are larger than designed.
- Outer walls bulging out unevenly from the model.
- Layers no longer stack cleanly and vertical curves become misshapen.
- Excess filament piles up randomly giving rough textures.
Why it happens
Too much extrusion tends to accompany calibration issues like:
- Nozzle diameter misconfigured as smaller than reality.
- Incorrect filament diameter entered into slicers.
- Loose filament tolerance allowing inconsistent diameters.
- Stepper motor steps/mm mismatch for the extruder.
- Multiplier or flow rate erroneously set too high.
How to prevent over-extrusion
To remedy over-extrusion:
- Carefully calibrate and measure actual nozzle/filament sizes.
- Configure slicing settings accordingly.
- Test extruder stepper motor steps/mm.
- Try reducing the extrusion multiplier incrementally.
- Monitor for slipping or grinding in drive gear.
Staying mindful of software and hardware calibration minimizes troublesome over-extrusion.
Problem 6: Under-Extrusion
What is Under-Extrusion?
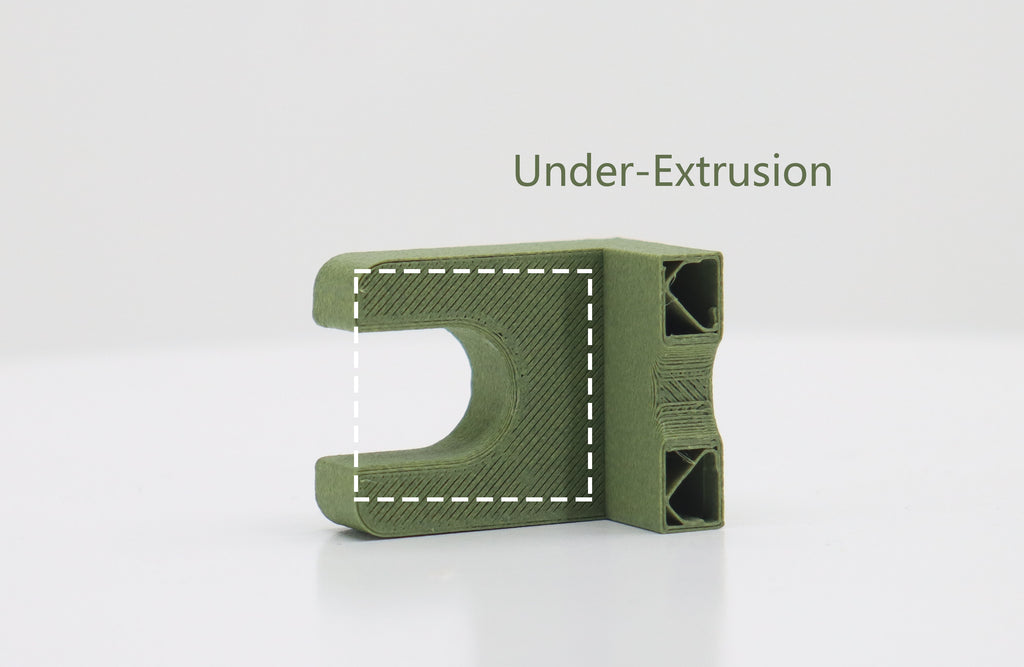
Under-extrusion is when inadequate material flows out of the nozzle compared to the print file instructions. This starves the print, leading to weak prints with gaps, porous surfaces, and ugly finishes. Severe under-extrusion can cause print failures.
Why it happens
Under-extrusion generally links to:
- Obstructions partially blocking filament flow.
- Slipping or grinding of the extruder drive gear.
- Overheating stepper drivers during long prints.
- Insufficient nozzle heating failing to melt filament fully.
- Speeds exceeding maximum volumetric flow capabilities.
How to prevent under-extrusion:
- Clearing nozzle clogs and obstructions.
- Improving cooling and torque on extruder steppers.
- Maximizing drive gear grip with tensioners.
- Raising temperatures closer to filament limits.
- Reducing print speeds for heavy volumetric sections.
Staying mindful of volumetric output limits and signs of inadequate flow enables resolving under-extrusion promptly.
Problem 7: Poor Print Resolution
What is print resolution?
Print resolution refers to the smallest distinguishable detail a 3D printer can produce. It determines how clear shapes and features turn out based on nozzle size, print speeds, and other settings. Poor resolution gives chunky, indistinct results.
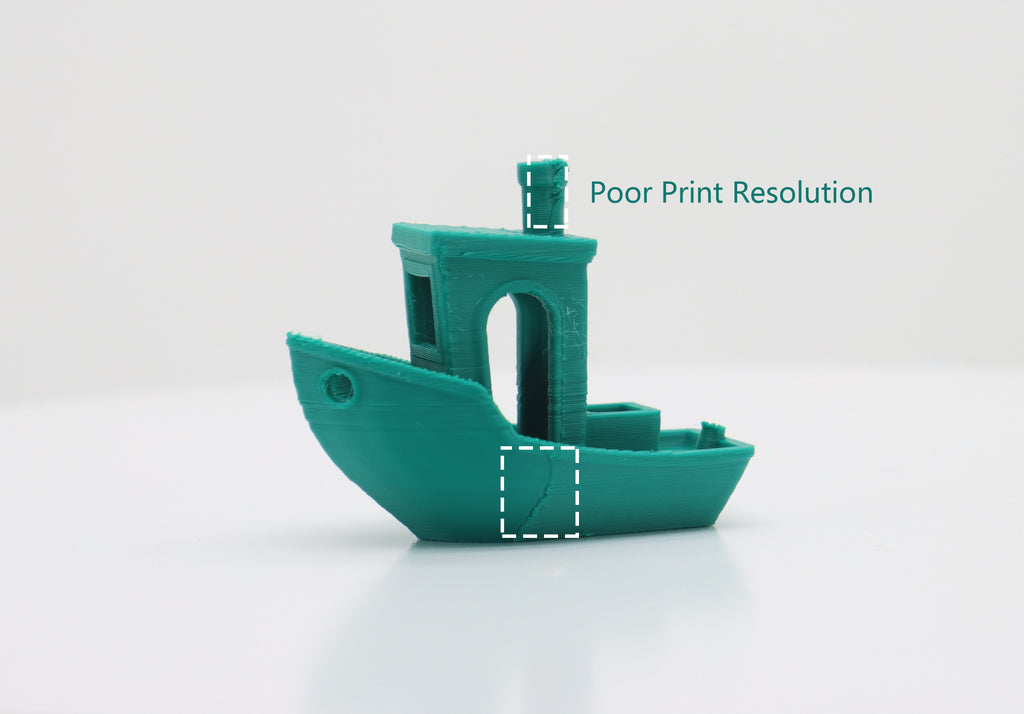
Why does poor resolution happen?
Issues lowering print quality and detail include:
- Large nozzle diameter unable to produce thin traces.
- High overall print speeds losing accuracy.
- Excess vibration interfering with motion systems.
- Loose or sloppy printer mechanics.
- Weak infill overlap failing to form solid shapes.
- Software settings limiting resolution.
How to prevent poor print resolution:
- Use the smallest nozzle capable of reasonable speeds.
- Optimize firmware acceleration control.
- Tighten hardware components allowing slop.
- Isolate printer from environmental vibrations.
- Adjust slicer settings like infill overlap percentage.
- Accept slower speeds for maximum resolution detail.
With software tuning complementing calibrated hardware, remarkable print resolution improvements are possible.
Problem 8: Nozzle Jams
What are nozzle jams?
Nozzle jams refer to obstructions blocking the filament pathway from the extruder to the hotend nozzle. This stops material from extruding properly mid-print, potentially damaging the nozzle. Jams instantly halt print jobs.
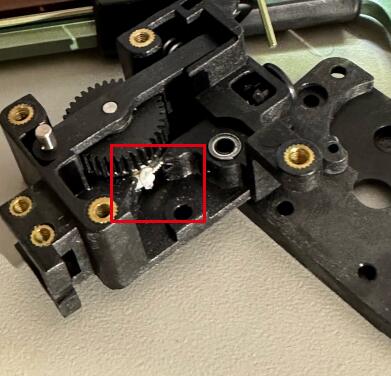
Why do nozzle jams happen?
Common triggers include:
- Contaminants in filament-like impurities or debris.
- Attempting soft or exotic materials unfit for the hotend.
- Filament degradation from moisture absorption.
- Heat creep allowing the filament to melt early.
- Excess temperatures breaking down filament.
How to prevent nozzle jams
While preventing jams is the best strategy, sometimes clogs are unavoidable. If you're currently dealing with a stubborn blockage, fixing it requires a specific set of steps. For a complete walkthrough on everything from simple "cold pulls" to full hotend disassembly, read our detailed guide: How to Fix 3D Printer Nozzle Jams.
To avoid future jams, focus on these key preventative measures:
- Install replaceable throats for easy cleaning.
- Use high-quality filament and optimal storage.
- Upgrade to all-metal hotend for tricky plastics.
- Maintain nozzle cooling and heat sinks.
- Print temperature tests to identify ideal ranges.
Staying observant and responsive while printing combined with thoughtful material selection minimizes jams.
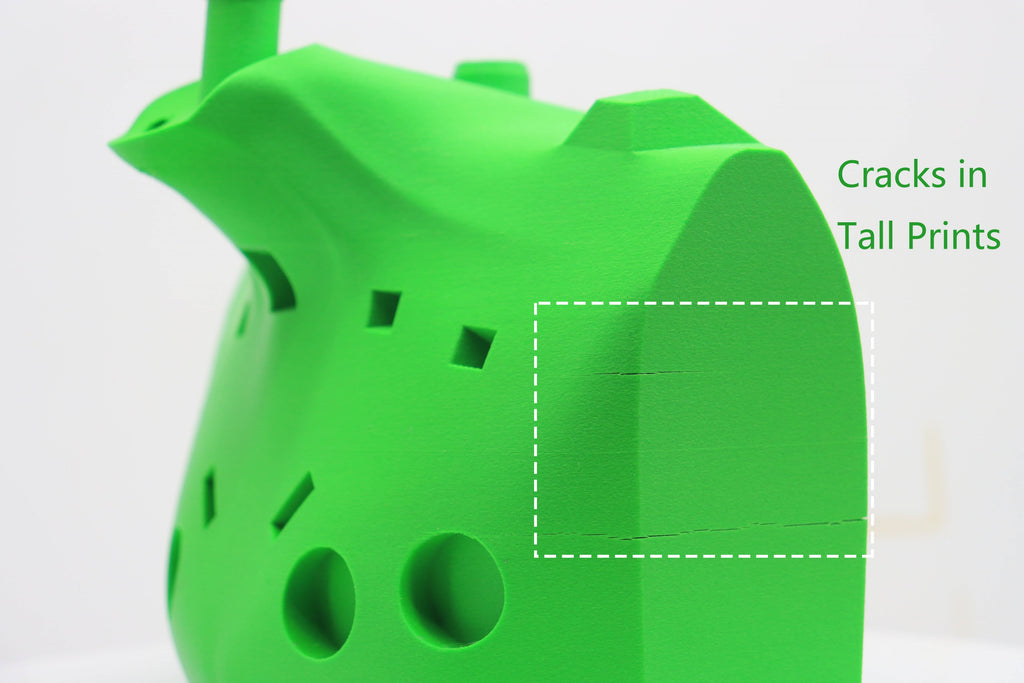
Problem 9: Cracks in Tall Prints
What are cracks in tall 3D prints?
As the height of a 3D print grows, leverage from the increasing stacked layers can cause thin parts to literally crack and split under internal stresses. Prints over about 6 inches tall become prone to cracking, especially with poor material choices.
The core cause is excessive residual stresses from uneven cooling and shrinking between layers due to limited heat dissipation higher off the print bed. Weak interlayer bonding from inadequate temperatures or drafts also makes layers separate easier instead of sticking together.
How to prevent cracks in tall prints
To enhance print integrity for tall parts:
- Orient the model strategically to minimize problematic overhangs.
- Modify designs to incorporate wider bases and beefier walls.
- Experiment with higher nozzle and bed input temperatures.
- Consider materials like ABS known for good layer bonding.
- Always use compatible adhesion methods for bed and layers.
- Enable cooling fans, but avoid directing fans at the lower sections.
With smart material selection and slicer adjustments, even soaring tall prints can demonstrate excellent vertical strength.
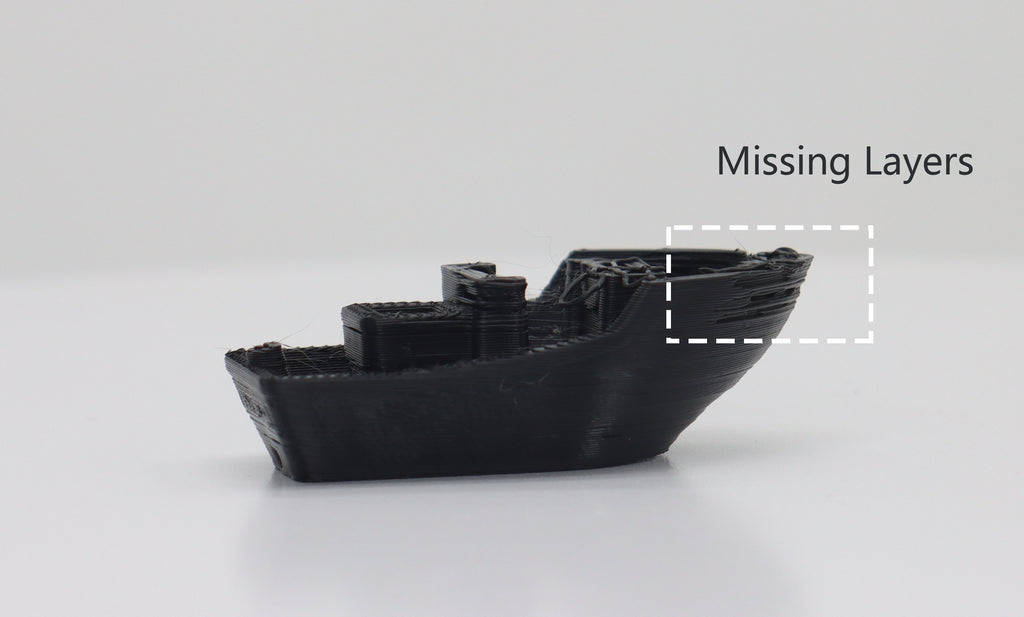
Problem 10: Missing Layers
Why do layers go missing?
Typical causes of sporadic layer gaps include:
- Nozzle clogs or jams halting extrusion intermittently.
- Filament grinding or slipping and failing to feed.
- Print head collisions or bumps disrupting print head motion.
- Stepper motor errors or electrical issues pausing movement.
- Software glitches during slicing or printer instruction codes.
- Debris, dust, or loose parts blocking the print head path.
How to troubleshoot missing layers
- Carefully check for nozzle clogs and clear any debris.
- Examine filament path and extruder gear for issues.
- Tighten belts/chains and ensure the printer moves smoothly.
- Test & replace failing stepper motors if an electrical issue.
- Reslice model using different slicer software if needed.
- Clean printer including rails, belts, wheels, etc thoroughly.
By methodically reviewing printer hardware, electronics, and software factors, the root causes of puzzling missing layer issues can be identified and corrected.
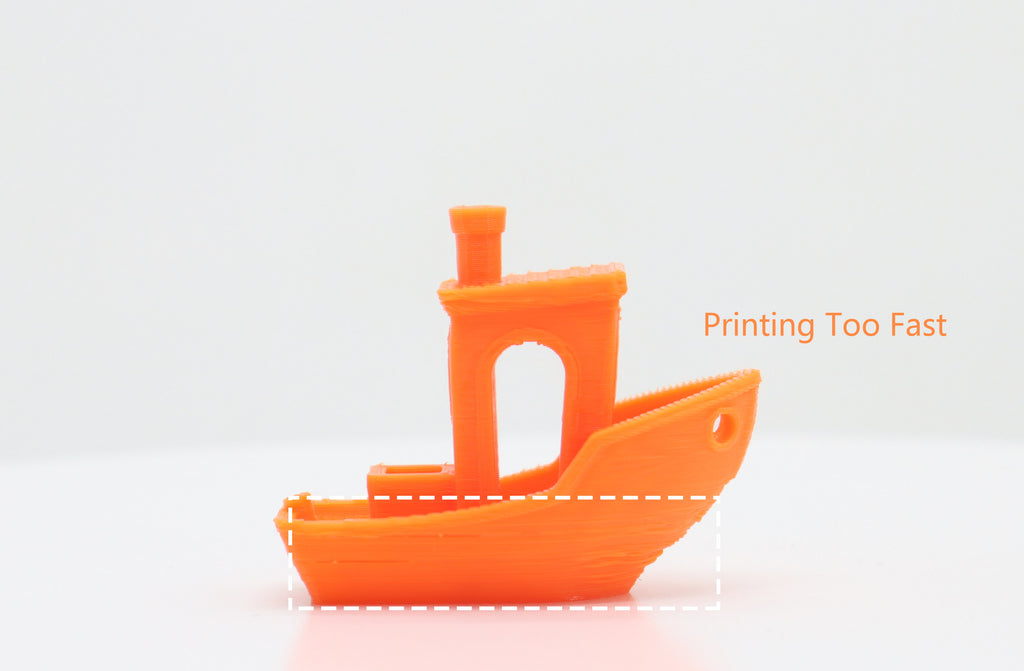
Problem 11: Printing Too Fast
What happens when you print too fast?
While faster speeds seem better for saving time, moving too quickly hurts quality. Common issues include:
- Loss of detail and choppy corners.
- More stringing/oozing between print sections.
- Gaps from under-extrusion.
- Higher warping risk from quick cooling.
- Weak bonding between layers.
- Layer shifts or knock-overs from collisions.
How to find the best print speed?
The ideal pace balances:
- Needed part detail and resolution.
- Mechanical integrity requirements.
- Print time goals.
- Printer hardware speed limits.
- Filament properties and behavior.
Quality vs. Speed Tradeoffs
Rushing prints risks wasting time and materials if they fail at the end. But too-slow speeds waste time. With practice, you can:
- Calculate the max flow rate for the printer.
- Tune accelerator settings.
- Test faster infill approaches.
- Dial in cooling.
- Independently control perimeter, infill, etc speeds.
Making informed speed adjustments based on data ensures efficiency without sacrificing quality.
Problem 12: Filament Quality Issues
Why Filament Matters
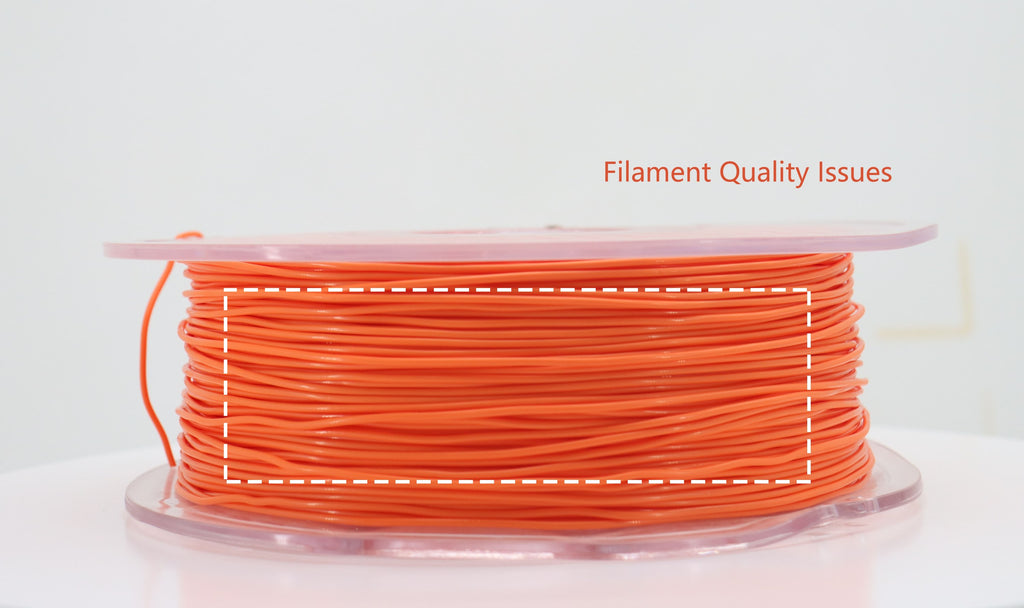
3D printers can only be as reliable and precise as the filament fed into them. Yet, variability exists even among reputable suppliers. Detecting and responding to inadequate filament prevents headaches down the road.
How to identify poor-quality filament?
Signs of poor filament include:
- Inconsistent coloring or lots of surface defects.
- Diameter deviating excessively from the labeled spec.
- Visible contamination like unmelted bits or black specks.
- Terrible stringing behavior during printing.
- Brass nozzle corrosion from unseen contaminants.
Reputable vendors disclose diameter tolerances under +/- 0.02mm. Precision diameter is vital for volumetric flow.
How to Preserve Filament
Moisture readily penetrates hygroscopic materials like ABS, Nylon, PETG, etc resulting in popping extrusion and vapor formation. Best practices include:
- Use sealed dry boxes or desiccant systems. Quality choices like QIDI filament dryer boxes excel at preserving integrity over time.
- Vacuum seal spools immediately after opening.
- Dry filament in an oven if humidity exposure is suspected.
- Carefully source, handle, and manage your filament inventory.
Click to learn how to store 3d printer filament.
Problem 13: Print Head Missing the Bed
Why does the print head miss the bed?
Typical causes include:
- Improper bed tramming or leveling allowing a tilt.
- Overly high or low Z-offset value entered.
- Uncompensated variance across a warped print bed.
- Outdated printer firmware missing offset data.
- Faulty limit switch triggering prematurely.
How to prevent print head missing
- Perform bed leveling calibration routines methodically.
- Gradually adjust the Z-offset value during the first layer watching closely.
- Use mesh bed leveling compensation for uneven beds.
- Update firmware and recheck all printer offsets.
- Inspect end stops and switches for correct positioning.
Remaining attentive and responsive during the crucial first moments of a print allows redirecting the extrusion right where it needs to go.
Problem 14: Extrusion Stopped Mid-Print
Why does extrusion stop mid-print?
Typical triggers leading to a loss of extrusion include:
- A clogged nozzle or heat creep creates a filament jam.
- The extruder filament path getting physically snagged somewhere.
- The extruder gear stripping or failing to grip the filament.
- An extruder gear getting locked up by a small object.
- Electrical issues like stepper motor faults or wiring shorts.
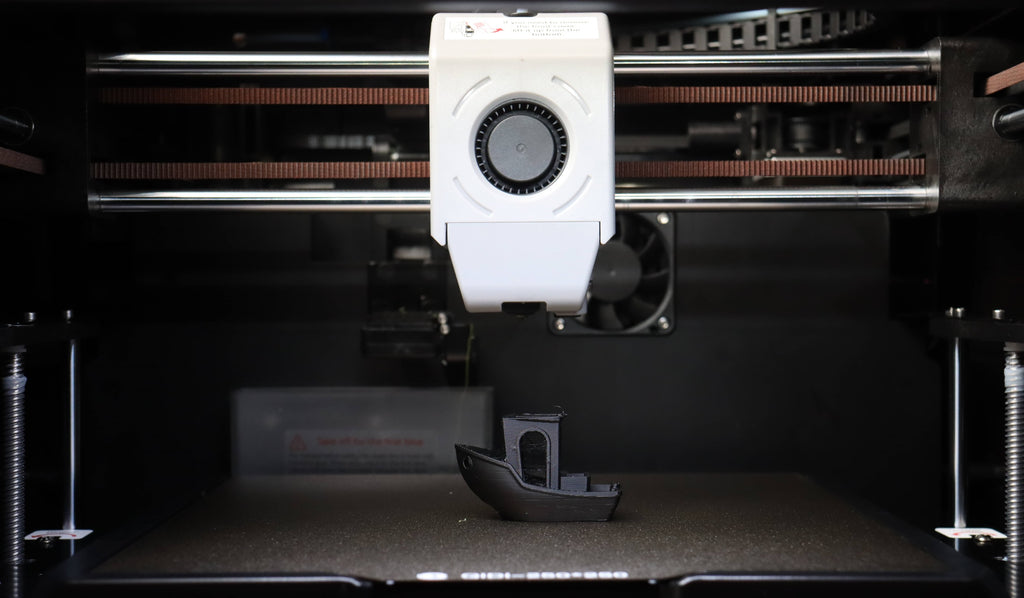
How to troubleshoot mid-print extrusion loss
- Stop the print job immediately when the flow halts.
- Check for obstructions or jams impeding filament flow.
- Examine extruder gear and path for signs of grinding or skipping.
- Ensure electronics are securely plugged in without any damage.
- Replace extruder drive gear if severely stripped or damaged.
Quickly identifying the underlying cause allows appropriate corrections and resuming printing with minimal losses.
How to fix the clogged extruder when the filament stuck in the extruder
Step 1: Remove the extruder
- Remove the front cover
- Remove screws
- Remove the hotend
- Cut out the filament and then remove screws
- Remove the extruder
Step 2: Clean up the extruder
- Remove screws
- Remove the cover
- Remove the pulley
- Use scissors to clear the clog
Step 3: Install the extruder
- Install the pulley
- Install cover
- Install screws
- Install extruder
- Install the hotend and then install screws
- Put on the front cover
Problem 15: Messy First Layer
Why does the first layer get messy?
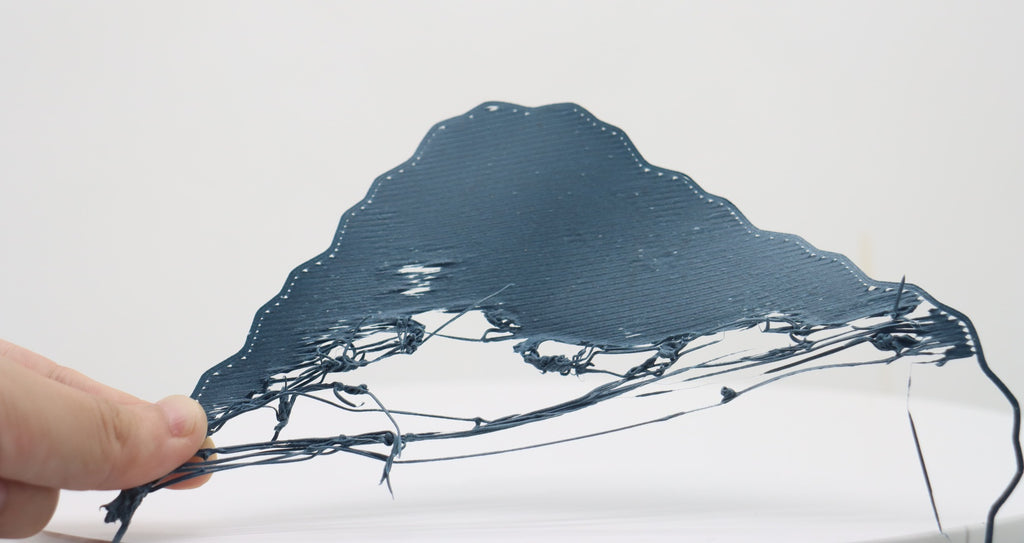
Common first-layer issues arise from problems like:
- Inadequate bed leveling and nozzle height.
- Bed contamination from dust, oils, leftover plastic.
- Insufficient preheating time or bed temperature.
- Unoptimized print speed or extrusion width.
- Filament inconsistencies or unexpected viscosity.
- Drafts or temperature swings affecting cooling.
How to get a clean first layer
- Re-level with "paper method", and adjust Z-offset gradually.
- Clean the bed thoroughly with isopropyl alcohol.
- Allow longer warm-up preheat time before printing.
- Slow down initial layer speed, optimize flow rate.
- Try dialing the first layer hotter or cooler.
- Block drafts that could prematurely cool plastic.
Paying special attention to the first layer sets up a print job for subsequent success.
Keep Improving Through Troubleshooting
Experiencing issues should motivate beginners to learn, not discourage them. Failed prints provide opportunities to grow abilities. Continually testing and tweaking printer settings uncovers ideal formulas for different filament materials. This self-sufficiency allows printing complex geometries once deemed improbable. The journey faces setbacks, but holding a custom-printed part makes the effort rewarding. Remember, experts all started as beginners. With patience and persistence in problem-solving, beginners gain expertise too. So, keep improving techniques and keep printing!


 Q2
Q2
 QIDI Box
 Plus 4
 Q1 Pro
 X-Max 3

