

 Q2
Q2
 QIDI Box
 Plus 4
 Q1 Pro
 X-Max 3


Essential Print Settings and Terminologies for Beginners

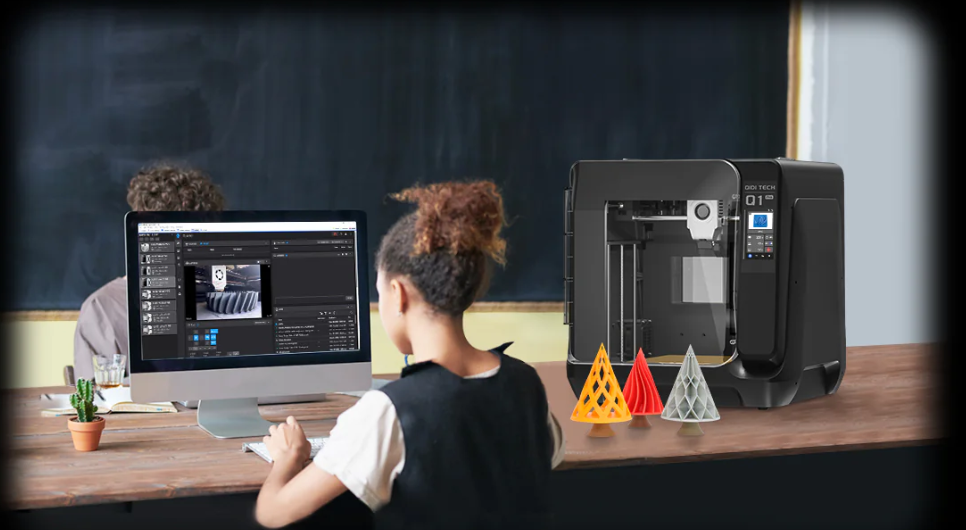
3D print settings are the numeric parameters a slicer writes into G-code to control how a printer builds a part. The core set is layer height, line width, wall count, infill density, nozzle and bed temperature, print speed, retraction, and cooling. Get those eight right and most beginner print failures disappear.
What follows is a working glossary for people who have a printer in front of them. Every term gets a one-sentence definition, a typical value range, and — the part most glossaries skip — what actually breaks when you set it wrong.
3D Printing Settings Glossary: 14 Terms in One Table
Every setting below appears in QIDI Studio, OrcaSlicer, PrusaSlicer, and Cura under the same or a near-identical name, so it transfers between slicers. Ranges are for 1.75 mm filament through a 0.4 mm nozzle — the default on almost every consumer FDM machine.
| Term | One-sentence definition | Typical value (0.4 mm nozzle) | What goes wrong if you set it wrong |
|---|---|---|---|
| Layer height | Layer height is the vertical thickness of each deposited layer, measured in millimetres. | 0.12–0.28 mm | Too high: visible stair-stepping, weak layer bonding. Too low: print time doubles or triples for little visual gain. |
| Line width | Line width is the horizontal width of a single extruded bead, normally set slightly wider than the nozzle. | 0.40–0.48 mm | Too narrow: gaps between perimeters and infill. Too wide: bulging corners and dimensions that run oversize. |
| Wall count (perimeters) | Wall count is the number of extruded loops that form the vertical skin of a part. | 2–4 walls | Too few: the part flexes and splits along the outer shell. Too many: material and time wasted on decorative prints. |
| Top/bottom layers | Top and bottom layers are the solid horizontal shells that close a part above and below its infill. | 4–6 layers each | Too few: pillowing, visible holes in the top surface where infill could not be bridged. |
| Infill density | Infill density is the percentage of a part's interior volume filled with material. | 10–25% general, 40–60% functional | Too low: soft, hollow-sounding parts that dent under load. Too high: long prints and heavy parts with little added stiffness. |
| Infill pattern | Infill pattern is the geometry the slicer uses to fill the interior, such as gyroid, grid, or honeycomb. | Gyroid or grid for general use | Wrong pattern: uneven strength direction, or infill that collides with the nozzle and causes clicking. |
| Nozzle temperature | Nozzle temperature is the hotend setpoint at which filament is melted before extrusion. | 200–230 °C PLA, 240–260 °C ABS/ASA | Too cold: under-extrusion and layers that peel apart. Too hot: stringing, drooping overhangs, blobs. |
| Bed temperature | Bed temperature is the setpoint of the heated build platform that holds the first layer in place. | 55–65 °C PLA, 90–105 °C ABS | Too cold: corners lift within the first ten layers. Too hot: elephant's foot, and PLA that fuses to the plate. |
| Print speed | Print speed is the linear velocity of the nozzle while extruding, in millimetres per second. | 60–300 mm/s depending on feature | Too fast for the hotend's flow rate: under-extrusion, ghosting, rounded corners. |
| Retraction | Retraction is the short reverse movement of the extruder that pulls filament back before a travel move. | 0.4–1.0 mm on direct drive; 3–6 mm on Bowden | Too little: stringing between towers. Too much: gaps at the start of each perimeter, or a jammed heat-break. |
| Flow rate (extrusion multiplier) | Flow rate is a percentage scalar applied to every extrusion move to correct for filament and hotend variation. | 95–105% | Too low: visible gaps between adjacent lines. Too high: rough top surfaces and oversize outer dimensions. |
| First layer | The first layer is the initial pass printed directly onto the build plate, usually thicker and slower than the rest. | 0.2–0.3 mm at 20–40 mm/s | Too high a nozzle gap: the part detaches. Too low: transparent, scraped lines and a scarred build surface. |
| Cooling (part fan) | Part cooling is the airflow directed at freshly extruded plastic to freeze it into shape. | 100% PLA, 0–30% ABS/ASA/PC | Too little on PLA: droopy overhangs. Too much on ABS: layer separation and cracking in tall parts. |
| Support material | Support material is sacrificial structure printed beneath overhangs and removed after the job. | Enable above ~50° overhang | Missing supports: sagging or collapsed overhangs. Excess supports: scarred surfaces and wasted filament. |
The rest of this guide explains why each of those ranges exists.
Layer Height and Line Width: The Geometry of a Single Bead
Layer height and line width together define the cross-section of every line your printer lays down, and therefore both surface finish and part strength. Think of an extruded bead as a flattened oval: line width is how wide it spreads, layer height is how tall it stands.
Layer height is capped by the nozzle at roughly 75–80% of its diameter, so a 0.4 mm nozzle tops out near 0.3 mm. Above that, each layer has too little contact area with the one below and the part delaminates under load. The floor is set by patience rather than physics — 0.08 mm layers look superb and take four times as long as 0.28 mm.

Line width behaves differently. Setting it to 105–120% of nozzle diameter gives the extruded bead something to squash against, which improves adhesion to neighbouring lines. Setting it below nozzle diameter almost never helps: the plastic still leaves the nozzle at nozzle width and simply gets stretched thin, leaving voids.
Resolution in FDM is not one number. Vertical resolution comes from layer height; horizontal resolution comes from nozzle diameter. A printer advertised as having "0.05 mm precision" is usually quoting positioning resolution, not the smallest feature it can print — a 0.4 mm nozzle cannot produce a wall thinner than about 0.4 mm regardless of what the steppers resolve. If layer lines are your main complaint, our guide on reducing visible layer lines covers the trade-offs.
Walls, Top Layers, and Infill: Where Strength Actually Comes From
In FDM parts, walls carry most of the load and infill mainly prevents the walls from buckling inward. This is the single most misunderstood point in beginner settings. Doubling infill from 20% to 40% adds far less stiffness than going from two walls to four, and costs more time.
| Part type | Walls | Top/bottom | Infill | Reasoning |
|---|---|---|---|---|
| Decorative model, vase, figurine | 2 | 3 / 3 | 5–10% | No structural load; infill exists only to support the top skin. |
| General household part, organiser, box | 3 | 4 / 4 | 15–20% | Handles casual handling and light bending. |
| Functional bracket, jig, tool holder | 4 | 5 / 5 | 40% | Walls resist bending; dense infill resists compression at bolt holes. |
| Threaded or press-fit component | 4–5 | 6 / 6 | 50–60% | Threads cut into infill strip out; solid material is required near the feature. |
| Snap-fit or living hinge | 2–3 | 4 / 4 | 15% | The feature needs to flex; extra material makes it brittle. |
Infill pattern matters less than most people expect for general printing and a lot for specific loads. Gyroid is close to isotropic and never crosses a previously printed line. Grid is fast but the nozzle collides with earlier passes at every crossing. Honeycomb gives excellent compressive strength per gram. Our breakdown of infill patterns and density compares them with print-time and weight numbers.
Temperature Settings: Nozzle, Bed, and Chamber Are Three Different Jobs
Nozzle temperature controls melt viscosity, bed temperature controls first-layer grip, and chamber temperature controls how evenly the whole part cools. They are frequently discussed as one topic and are not interchangeable.
| Material | Nozzle | Bed | Part cooling fan | Chamber |
|---|---|---|---|---|
| PLA | 200–220 °C | 55–60 °C | 100% | Not needed; keep it open or cool |
| PETG | 230–250 °C | 70–85 °C | 30–50% | Not needed |
| ABS | 240–260 °C | 95–110 °C | 0–20% | Strongly beneficial, 50–65 °C |
| ASA | 250–270 °C | 95–110 °C | 0–20% | Strongly beneficial, 50–65 °C |
| PC / PC blends | 270–300 °C | 100–120 °C | 0–10% | Effectively required for large parts |
| Nylon (PA, PA-CF) | 260–290 °C | 70–100 °C | 0–20% | Strongly beneficial; dry filament matters more |
| TPU (95A) | 220–240 °C | 30–50 °C | 30–60% | Not needed |
Always start with the range printed on the spool. Pigment alone can shift the usable window by 10 °C. QIDI publishes profiles for its own filament range inside QIDI Studio.
The chamber column is the one beginners skip. A hot chamber slows the cooling rate of the whole part, which is what stops ABS and ASA cracking halfway up a tall print. It is not the same as an unheated box — see our article on the temperature-controlled chamber. On QIDI's current lineup the Q2, Plus 4, and Max4 carry active chamber heating to 65 °C, while the Q2C uses a flame-retardant enclosed chamber without active heating.
First Layer, Skirt, Brim, and Raft: The Adhesion Vocabulary
The first layer is the only layer that bonds to the machine rather than to plastic, which is why it has its own settings and its own failure modes. Most slicers print it thicker, slower, and hotter than everything above it.
A skirt is one or more loops printed around the part without touching it. Its job is diagnostic: it primes the nozzle, purges the last colour, and gives you a few seconds to check nozzle height before the real part starts.

A brim is a flat single-layer collar printed in direct contact with the part's base, extending its footprint outward. It adds bed contact area without adding height, so it is the standard fix for tall, narrow models and for warp-prone materials. A 5 mm brim is usually enough; 10 mm is the point of diminishing returns.

A raft is a multi-layer platform printed under the entire part. It costs material and leaves a rough underside, but it rescues models with almost no flat contact area. On a modern textured PEI plate with a calibrated Z offset, rafts are rarely necessary. If your first layers keep failing, work through first layer problems and fixes before reaching for one; Prusa's first-layer troubleshooting reference covers the same symptoms from a different angle.
Retraction, Flow, and Cooling: The Calibration Trio
Retraction, flow rate, and cooling are the three settings you tune per filament rather than per model. Everything else can usually stay on a profile default.
Retraction pulls filament backwards out of the melt zone so that pressure drops before a travel move. Direct-drive extruders — which every current QIDI printer uses — place the drive gear centimetres from the nozzle, so 0.4–1.0 mm is typically enough. Bowden setups push filament through a long PTFE tube that stores pressure, so they need 3–6 mm. Our comparison of direct drive and Bowden extruders covers why.

Retraction alone will not eliminate stringing. Nozzle temperature, travel speed, and above all filament moisture matter just as much — wet PETG or nylon strings no matter how you tune retraction. Our stringing fix guide works through the causes in order of likelihood.
Flow rate, also called the extrusion multiplier, scales every extrusion move by a percentage. It exists because real filament is not exactly 1.75 mm and real hotends do not melt at exactly the same rate. Calibrate it once per filament brand with a single-wall test cube: print a wall at a known line width, measure it with calipers, adjust flow by the ratio.
Often confused with flow is pressure advance (linear advance in Marlin). It compensates for the lag between extruder motion and plastic actually leaving the nozzle, which is what causes bulging corners and gaps after travel moves at speed. The Klipper pressure advance documentation gives the calibration procedure; every current QIDI printer runs Klipper-based firmware, so the same method applies.
Cooling is where material-specific behaviour is most dramatic. PLA needs maximum airflow to freeze overhangs into shape. ABS and ASA need almost none, because rapid cooling is precisely what causes them to crack — get it wrong and the part looks perfect until you snap it in half along a layer line.
Supports, Overhangs, and Bridging
An overhang is any surface angled more than roughly 45° from vertical, and a bridge is a horizontal span printed across open air between two anchor points. The two need different solutions.
Overhangs steeper than about 50–55° generally need support material; below that angle each layer overlaps the one beneath it enough to stay anchored. Support placement and density control how much surface scarring you get on removal — worked through in our support structure guide.
Bridges are different: they are extruded into free space, pulled taut by their own tension, then frozen by the part cooling fan. Bridge quality depends far more on cooling and bridge-specific speed and flow than on support. Our bridging techniques guide covers spanning 40 mm or more without supports at all.
How These Settings Interact on a High-Speed Printer
On printers that move at 300 mm/s or more, settings stop being independent and start constraining each other. Volumetric flow is the binding constraint: layer height × line width × speed gives the cubic millimetres per second the hotend has to melt. A hotend that maxes out at 25 mm³/s cannot sustain 0.28 mm layers at 0.45 mm width above roughly 200 mm/s no matter what the profile says — it will simply under-extrude. Modern slicers expose a maximum volumetric speed field per filament for exactly this reason.
Acceleration and input shaping are the other half. QIDI's current CoreXY printers run 20,000 mm/s² on the Q2 and Q2C and 30,000 mm/s² on the Max4, with hotends rated to 370 °C. Those numbers only produce clean parts because Klipper's resonance compensation cancels the ringing that acceleration would otherwise leave on vertical edges. Our CoreXY guide explains why fixed motors and a crossed belt path make that acceleration possible, and the Klipper kinematics documentation gives the motion equations.
Frequently Asked Questions
What is the best layer height for 3D printing?
0.2 mm is the best default layer height for a 0.4 mm nozzle. It balances surface finish, strength, and speed for the large majority of parts. Drop to 0.12 mm for miniatures and curved organic shapes; go up to 0.28 mm for large functional parts where speed matters more than the look of the surface.
What infill percentage should I use for 3D printing?
Use 15–20% infill for general prints and 40–50% for functional parts that take load. Going above 60% rarely pays off — beyond that point, adding wall loops gives you more stiffness per gram and per minute than adding infill.
Why is my 3D print not sticking to the bed?
The most common cause is nozzle height, not bed temperature. If the first layer looks like round spaghetti rather than flattened ribbons, the nozzle is too far from the plate. Second most common is a contaminated plate — skin oils from handling defeat even a well-calibrated Z offset, and isopropyl alcohol removes them in seconds.
What does retraction do in 3D printing?
Retraction pulls filament backwards out of the hotend before a travel move, dropping the pressure inside the melt chamber so molten plastic does not ooze out during the move. It is the primary control for stringing, though filament moisture and nozzle temperature contribute at least as much.
What is the difference between layer height and resolution?
Layer height sets vertical resolution; nozzle diameter sets horizontal resolution. A printer cannot produce a feature narrower than its nozzle in the XY plane regardless of how fine its layers are, which is why 0.2 mm nozzles exist for detailed work.
Do I need to change print settings for every filament?
Change nozzle temperature, bed temperature, cooling, and maximum volumetric speed for every filament type, and re-check flow rate for every new brand. Layer height, wall count, and infill are model-driven rather than material-driven, so they carry over unchanged.
Where to Go Next
If the underlying technology is still fuzzy, start with what FDM 3D printing is, then work through the slicer software terms that surround these values in the interface. For a materials-first view, the filament types guide maps each polymer to the settings it demands, and the RepRap wiki glossary covers the older hardware terminology you will still meet in forum threads.
- 3D Printing Settings Glossary: 14 Terms in One Table
- Layer Height and Line Width: The Geometry of a Single Bead
- Walls, Top Layers, and Infill: Where Strength Actually Comes From
- Temperature Settings: Nozzle, Bed, and Chamber Are Three Different Jobs
- First Layer, Skirt, Brim, and Raft: The Adhesion Vocabulary
- Retraction, Flow, and Cooling: The Calibration Trio
- Supports, Overhangs, and Bridging
- How These Settings Interact on a High-Speed Printer
- Frequently Asked Questions
- What is the best layer height for 3D printing?
- What infill percentage should I use for 3D printing?
- Why is my 3D print not sticking to the bed?
- What does retraction do in 3D printing?
- What is the difference between layer height and resolution?
- Do I need to change print settings for every filament?
- Where to Go Next
Recommended products






