

 Q2
Q2
 QIDI Box
 Plus 4
 Q1 Pro
 X-Max 3


How to Unload Filament

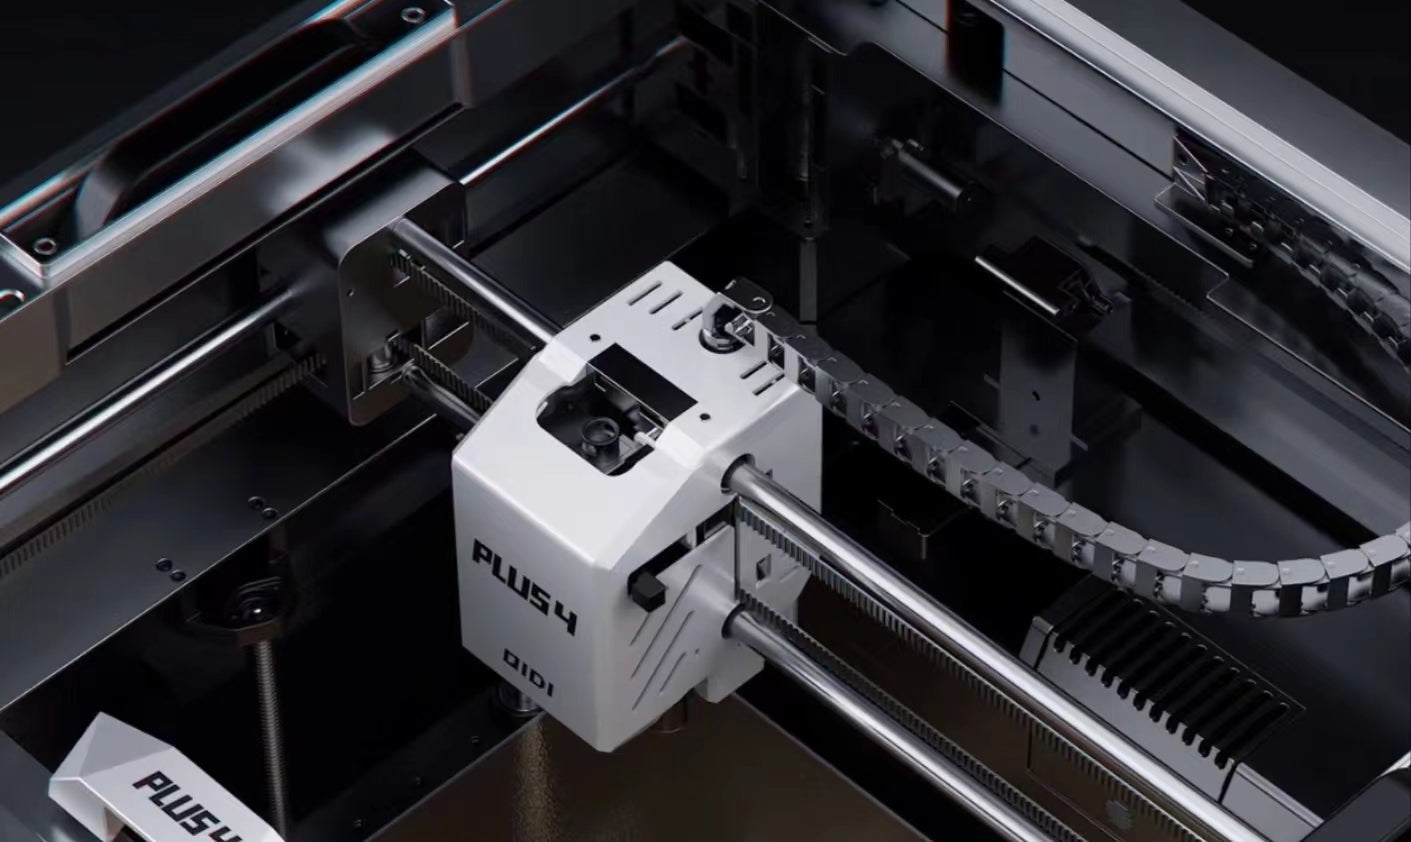
To remove filament from a 3D printer, heat the nozzle to the material's normal printing temperature, release the extruder tension lever, push the filament in about 5 mm to break the melted tip loose, then pull it out in one smooth motion. Cut the deformed tip off, coil the spool, secure the end, and store it sealed with desiccant.
Removing filament is a basic but important task. You will need to do it when switching materials, when a spool runs low, or before the printer sits idle for a few weeks. The process is simple, but doing it correctly prevents clogs, broken strands stuck inside the extruder, and the slow build-up of burnt residue that ruins the next print.
Filament Unloading Temperature by Material
The single most common cause of a stuck strand is unloading too cold. Molten plastic at the nozzle tip forms a bulb wider than the filament path; if it solidifies before you pull, you are trying to drag that bulb backwards through a narrower channel. Heat first, always.
| Material | Typical printing temperature | Unload temperature | Cold-pull temperature |
|---|---|---|---|
| PLA | 190-220 °C | 200-220 °C | 90-100 °C |
| PLA-CF (QIDI spec) | 210-240 °C | 220-240 °C | 90-100 °C |
| PETG (QIDI spec) | 240-280 °C | 250-270 °C | 110-120 °C |
| ABS / ASA | 220-260 °C | 230-250 °C | 120-130 °C |
| TPU | 210-230 °C | 220-230 °C | Not recommended, TPU stretches |
| QIDI UltraPA (nylon) | 260-280 °C | 270-280 °C | 130-150 °C |
| QIDI PET-CF | 280-320 °C | 290-310 °C | 140-160 °C |
| QIDI UltraPA-CF25 | 300-340 °C | 310-330 °C | 150-170 °C |
| QIDI PPS-CF | 310-350 °C | 320-340 °C | 160-180 °C |
The printing-temperature figures for the QIDI materials come from their published data sheets; the rest are the standard windows for those material classes, and Simplify3D's materials guide confirms that ABS requires 220-240 °C. If you do not know what is loaded, unload at 240 °C — hot enough for everything below PETG, cool enough that PLA will not char in the melt zone during the few seconds it takes.
Equipment and Setup for Filament Unloading
Safe and proper filament unloading requires minimal equipment but careful preparation. The right tools and printer conditions help prevent common problems during the process.
Basic Tools
You don't need many tools to unload filament. A pair of flush cutters will make clean cuts. Some well-equipped printers come with needle-nose pliers, which can be useful if the filament gets stuck. Keep a small container nearby to store any waste material.
Printer Status Requirements
Before starting, your printer should be on but not actively printing. Check that it's plugged in and the display screen is working. The print bed should be clear of any objects. Make sure the printer is stable and on a flat surface. If you've just finished a print, wait a few minutes for the components to return to their home positions.
Safety Checklist
- The printer should be in an open area with good ventilation
- All moving parts should be still
- The print bed should be at room temperature
- The control panel should be responsive
- Nothing loose (sleeves, cables, cloth) is near the hot nozzle
These basic preparations will make the unloading process smoother and safer. A well-prepared workspace helps prevent accidents and ensures successful filament removal.

Step-by-Step Filament Unloading Process
The right sequence of steps makes filament unloading quick and effective. Following these steps in order prevents damage to both the 3D printer and the filament.
Step 1: Heat the Nozzle
Turn on the printer and wait for the control panel to fully load. Navigate to the temperature or filament menu and heat the nozzle to the unload temperature from the table above. Wait until the reading stabilises for at least 30 seconds — a nozzle that has just touched its setpoint is still cooler in the melt zone than the sensor suggests.
Step 2: Release the Extruder Tension
Once the nozzle reaches the correct temperature, locate the extruder's tension lever. Press the lever to release the grip on the filament. The lever should move smoothly and stay in the released position so that you can release extruder tension completely. If it feels stuck, check for any debris around the mechanism.
Step 3: Push In Before You Pull Out
This is the step most guides skip and the reason most strands break. Push the filament forward roughly 5 mm first. That forces the softened tip out of the nozzle bore and breaks the mechanical lock between the cooled bulb and the throat. Then pull.
Step 4: Pull Out the Filament
Hold the 3D print filament near the extruder entrance and pull it out smoothly in one motion. Keep the filament straight while pulling to avoid breaks, and maintain a steady, moderate speed. If you feel resistance, don't force it — check the temperature again or try gentle back-and-forth movements. Watch for melted filament drips from the nozzle during removal.
Step 5: Cool Down and Store
After removing the filament, use the control panel to start the cooling process. While the printer cools, inspect the removed filament end: it should be clean and smooth. If the tip is deformed into a bulb or a hook, cut it off cleanly before storing — that deformed section is what jams the next load. Coil the filament carefully, secure the end in the spool hole or with a clip, and store it in a sealed bag or box with a desiccant packet. Getting this last step right also prevents the spool tangles that show up weeks later.

How to Remove Old Filament That Has Been Sitting in the Printer
Filament left loaded for weeks behaves differently from filament you unloaded yesterday. Two things have changed: the section inside the hot zone has been through repeated heat cycles and may have partly degraded, and the length outside has absorbed moisture from the room.
- Heat to the unload temperature, then hold for two full minutes before touching anything. Old material needs longer to soften all the way through the melt zone.
- Purge 30-50 mm of material out of the nozzle first. This pushes the degraded section out the front instead of dragging it backwards through the throat.
- Push in 5 mm, then pull. If it resists, raise the temperature by 10-15 °C and wait another minute rather than pulling harder.
- Cut back at least 200 mm from the tip before you re-spool it. That is the section that took the heat and the moisture.
- If the spool has been open for more than a few weeks, run a drying cycle before the next print. The temperatures and times are in the filament drying guide.
How to Maintain Your Printer After Filament Removal
A few essential maintenance steps after unloading filament keep your printer ready for its next use and prevent future problems.
Clean the Nozzle
After filament removal, small amounts of melted material often remain in the nozzle. Use the printer's built-in cleaning function to clean the nozzle if available. Push a short length of new filament through the hot nozzle until it flows cleanly. For stubborn residue, use a nozzle cleaning needle when the printer is hot, but be careful to avoid burns. Remove any leaked material around the nozzle with metal brushes or tweezers.
Reset Temperature Settings
Return all temperature settings to their default values through the control panel. Clear any special heating profiles you created for the unloading process. This prevents accidentally starting your next print with incorrect temperatures. Make sure the nozzle and bed temperatures both return to room temperature.
Update Material Settings
If you plan to load a different type of filament, change your printer's material profile now. Access your printer's settings menu and select the correct profile for your next filament type. Double-check all temperature, speed, and extrusion settings match your new material's requirements. This preparation saves time during your next print setup.
Purge Between Incompatible Materials
Switching from a high-temperature material to a low-temperature one leaves residue that will char. As a rule, purge until the extrudate runs clean in the new colour and material, and always purge at the higher of the two temperatures. Going from PA-CF at 320 °C to PLA at 200 °C without purging is the classic way to create a clog that looks like a hardware fault.

Common Filament Unloading Problems
Most filament unloading issues can be fixed quickly at home. The table below is the fast triage; the sections after it give the detail.
| Symptom | Most likely cause | First action | If that fails |
|---|---|---|---|
| Filament will not budge at all | Nozzle below the material's softening point | Raise nozzle 10-15 °C, wait 2 min, push in 5 mm then pull | Full heat-cool-reheat cycle to crack the bond |
| Filament snaps, leaving a stub | Moisture-embrittled or degraded strand | Grip the stub with needle-nose pliers while hot | Push a fresh length in to drive the stub out the nozzle |
| Comes out with a wide bulb on the tip | Pulled without the 5 mm push-in step | Cut the bulb off before storing | Nothing further needed |
| Nozzle will not extrude after reload | Residue or a hard particle in the bore | Cleaning needle at printing temperature | Cold pull at the temperature in the chart above |
| Filament stuck in the feed tube, not the hotend | Kinked strand or a burr in the tube | Disconnect the tube at both ends and push the strand through | Replace the tube section |
| Grinding sound, flat spot on the strand | Tension arm still engaged | Release the lever fully before pulling | Re-check tension setting after reload |
Filament Won't Pull Out
A stuck filament usually means the nozzle isn't hot enough or the filament has hardened inside. Increase the nozzle temperature by 10-15 degrees above normal printing temperature. Push the filament in slightly before pulling out — this breaks any hardened material free. If the filament still won't move, turn off the printer, let it cool completely, then reheat it. This temperature cycle often loosens stuck material. For very stubborn cases, you may need to disconnect the feed tube from the extruder to pull from both ends.

Nozzle Stops Extruding After Unloading
A clogged nozzle prevents smooth filament flow and needs immediate attention. First, heat the nozzle to normal printing temperature. Insert the cleaning needle that came with your printer to clear the opening. Try pushing fresh filament through at a higher temperature to force out any debris. If this doesn't work, perform a cold pull: heat the nozzle, let it cool to the cold-pull temperature in the chart above, then pull the filament out firmly in one motion. The plug of solidified plastic brings the debris with it. Repeat until the tip comes out clean and cone-shaped. If it still will not clear, work through the nozzle jam procedure.
Broken Filament Inside the Extruder
When filament breaks during removal, you'll need to extract all the pieces to prevent jams. Heat the nozzle to regular printing temperature. Use needle-nose pliers to carefully grip any visible pieces. For pieces you can't reach, insert a new piece of filament to push out the broken parts. If pieces remain stuck, you may need to remove the feed tube or disassemble the hot end — check your printer's manual for the correct procedure. Strands that snap during a routine unload are almost always wet: dry the spool before you reload it.
QIDI Box Filament Stuck
When a strand jams inside a multi-material unit rather than the printer, the fix sequence is different because there are more places for it to catch. On the QIDI Box:
- Let the printer finish the unload at the hotend first. Do not pull at the Box while the far end is still gripped in the extruder.
- Check the buffer and the feed path between the Box and the printer before opening the unit — a strand that has kinked in the tube feels identical to one jammed at the drive gear.
- Open the lid and confirm which slot the strand belongs to. The Box's tangle and clog detection reports the slot that stalled, which saves guessing.
- Release the drive on that channel, then pull the strand back toward the spool, not forward. Pulling forward drags the damaged section deeper into the path.
- Cut back past any flat spot or kink, re-cut the tip at a shallow angle, and reload.
Because the Box holds its chamber at 65 °C while printing, filament coming out of it is dry and therefore less brittle than a strand from an open spool — a strand that still snaps points at an older moisture problem from before it went in. The full feature set is covered in the QIDI Box guide.
FAQs About Removing Filament from a 3D Printer
How do you take filament out of a 3D printer?
Heat the nozzle to the material's printing temperature, release the extruder tension lever, push the filament in about 5 mm, then pull it straight out in one continuous motion. Cut off the deformed tip, secure the end on the spool, and store it sealed with desiccant. Most printers also have a guided unload routine in the filament menu that automates the heating and retraction.
Do I need to heat the nozzle to unload filament?
Yes, in nearly every case. Pulling cold filament drags a solidified bulb backwards through a narrower throat, which either snaps the strand or scores the inside of the heat break. The only exception is the deliberate cold pull, which is a cleaning technique performed at a specific reduced temperature, not a way to change spools.
Should I unload filament before storing the printer?
Yes, for anything longer than about a week. Filament left in the hot zone slowly absorbs moisture and can degrade, and a strand sitting in the extruder gear develops a flat spot under spring pressure. Unload, cut back the last 200 mm, and seal the spool.
Why does my filament break when I try to remove it?
Almost always moisture. Water uptake makes most 3D printing polymers brittle, and nylon and PA-CF are the worst offenders. A strand that snaps cleanly with barely any bend has been sitting in humid air. Dry the spool at the correct temperature before reloading, and store it below 20% RH afterwards.
Can I leave the same filament loaded between prints?
For a day or two, yes. Beyond that, either unload it or keep it in a sealed, actively dried feed system. The risk is not the printer, it is the material: a spool left open on the holder for a month absorbs enough moisture to string, pop and bond poorly on the next job. Details of the various filament types and how quickly each one takes on water are in the filament range data sheets.
Keep Your 3D Printer Ready for Your Next Project
Proper filament unloading is key to maintaining your 3D printer's performance and reliability. The process might seem detailed, but each step serves a purpose: heat so the tip is molten, push before you pull so the bulb clears the bore, cut the deformed tip so the next load threads cleanly, and seal the spool so the material you paid for is still printable next month. When problems do arise, they are usually a temperature that was too low or a spool that was too wet, and both are simple to correct.
- Filament Unloading Temperature by Material
- Equipment and Setup for Filament Unloading
- Basic Tools
- Printer Status Requirements
- Safety Checklist
- Step-by-Step Filament Unloading Process
- Step 1: Heat the Nozzle
- Step 2: Release the Extruder Tension
- Step 3: Push In Before You Pull Out
- Step 4: Pull Out the Filament
- Step 5: Cool Down and Store
- How to Remove Old Filament That Has Been Sitting in the Printer
- How to Maintain Your Printer After Filament Removal
- Clean the Nozzle
- Reset Temperature Settings
- Update Material Settings
- Purge Between Incompatible Materials
- Common Filament Unloading Problems
- Filament Won't Pull Out
- Nozzle Stops Extruding After Unloading
- Broken Filament Inside the Extruder
- QIDI Box Filament Stuck
- FAQs About Removing Filament from a 3D Printer
- How do you take filament out of a 3D printer?
- Do I need to heat the nozzle to unload filament?
- Should I unload filament before storing the printer?
- Why does my filament break when I try to remove it?
- Can I leave the same filament loaded between prints?
- Keep Your 3D Printer Ready for Your Next Project
Recommended products






