

 Q2
Q2
 QIDI Box
 Plus 4
 Q1 Pro
 X-Max 3


How to Smooth the Top Layer of 3D Prints

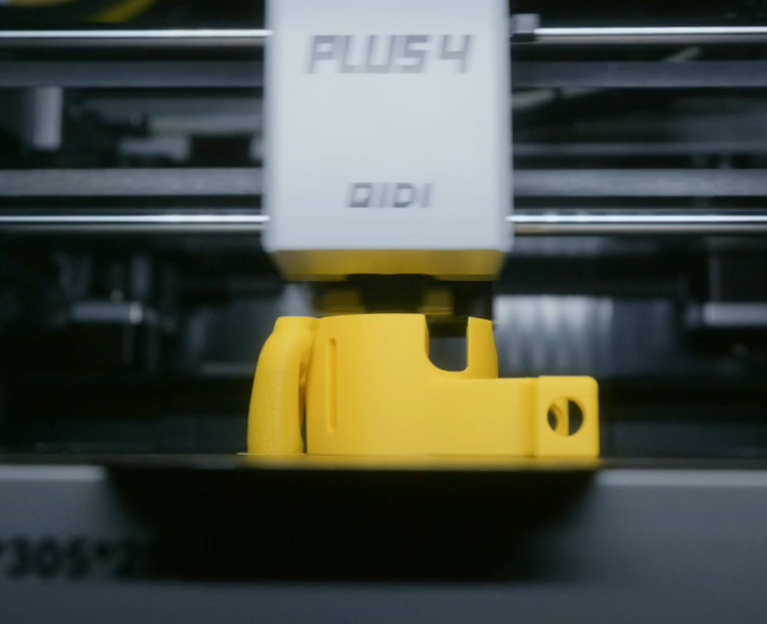
The right 3D print finishing method depends on your material and your target look. Sanding works on every FDM plastic and costs almost nothing. Acetone vapour smoothing only works on ABS and ASA, but removes layer lines outright. Filler primer plus spray paint hides lines on any material. Ironing and a finer layer height fix the problem before it exists.
This guide is the selection layer. It tells you which method to reach for, what each one realistically achieves, what it costs, and where each one can ruin a part. Two companion guides go deep on individual processes: sanding and polishing PLA step by step, and acetone vapour smoothing for ABS.
Which finishing method should you use?
Pick the method by matching three things: the plastic you printed in, the finish you actually need, and how much time you are willing to spend per part. The table below is the decision shortcut. Costs are consumables only and assume a palm-sized part.
| Method | Works on | Realistic result | Consumable cost / part | Hands-on time | Main risk |
|---|---|---|---|---|---|
| Finer layer height + ironing | All FDM plastics | Lines reduced, not removed; flat tops near-glassy | $0 (print time only) | 0 min (slicer setting) | Print time rises 40–90% |
| Dry sanding (220→800) | All FDM plastics | Matte, uniform, lines gone by touch | $0.30–$1.00 | 10–25 min | Sanding through thin walls; heat-smearing PLA |
| Wet sanding (800→2000) | PLA, ABS, ASA, PC | Satin to semi-gloss | $0.50–$1.50 | 20–40 min | Water intrusion into unsealed infill |
| Acetone vapour | ABS, ASA only | Glossy, layer lines fully melted away | $0.20–$0.60 | 5 min setup + 15–40 min unattended | Flammable solvent; dimensional loss on fine detail |
| Filler primer + sanding + paint | All FDM plastics | Injection-moulded appearance, any colour | $1.50–$4.00 | 45–90 min over 2 days | Adds 0.1–0.3 mm; masks tight tolerances |
| Two-part epoxy coat | All FDM plastics | Thick gloss shell, waterproof | $1.00–$3.00 | 15 min + 12–24 h cure | Drips, runs, permanent once cured |
| Heat gun / flame polish | PETG, PLA (light passes) | Spot gloss, uneven across large areas | $0 | 2–5 min | Warping and sagging; hardest method to control |
If you only ever remember one line from this table: sanding is the method that never fails and never surprises you, and vapour smoothing is the only method that removes layer lines rather than hiding them.
What does "smooth" actually mean?
Surface roughness is measured as Ra, the arithmetic mean deviation of the surface profile from its mean line, expressed in micrometres. A raw FDM part at 0.2 mm layer height typically lands in the tens of micrometres Ra on vertical walls; injection-moulded consumer plastic is usually an order of magnitude finer. You can read the formal definition on the surface roughness reference page.
The practical version: three separate defects get called "rough", and they need different fixes.
- Layer lines are the horizontal banding from stacking extrusions. Finer layers, ironing, sanding, or vapour smoothing.
- Stair-stepping is the terracing on shallow curves and domes. Adaptive layer height and part orientation fix this at the slicer; sanding fixes it after the fact.
- Blobs, zits, and seam scars are extrusion artefacts, not roughness. No amount of sanding fixes the root cause — retraction and seam placement do. Our layer-line reduction guide covers the print-stage settings in detail.

Sanding: the method that works on everything
Sanding is the only finishing method that works on every FDM material, needs no ventilation equipment beyond a dust mask, and gives you continuous control over how far you go. It is also the slowest.
The grit progression that matters is 220 → 400 → 800, then 1200 → 2000 only if you want gloss. Each grit must fully erase the scratch pattern of the previous one before you move up; skipping a step leaves deep scratches that the finer grits polish but never remove. Grit numbering itself follows two competing standards, CAMI in the US and FEPA (marked with a "P") in Europe, and they diverge above 220 — a P400 sheet is not the same as a 400 sheet.
Wet sanding from 800 upward keeps the abrasive clear and stops PLA from heat-smearing. Add a drop of dish soap to the water. Do not wet sand a part you intend to leave unsealed — water gets into the infill through the seams and takes days to leave.
The mistake to avoid: sanding a part with 2 wall loops. A 0.4 mm nozzle at 0.42 mm line width gives you roughly 0.84 mm of wall. Aggressive 220-grit work removes 0.1–0.2 mm quickly, and you will break through into infill. Print anything you plan to sand with 4 walls.
Acetone vapour smoothing: gloss, but only for ABS and ASA
Acetone vapour smoothing dissolves the outermost few microns of an ABS or ASA part so surface tension pulls it flat, eliminating layer lines instead of abrading them away. It does not work on PLA, PETG, PC, nylon, or TPU — those polymers are not meaningfully soluble in acetone, and you will just get a wet part.
The process is unattended and cheap, which makes it the highest-leverage finishing method available for the materials it suits. It is also the one with real handling requirements: acetone is highly flammable with a flash point around −20 °C, and OSHA publishes exposure limits and handling guidance in its chemical data sheet for acetone. Work in a ventilated space, keep it away from ignition sources, and never use a heated chamber or heat gun to accelerate the vapour.
Expect to lose fine detail. Text below about 1 mm stroke width, sharp fillets, and thread crests soften noticeably at 20+ minutes of exposure. The full ABS vapour smoothing walkthrough covers container setup, exposure timing, and the outgassing period.
Filler primer and paint: the finish that hides everything
Filler primer is a high-solids spray primer that fills shallow surface defects as it dries, letting you sand back to a level surface without removing part material. It is the standard route for cosplay props, model kits, and any part where the final look matters more than dimensional accuracy.
The working cycle is: sand to 400 grit, spray two light coats of filler primer, sand back at 600 grit, inspect under raking light, repeat until no lines show, then colour coat and clear coat. Two or three cycles is normal on a part printed at 0.2 mm.
Budget 0.1–0.3 mm of added thickness across all coats. On a friction-fit or threaded feature, that is enough to kill the fit, so mask those surfaces before you spray.

Epoxy coating: gloss plus waterproofing in one step
A two-part pour-on epoxy gives a thick, self-levelling gloss shell that both hides layer lines and seals the part against water ingress. It is the standard finish for functional outdoor parts, tabletop terrain, and anything that will get wet.
Mix by weight to the manufacturer's ratio, brush on thin, and rotate the part on a turntable for the first 20 minutes so the coat does not sag. Two thin coats beat one thick coat every time. Cure is typically 12–24 hours at room temperature and the result is permanent — there is no sanding an epoxy coat back off without destroying the surface underneath.
Print-stage smoothing: the free option people skip
The cheapest finishing work happens in the slicer, before the print starts. Three settings do most of the work:
- Layer height. Dropping from 0.20 mm to 0.12 mm roughly halves visible banding on vertical walls, at the cost of 40–90% more print time.
- Adaptive (variable) layer height. Fine layers only where geometry curves, coarse layers on straight walls. Most of the visual benefit for a fraction of the time penalty.
- Ironing. A final no-extrusion or low-extrusion pass with the hot nozzle over flat top surfaces, melting the tops of adjacent extrusions together. It affects horizontal top faces only — it does nothing for vertical walls. Prusa's ironing parameter reference explains the flow and spacing values clearly, and our own ironing walkthrough covers the QIDI Studio implementation.
Machine rigidity sets the floor here. Resonance and belt slack show up as ringing next to corners, and no amount of post-processing removes ringing cleanly — you sand a wave into a flatter wave. A rigid CoreXY frame with input shaping, like the one on the QIDI Max4 or the enclosed Q2, keeps the surface you start with closer to what you want.
Material-by-material selection
Different plastics respond to the same tool very differently. Match the method to the polymer before you start.
| Material | Best first method | Vapour smoothing | Sanding notes | Heat gun |
|---|---|---|---|---|
| PLA | Sand 220→2000, then polish | No (acetone ineffective) | Gums up above ~60 °C; wet sand from 800 | Risky — softens near 60 °C, warps fast |
| ABS | Acetone vapour | Yes — the reference case | Sands cleanly, dust is fine and static-prone | Works but vapour is easier |
| ASA | Acetone vapour | Yes, slightly slower than ABS | Same as ABS | Works, same caveats |
| PETG | Filler primer or epoxy | No | Scratches easily; stay at 320+ and dry sand | Most responsive to heat of the common plastics |
| PC | Sand, then epoxy | No | Hard and slow; expect long sanding sessions | Needs high heat, easy to scorch |
| Nylon (PA) | Sand, then dye | No | Fuzzy surface; sand dry, sharp grit only | Poor results |
| Carbon-fibre filled | Sand, then clear coat | No | Destroys abrasive quickly; buy cheap paper in bulk | No |
| TPU | Leave as printed | No | Abrasive tears the surface rather than cutting it | No |
Note the pattern: solvent smoothing is an amorphous-polymer trick. ABS and ASA smooth because acetone attacks them; the semi-crystalline and chemically resistant plastics in the engineering filament range do not respond, which is exactly the property that makes them useful for functional parts.

Where finishing effort is wasted
Some surface problems are print defects wearing a roughness costume, and post-processing on those is money burned. Check these before you pick up sandpaper:
- Under-extrusion gaps on top surfaces. Raise top solid layers to 4–5 and top infill overlap to about 20%. Sanding a gappy top layer just opens the gap wider. Our infill guide covers the density needed to support a solid top.
- Elephant foot on the first layer. Fix the Z-offset and first-layer squish. A chamfer at the slicer costs nothing; filing the flare off by hand costs 10 minutes per part.
- Warped or lifted corners. A warped part sanded flat is a thinner warped part. Chamber temperature and bed adhesion fix this, not abrasive.
- Visible Z-seams in a line. Random or aligned seam placement, or scarf/wipe settings, move the problem instead of you removing it by hand on every copy.
For the rest of the toolkit in escalating order of effort, the complete post-processing guide works through each technique with the tooling needed. The filament itself also matters more than most people expect — matte finishes hide layer lines that gloss finishes advertise, and the QIDI filament range includes both.
A realistic time and cost budget
Finishing cost is dominated by your own labour, not consumables. Here is what a single palm-sized part costs to take from raw print to each finish level.
| Target finish | Steps | Consumables | Active time | Elapsed time |
|---|---|---|---|---|
| Tidy raw print | Deburr, remove supports, clean seams | < $0.10 | 5 min | 5 min |
| Uniform matte | Sand 220 → 400 → 800 | $0.30–$1.00 | 15–25 min | 25 min |
| Satin / semi-gloss | Above, then wet sand to 2000 + polish | $1.00–$2.00 | 35–55 min | 1 h |
| Glossy ABS/ASA | Light sand, acetone vapour, outgas | $0.30–$0.80 | 10 min | 24–48 h (outgassing) |
| Painted / prop grade | Sand, 2–3 primer cycles, colour, clear | $2.00–$4.00 | 60–90 min | 2–3 days |
| Sealed and waterproof | Sand 400, two epoxy coats | $1.00–$3.00 | 20 min | 24–48 h |
At roughly an hour of hands-on work for a satin finish, batching matters. Sand five parts through 220 grit, then five through 400, and so on — the setup and cleanup overhead only gets paid once. If you are running parts for sale rather than for yourself, print them at 0.12 mm on a machine from the current printer lineup and skip a whole grit step; the extra print hours are unattended, and your hours are not.
Frequently asked questions
Can you smooth PLA with acetone?
No. PLA is not appreciably soluble in acetone, so vapour exposure leaves the surface wet and slightly hazy without smoothing it. Sanding, filler primer, or an epoxy coat are the working options for PLA. Some hobbyists use ethyl acetate or dedicated PLA smoothing solutions, but results are inconsistent and detail loss is unpredictable.
What grit sandpaper should I start with on a 3D print?
Start at 220 grit for a part printed at 0.2 mm layer height, and 320–400 grit if you printed at 0.12 mm or finer. Anything coarser than 180 removes material faster than you can judge and will flatten edges you wanted to keep. Progress 220 → 400 → 800, and only continue to 1200 and 2000 if you want gloss rather than a uniform matte.
Does ironing remove layer lines?
Ironing only smooths flat horizontal top surfaces — it does nothing for vertical walls, where most visible layer lines live. It is excellent for the top face of a nameplate or a flat lid, and irrelevant for a curved vase. To reduce lines on walls, lower the layer height or use adaptive layer height instead.
How long should ABS parts outgas after acetone smoothing?
Give a smoothed ABS part at least 24 hours in a ventilated space before handling it much, and 48 hours before painting or gluing. The surface will feel dry long before the solvent has left the softened skin layer, and fingerprints pressed in during that window stay permanently.
Is it cheaper to print finer or to sand more?
Printing finer is almost always cheaper, because print time is unattended and sanding time is not. Halving the layer height from 0.20 mm to 0.12 mm might add two hours to an overnight print you were not watching anyway, and can save 10–15 minutes of hands-on sanding per part. Sanding only wins when you need a finish that no layer height can reach, such as full gloss or a painted surface.
Will sanding weaken a 3D printed part?
Sanding removes material from the outer walls, which are the load-bearing skin of an FDM part, so aggressive sanding does reduce strength. On a part printed with two perimeters, taking 0.2 mm off means losing roughly a quarter of the wall. Print anything structural that you intend to sand with four or more perimeters, and keep coarse grits away from thin sections and screw bosses.
- Which finishing method should you use?
- What does "smooth" actually mean?
- Sanding: the method that works on everything
- Acetone vapour smoothing: gloss, but only for ABS and ASA
- Filler primer and paint: the finish that hides everything
- Epoxy coating: gloss plus waterproofing in one step
- Print-stage smoothing: the free option people skip
- Material-by-material selection
- Where finishing effort is wasted
- A realistic time and cost budget
- Frequently asked questions
- Can you smooth PLA with acetone?
- What grit sandpaper should I start with on a 3D print?
- Does ironing remove layer lines?
- How long should ABS parts outgas after acetone smoothing?
- Is it cheaper to print finer or to sand more?
- Will sanding weaken a 3D printed part?
Recommended products






