 Q2
Q2
 QIDI Box
 Plus 4
 Q1 Pro
 X-Max 3


From Rough to Refined: The Ultimate Guide to Post-Processing Your 3D Prints

Your 3D printer has finished its work, bringing a digital design to life. Before you is a detailed model, fresh off the build plate. The journey, however, isn't quite over. To transform that raw print into a professional-grade masterpiece that truly wows, you need post-processing. This essential stage of 3D printing removes imperfections and elevates the aesthetics, unlocking the full potential of your projects. This guide provides the actionable steps and pro-tips you need to clean, sand, and paint your prints to perfection. Let's get started.
What's the First Step for Any 3D Printing Project After It's Finished?
Every great finish begins with a clean start. This means properly removing support structures and cleaning the model. The method varies slightly depending on whether you are using a resin or an FDM 3D printer.
For FDM Prints
Models from FDM machines require the physical removal of support material. Patience here is key to avoiding damage to your print.
Tools You'll Need:
- Flush cutters
- Pliers
- A deburring tool or hobby knife
- A heat gun (optional)
First, try to remove the larger support pieces by hand. They are often designed to break away. For more stubborn or intricate supports, use flush cutters to carefully snip them away from the model's surface. A deburring tool or hobby knife is excellent for shaving off any small remaining nubs. If you see white stress marks on the plastic after removal, a quick, gentle pass with a heat gun can often make them disappear. This initial cleanup is a vital first step for any 3D printing enthusiast.

For Resin Prints
Resin prints require a different approach involving chemical cleaning and curing.
- Safety First: Always wear nitrile gloves and safety glasses when handling uncured resin. It is a skin irritant.
- The Wash & Cure Process: Your first action is to give the print a bath. Submerge your model in Isopropyl Alcohol (IPA) and gently agitate it to wash away any uncured resin. An all-in-one wash and cure station can automate this process, providing a thorough and contained cleaning. After washing, you can remove the supports. They are often easier to remove at this stage, as the material is softer. Finally, the model needs to be cured under UV light to achieve its final hardness and strength.
How Can You Smooth Your 3D Printer Models for a Flawless Finish?
This is the step that truly separates an average print from a stunning one. Eliminating layer lines, especially on FDM prints, is the secret to a professional look. This section will guide you through making your 3D printer models incredibly smooth.
The most effective method is sanding. It is a manual process that requires some effort, but the results are absolutely worth it, especially when sanding and polishing popular materials like PLA.
The Sanding Workflow
You will need a selection of sandpapers with different grits. The number on the back indicates its coarseness; a lower number is coarser, and a higher number is finer.
- Start Coarse: Begin with a lower grit sandpaper, like 220, to sand down the most prominent layer lines and support marks. Work in circular motions to avoid creating flat spots.
- Move Up the Grits: After the initial pass, move to a finer grit, such as 400. This will smooth out the scratches left by the coarser paper. Continue this process, moving progressively higher to 800, 1000, and even 2000 grit for a glass-like polish.
Introduce Wet Sanding
For the best possible results, try wet sanding. Simply dip your fine-grit sandpaper in water before and during sanding. The water acts as a lubricant, washing away dust particles and preventing the sandpaper from clogging. This technique results in an exceptionally smooth surface and is a hallmark of high-quality 3D printing finishing.
The Ultimate Trick for FDM Prints: Filler Primer
Here is a game-changing technique. Filler primer is a special type of sprayable primer that fills in tiny imperfections like layer lines. You can find it at most hardware or auto parts stores.
- Apply a light, even coat of filler primer to your sanded model.
- Let it dry completely.
- Sand the primed surface with a fine-grit sandpaper (400 or higher). You will be amazed at how the layer lines vanish. For very prominent lines, you might apply a second coat and sand it again. This single trick can make your FDM 3D printer parts look almost identical to injection-molded products.
What's the Professional Way to Paint 3D Printing Models?
With a perfectly smooth surface, your model is now a blank canvas ready for color. A proper painting process ensures the paint adheres well and results in a vibrant, durable finish. This is how you bring your 3D printing creations to life.
Step 1: Priming is Non-Negotiable
Never apply color directly to the raw plastic. Start with a primer. A good primer creates a uniform surface that paint loves to stick to. It ensures your final colors appear rich and true, without the underlying plastic color showing through. For most projects, a matte grey or white acrylic hobby primer is an excellent choice.
Step 2: Choosing Your Painting Method
You have several options for applying color, each with its own advantages.
- Spray Cans: These are perfect for applying a uniform base coat or coloring large models. The key to a good finish is control. Remember this rule: many light coats are better than one heavy coat. A heavy coat will run and obscure details.
- Airbrushing: For those seeking the highest level of detail and control, an airbrush is the tool of choice. It allows you to create smooth gradients, subtle shading, and fine lines that are impossible to achieve otherwise.
- Hand Brushing: Get in touch with your artistic side. Using acrylic paints and a set of quality brushes is ideal for picking out small details, weathering effects, and giving your model a unique, handcrafted character.
Step 3: Protect Your Work with a Clear Coat
After your paint has fully dried, the final touch is a protective clear coat or varnish. This seals the paint job, protects it from chipping and UV damage, and gives your model a consistent finish. You can choose from matte, satin, or gloss finishes to achieve the exact look you desire.
How Do You Join Multiple 3D Printer Parts Together Seamlessly?
Sometimes a project is too large or complex to be handled by your 3D printer in one go. For these situations, you will need to bond multiple parts together. Using the right adhesive is crucial for a strong, clean seam.
- For PLA & PETG: The best and easiest choice is Cyanoacrylate (CA) glue, commonly known as Super Glue. It creates a fast, strong bond. For an instant bond, you can use a CA glue accelerator spray.
- For ABS: You can use CA glue, but for a true chemical weld, use a solvent cement made for ABS or even pure acetone. It slightly melts the plastic surfaces, fusing them together as it evaporates. Epoxy also works very well for a gap-filling, ultra-strong bond.
- For Resin Prints: CA glue works perfectly on cured resin parts. For a truly seamless connection, you can apply a small amount of liquid resin to the joint and cure it with a handheld UV light.
For the strongest possible bond, always sand the contact surfaces of the parts before applying adhesive. This creates a rougher texture for the glue to grip.

Turning Your Prints into Masterpieces by 3D Printing
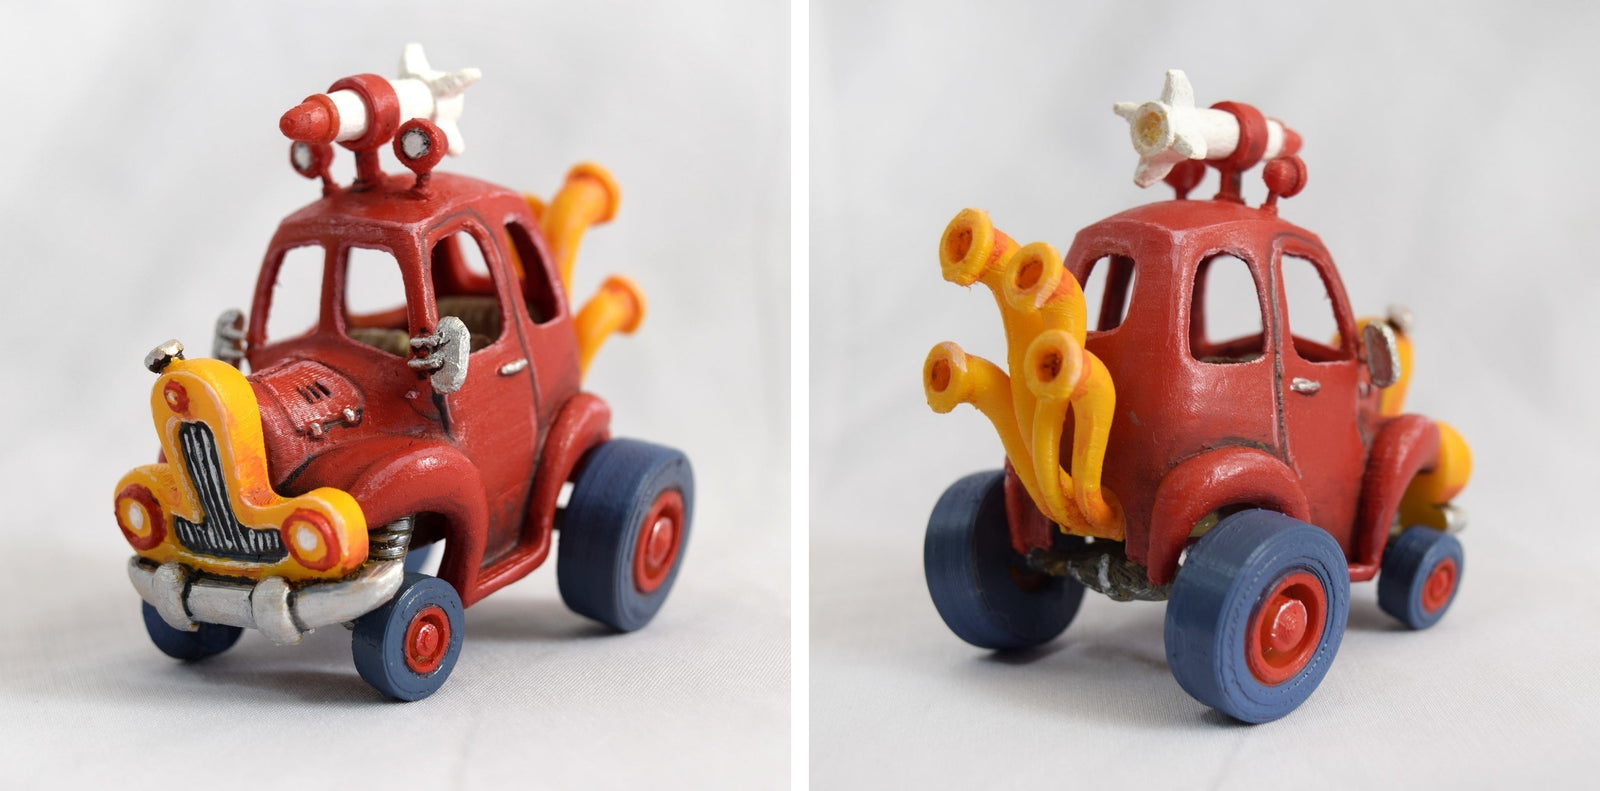
Post-processing is where technical skill meets artistry. By mastering these cleaning, sanding, and painting techniques, you elevate your 3D printing projects from simple objects to impressive, professional-quality creations. The process transforms a good print into a great one. The 3D printer in your workshop is the start of this creative journey, and your hands-on skills are what complete it. Now, pick a print from your collection, and start creating something truly special.
Explore the world of 3D printing and find the perfect materials and techniques for your next masterpiece.
- What's the First Step for Any 3D Printing Project After It's Finished?
- For FDM Prints
- For Resin Prints
- How Can You Smooth Your 3D Printer Models for a Flawless Finish?
- The Sanding Workflow
- Introduce Wet Sanding
- The Ultimate Trick for FDM Prints: Filler Primer
- What's the Professional Way to Paint 3D Printing Models?
- Step 1: Priming is Non-Negotiable
- Step 2: Choosing Your Painting Method
- Step 3: Protect Your Work with a Clear Coat
- How Do You Join Multiple 3D Printer Parts Together Seamlessly?
- Turning Your Prints into Masterpieces by 3D Printing
Recommended products


