

 Q2
Q2
 QIDI Box
 Plus 4
 Q1 Pro
 X-Max 3


How to Make 3D Prints Stronger

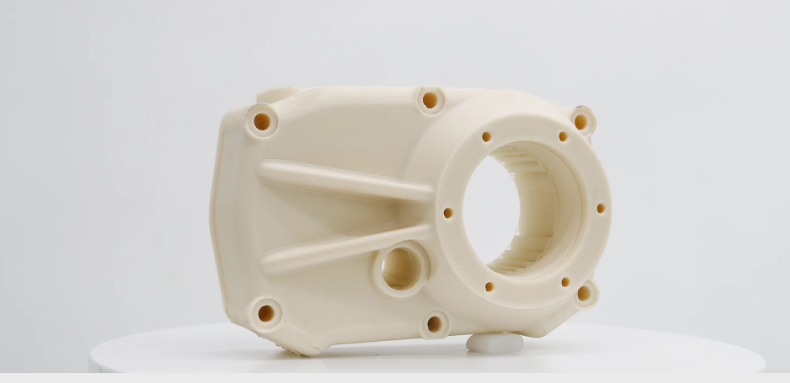
To make 3D prints stronger, change four things in this order: pick a tougher filament, add perimeters rather than infill, orient the part so layer lines run across the load instead of along it, and print hot enough for the layers to weld. Post-processing such as annealing helps afterwards, but it cannot rescue a part that was oriented wrongly.
That order matters because the gains are not equal. Switching from PLA to PETG raises published tensile strength by roughly 30%, while raising infill from 20% to 40% adds far less and doubles the print time. This guide works through each lever, with the numbers to justify it.
How Strong Is a 3D Print, Really?
An FDM part is anisotropic: it is markedly weaker across the layer lines than along them, because each layer is a weld rather than continuous material. That single fact governs almost every decision below. A tensile figure printed on a spec sheet is measured in the strong direction — the X-Y plane — so treat it as a ceiling, not a guarantee.
Anisotropy is why the same model can survive one drop test and shatter in another, depending only on how it sat on the plate. It is also why print orientation earns a section of its own further down.
Step 1: Choose the Right Filament for Strength
The material you choose has the largest single effect on how strong a print will be. The table below uses QIDI's own published test data so the numbers are measured the same way and can be compared directly.

| Filament | Tensile strength (X-Y) | Impact strength (X-Y) | Heat deflection temp. | Best used for |
| PLA Basic | 34.7 ± 4 MPa | 18 ± 2 kJ/m² | 57.6 °C | Display models, jigs, indoor low-load parts |
| PETG Basic | 45.2 ± 4 MPa | 25 ± 3.5 kJ/m² | 71.8 °C | Brackets, enclosures, parts that must flex before breaking |
| PETG-CF | 57 MPa | 30 kJ/m² | 77 °C | Stiff structural parts with good impact tolerance |
| Ultra PA (nylon) | 69.3 ± 1.2 MPa | — | 72.5 °C | Gears, hinges, wear surfaces |
| PET-CF | 72.5 ± 1.4 MPa | — | 86.7 °C | Load-bearing engineering parts |
| PAHT-GF | 86.5 ± 1.0 MPa | 7.3 ± 0.8 kJ/m² | 80 °C | Maximum stiffness and strength; brittle on impact |
Read the impact column as carefully as the tensile column. PAHT-GF is the strongest material in the table and the worst at absorbing a sudden blow — its elongation at break is under 2%, so it is stiff and it snaps. PETG-CF is weaker on paper and tougher in practice for anything that gets dropped. "Strong" is not one property.
Matching Material to Job
- Load-bearing parts: PET-CF, PAHT-GF or nylon. Check the high-performance filament range for spec sheets.
- Impact and vibration: PETG, PETG-CF or ABS — materials that deform before they fracture.
- Heat resistance: PET-CF at 86.7 °C heat deflection, or a PC blend above that. PLA gives up at around 57 °C, which is why a PLA part left in a parked car deforms.
- Outdoor use: ASA for UV resistance; see the ABS versus ASA comparison for outdoor mounts.
- Flexibility: TPU where the part must bend and return.
A Note on Filled Filaments
Carbon- and glass-filled grades raise stiffness and heat resistance but usually reduce impact toughness, and they abrade brass nozzles quickly — use a hardened or bimetal nozzle. Metal-filled filaments add weight and appearance; they do not add structural strength.
Step 2: Design for Strength
Design changes are free. They cost no print time and no material, and they often outperform a settings change.
Replace Sharp Corners With Fillets and Chamfers
Sharp internal corners concentrate stress and become crack initiation sites. Adding a fillet distributes the force through a curve instead of a point. Even a 1–2 mm radius makes a measurable difference without changing how the part functions. At high-stress features such as hook bases and mounting holes, local thickening buys a lot of strength for very little material.
Strengthen Flat Surfaces With Ribs and Gussets
Instead of thickening the whole part, add targeted reinforcement. Thin ribs along a flat face provide stiffness at a fraction of the material cost, and triangular gussets at joints transfer force between connected sections. These are the same principles used in injection-moulded parts and structural steel, and they print faster than a solid equivalent.
Orient Layers Across the Load, Not Along It
This is the highest-leverage design decision. Because prints are weakest between layers, position the model so layer lines run perpendicular to the main force. A hook printed lying down, with layers crossing the curve, is dramatically stronger than the same hook printed standing up with layers stacked along the load path. When you are unsure, print two small test coupons in different orientations before committing to the full part. Our guide to model placement for strength covers this in detail.

Step 3: Optimize Printer Settings for Strength
Slicer settings are where most people start and where the returns are smallest per unit of effort. Spend them wisely.
| Setting | Recommended for strength | Effect | Cost |
| Perimeters / walls | 3–5 (1.2–2.0 mm at 0.4 mm nozzle) | Largest slicer-side gain — the shell carries most bending load | Small time increase |
| Infill density | 20–40% for functional parts | Moderate gain; diminishing above 40% | Time and material rise steeply |
| Infill pattern | Gyroid, cubic or triangular | Better strength-to-material ratio than grid | None |
| Top / bottom layers | 4–5 each | Stops the shell caving at stress transitions | Small |
| Layer height | 0.2–0.3 mm at 0.4 mm nozzle | Thicker layers hold heat and weld better | Lower surface detail |
| Nozzle temperature | Upper half of the material's range | Directly improves interlayer bond | More stringing; tune retraction |
| Part cooling fan | Low or off for ABS, ASA, PA | Prevents flash-cooling that weakens the weld | Worse overhangs |
Walls beat infill. In bending, the material furthest from the neutral axis carries the most stress, and that material is the shell. Going from two perimeters to four typically helps more than doubling infill, and costs less time. A 2026 comparative study printed ABS, PC, PLA and PETG at 30% and 60% infill and ran tensile, Charpy impact and hardness tests on all of them; it is a useful reference for how much infill density actually changes mechanical properties and how differently each polymer responds. Our own guide to infill patterns and density covers the pattern choice, and minimum wall thickness covers the geometry side.
Step 4: Control the Printing Environment
Environment affects layer adhesion more than most people expect, and layer adhesion is where functional parts fail.
Keep the Ambient Temperature Stable
A stable room between roughly 20 °C and 25 °C prevents drafts from flash-cooling layers before they weld. For high-shrinkage materials the room is not enough: an actively heated chamber holds a set point regardless of what the room does. QIDI's Q2, Plus 5 and Max4 run a 65 °C actively heated chamber, which is what makes ABS, ASA and nylon parts repeatably strong rather than occasionally strong. The entry-level Q2C has a flame-retardant enclosure without a chamber heater, so it is best matched to PLA and PETG. If parts are cracking along layer lines, start with our guide to layer separation.
Keep the Filament Dry
Moisture is the quietest strength killer. Water trapped in the filament flashes to steam in the nozzle and leaves voids in every extruded line, cutting the bonded cross-section. Nylon is the worst offender — QIDI specifies drying Ultra PA at 80–100 °C for 4–6 hours and keeping it below 15% relative humidity while printing. PETG wants 60–65 °C for 6–8 hours. See filament drying techniques for the equipment options.
Handle and Store Finished Parts Properly
Let prints cool fully before removing them, and use even pressure rather than sharp impacts, which can start internal cracks. PLA degrades with UV exposure and humidity over time; PETG, ASA and ABS hold up better outdoors. For critical parts, store cool, dry and out of direct sunlight.

Step 5: Post-Processing — Including How to Make PLA Stronger After Printing
Once a part is off the plate, three techniques can still change its properties.
Annealing
Annealing means holding a part above its glass transition temperature so the polymer chains reorganise into a more ordered, more crystalline structure. For PLA this reliably raises heat resistance — an annealed PLA part keeps its shape well above the 57.6 °C heat-deflection temperature of the untreated material.
| Material | Typical annealing window | Time | What to expect |
| PLA | 80–100 °C | 30–60 minutes, then cool slowly | Clear gain in heat resistance and stiffness; measurable shrinkage |
| PETG | Not usually worth it | — | Small gains, high risk of deformation |
| Nylon (PA) | Per the manufacturer's data sheet | Varies | Improves crystallinity; must be dried first |
| ABS | 90–100 °C | 30–60 minutes | Relieves internal stress more than it adds strength |
Two honest caveats. First, published results for tensile and impact strength after annealing vary widely by grade and test method — heat resistance and stiffness improve consistently, impact toughness often does not. Second, annealed parts shrink and can distort, so anneal a test piece, measure it, and only then commit a part that has to fit something. Support the part on a flat surface or in a sand bed while it is hot.
Chemical Treatments
Acetone vapour smoothing partly dissolves the surface of ABS, fusing the outermost layer lines together and removing the notches where cracks start. It is a surface treatment: it improves appearance and reduces stress risers, and it slightly softens the part's outer skin. It does nothing for PLA or PETG, which are not soluble in acetone.
Mechanical Reinforcement
For the highest-stress parts, embed reinforcement. Pause the print at a chosen layer, drop in threaded inserts, metal rods or carbon rods, and resume so the material closes over them. Alternatively, design channels and add reinforcement afterwards. When joining printed sections, cyanoacrylate with activator or a two-part epoxy usually produces a joint stronger than the layer bond it replaces.
Step 6: Test, Then Change One Thing
You do not need a load frame to make progress. Print two coupons that differ in exactly one variable, load them the same way to failure, and record where and how each one broke. The failure mode tells you what to change next:
- Clean break along a layer line → interlayer bonding: raise nozzle temperature, cut the fan, or enclose the printer.
- Shell cracked, infill intact → add perimeters.
- Infill collapsed under the shell → raise infill density or change the pattern.
- Crack started at a sharp internal corner → add a fillet.
- Part deformed rather than broke → the material is too soft for the temperature; move up the heat-deflection column.
Keep a short log of what you changed and what happened. It is the fastest route to a set of profiles you can trust.

FAQs About 3D Print Strength
Q1: How do I make PLA stronger?
Before printing: use 3–4 perimeters, 0.2–0.3 mm layers, a nozzle temperature in the upper half of the range, and an orientation where layer lines cross the load. After printing: anneal at 80–100 °C for 30–60 minutes and cool slowly, accepting some shrinkage. If the part still fails, PLA is the wrong material — its 57.6 °C heat-deflection temperature and low impact tolerance are hard limits.
Q2: How do I make PLA stronger after printing?
Annealing is the only treatment that changes the bulk material. Hold the part at 80–100 °C for 30–60 minutes, supported so it cannot sag, then let it cool slowly. Heat resistance and stiffness improve consistently; impact toughness may not. Expect dimensional change, so test on a spare part first. Epoxy coatings and embedded inserts reinforce a part without altering the polymer itself.
Q3: How do I make PETG stronger?
PETG rewards heat more than settings. Print at the upper end of its range, keep the part cooling fan at 30–50% rather than 100%, and dry the spool at 60–65 °C for 6–8 hours before printing — PETG is hygroscopic and wet PETG loses noticeable strength. Add perimeters before adding infill. Prusa's PETG material reference is a good cross-check on temperatures.
Q4: Is more infill always stronger?
No. Above roughly 40% the returns flatten out while print time and material keep climbing. Perimeter count is the more efficient lever for bending loads, because the shell sits furthest from the neutral axis. Reserve very high infill for parts loaded in compression.
Q5: Which direction is a 3D print weakest?
Across the layers, in Z. The bond between layers is a thermal weld with less strength than the continuous plastic within a layer. Design and orient accordingly, and never assume a spec-sheet tensile figure applies in Z.
Q6: Does printing slower make parts stronger?
Slightly, and indirectly. Slower printing gives each layer more time near bonding temperature, which helps interlayer adhesion. Raising nozzle temperature and reducing part cooling do the same job more efficiently, so try those first.
Strengthen Your Prints Deliberately
Strong prints come from stacked decisions, not one trick: pick the right material for the actual load case, design out stress concentrations, orient the part so the layers work with the load, put the slicer effort into perimeters, keep the filament dry and the environment stable, and anneal only when heat resistance is what you need. Change one variable at a time and let the broken test pieces tell you which lever to pull next.
- How Strong Is a 3D Print, Really?
- Step 1: Choose the Right Filament for Strength
- Matching Material to Job
- A Note on Filled Filaments
- Step 2: Design for Strength
- Replace Sharp Corners With Fillets and Chamfers
- Strengthen Flat Surfaces With Ribs and Gussets
- Orient Layers Across the Load, Not Along It
- Step 3: Optimize Printer Settings for Strength
- Step 4: Control the Printing Environment
- Keep the Ambient Temperature Stable
- Keep the Filament Dry
- Handle and Store Finished Parts Properly
- Step 5: Post-Processing — Including How to Make PLA Stronger After Printing
- Annealing
- Chemical Treatments
- Mechanical Reinforcement
- Step 6: Test, Then Change One Thing
- FAQs About 3D Print Strength
- Q1: How do I make PLA stronger?
- Q2: How do I make PLA stronger after printing?
- Q3: How do I make PETG stronger?
- Q4: Is more infill always stronger?
- Q5: Which direction is a 3D print weakest?
- Q6: Does printing slower make parts stronger?
- Strengthen Your Prints Deliberately
Recommended products






