

 Q2
Q2
 QIDI Box
 Plus 4
 Q1 Pro
 X-Max 3


What Is the Minimum Wall Thickness for 3D Printing?

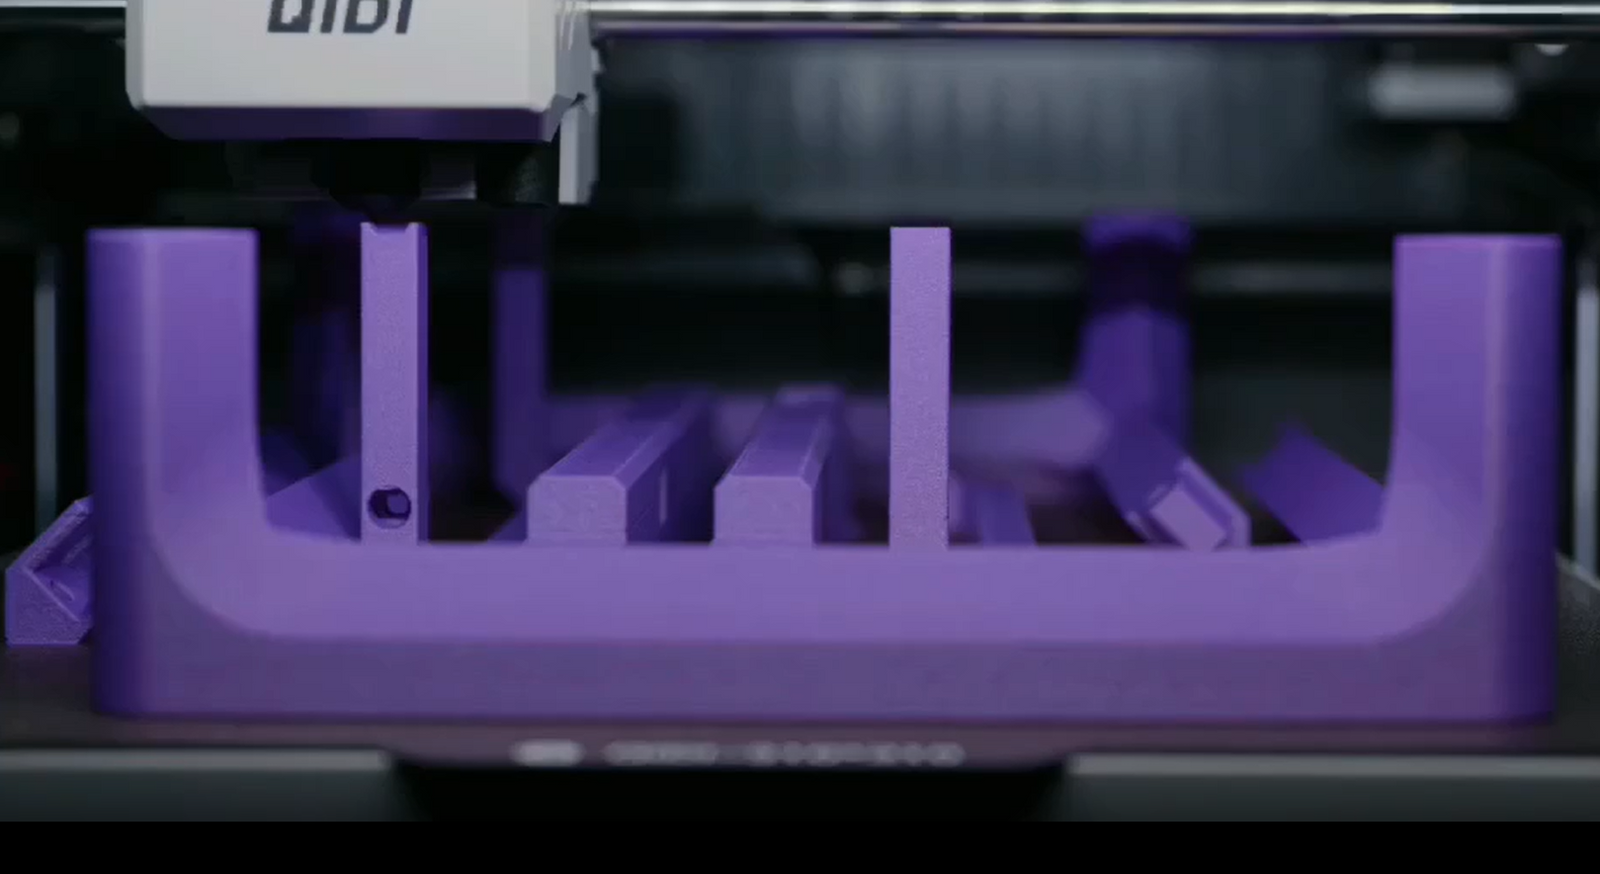
An FDM 3D printer can print a wall as thin as one extrusion — about 0.4 mm with a standard 0.4 mm nozzle — but the practical minimum for a part you intend to use is two walls, roughly 0.8 mm. Resin (SLA) machines go thinner, down to about 0.6 mm, because they cure a whole layer optically instead of tracing it with a fixed-width nozzle.
Wall thickness in 3D printing directly affects whether your model will print successfully and hold up during use. Your design should have walls that are thick enough to be strong, but not so thick that they waste materials or take too long to print. Different 3D printing methods require different wall widths. FDM printers usually need walls that are at least 0.8mm thick, while resin printers can use walls as thin as 0.6mm. This guide explains important things to know about wall thickness for your 3D printing projects.
How Thin Can a 3D Printer Print? Start From the Nozzle
For FDM, the answer is not a single number — it is a multiple. Wall thickness on an FDM printer is built from whole extrusions, and the width of one extrusion is set by the nozzle. A slicer will typically lay down a line roughly as wide as the nozzle diameter (default line widths generally sit between 100% and 120% of it). Everything else follows from that.
| Nozzle diameter | 1 wall | 2 walls | 3 walls | 4 walls | Practical minimum for a functional part |
|---|---|---|---|---|---|
| 0.2 mm | 0.20 mm | 0.40 mm | 0.60 mm | 0.80 mm | 0.6 mm (3 walls) |
| 0.4 mm (standard) | 0.40 mm | 0.80 mm | 1.20 mm | 1.60 mm | 1.2 mm (3 walls) |
| 0.6 mm | 0.60 mm | 1.20 mm | 1.80 mm | 2.40 mm | 1.8 mm (3 walls) |
| 0.8 mm | 0.80 mm | 1.60 mm | 2.40 mm | 3.20 mm | 2.4 mm (3 walls) |
Two design rules come straight out of that table.
Design wall thickness as a whole multiple of your extrusion width. A 1.0 mm wall on a 0.4 mm nozzle is the worst of both worlds: it is 2.5 extrusions wide, so the slicer either drops to two walls and leaves a 0.2 mm void down the middle, or stretches the extrusions and over-fills. A 0.8 mm or 1.2 mm wall slices cleanly. Modern perimeter generators handle awkward widths far better than they used to, but you still get the most predictable result by designing to the grid.
Single-wall parts are for vases, not for function. A one-extrusion wall has no internal bond line to share load, no redundancy against a single under-extrusion event, and typically fails along the layer boundary at a fraction of the material's rated strength. It prints, it looks fine, and it snaps. If a part will be handled, loaded, screwed into, or dropped, start at three walls.
Key Factors That Affect 3D Printing Wall Thickness
The minimum wall thickness needed for successful 3D printing relies on multiple factors working together. The right thickness depends on your printer's skills, the material you're using, and how the part will be used.
3D Printing Technology
Different printing methods build layers differently, which affects how thin your walls can be.
1. FDM
FDM 3D printers have a fixed nozzle size and require multiple passes to build robust walls. The adhesion strength between layers is crucial when determining the minimum wall thickness.

2. SLA
SLA (Stereolithography) printers use laser precision to make finer details than FDM. The liquid resin's qualities affect how thin the layers can be, which makes these printers great for creating small, detailed shapes.
3. SLS
SLS (Selective Laser Sintering) uses powdered materials, and the size of the particles affects how small the details can be. This method can handle complicated shapes, but removing extra powder limits how thin the walls can be.
4. MultiJet/PolyJet
MultiJet and PolyJet printers use accurate droplet printing, much like how inkjet printers work. They can work with different materials, but each material needs a specific width.
Material Properties
The type of 3D printing material you choose significantly impacts the minimum wall thickness. Brittle 3D printing materials require thicker walls to prevent cracking, whereas flexible materials need additional thickness to maintain their shape and avoid bending. Stronger materials can typically be used to create thinner walls without sacrificing strength.
Different materials can handle heat differently, which influences how they perform during printing and when in use. Some materials can bend or warp if printed too thin, so it's important to think about the minimum width needed.
There is a second-order effect worth knowing about on FDM: thin walls cool faster. On materials that shrink significantly as they cool — ABS and ASA above all — a thin wall on a large part has less thermal mass to resist the stress that builds up between layers, which is why thin-walled ABS parts are more prone to warping and to layer separation on tall prints than the same geometry in PLA. A heated chamber addresses the cause rather than the symptom, which is why engineering materials are usually printed enclosed.
End Use Requirements
Structural Considerations
The aim of your printed part decides how thick the walls need to be. The thickness of items depends on their purpose. Decorative items can be smaller, but parts that support weight need to be thicker for strength. Moving parts need certain spaces, and snap-fit pieces must be flexible enough to function correctly.
Environmental Factors
Environmental factors are also very important. Thin walls that get hot may become misshapen. Exposure to moisture can weaken some materials over time, so stronger walls are needed for strength. The need for UV light protection and resistance to contact also affects how thick materials must be for long-term stability.

Recommended Wall Thickness for Different 3D Printing Methods
The specific minimum wall thickness varies by printing method and material. Here are detailed recommendations for your 3D printing projects.
Minimum Wall Thickness by Technology
| Print Type | Basic Parts | Standard Parts | Load-Bearing Parts | Detailed Features |
| FDM | 0.8mm | 1.2mm | 2.0 - 2.4mm | 1.0mm |
| SLA | 0.6mm | 0.8mm | 1.2 - 1.5mm | 0.6mm |
| SLS | 0.7mm | 1.0mm | 1.5 - 2.0mm | 0.8mm |
| MultiJet | 0.6mm | 0.8mm | 1.2 - 1.5mm | 0.6mm |
These figures assume a part in the tens-of-millimetres range. They are floors, not targets, and they do not scale up on their own — see the section on large parts below.
Material-Based Thickness Adjustments
| Material Type | Additional Thickness Needed |
| Standard PLA | No adjustment needed |
| ABS/ASA | +0.2mm |
| Carbon Fiber | +0.1mm |
| Soft TPU | +0.4mm |
| Very Soft TPU | +0.6mm |
| Elastic Resin | +0.3mm |
Special Applications
| Application | Recommended Thickness |
| Support Structures | 1.0 - 1.6mm |
| Moving Parts | 1.2 - 1.5mm |
| Snap Fits | 1.2 - 2.0mm |
| Clear Parts | 0.8 - 1.0mm |
| Molds | 1.2 - 2.0mm |
These measurements provide starting points for common applications. The final wall thickness should account for your specific printer's capabilities and the part's intended use.
Wall Thickness on Large Parts: Why the Minimums Stop Applying
The most common wall-thickness mistake is scaling a model up and leaving the wall where it was. Stiffness and strength do not scale with size the way people expect. A hollow shell's resistance to bending depends on its wall thickness relative to its span; double the part's dimensions and keep the wall the same, and the same handling force produces far more deflection in the wall — while the part's own mass, which the wall now has to carry, has gone up roughly eightfold.
Practical consequences:
- Small parts (under ~50 mm): the technology minimums in the table above are usable as-is.
- Medium parts (50–150 mm): plan on 1.6–2.4 mm on FDM for anything that will be handled, and consider internal ribs rather than a uniformly thicker shell.
- Large parts (over 150 mm), hollow: 2–3 mm walls are a more realistic floor regardless of process. For a 200 mm tall hollow resin figure, the 0.6–0.8 mm SLA minimum is not the right number — that value describes what the machine can resolve, not what will survive being picked up.
Two extra requirements come with hollow large parts. Resin prints need drain holes (typically several millimetres across, placed so uncured resin cannot be trapped in a pocket) or the trapped liquid will cure later, expand and crack the shell. FDM prints of that size need enough internal infill or ribbing that the large flat spans do not oil-can, and enough top layers that the ceiling does not sag between infill lines.
Design Considerations for 3D Printing Wall Thickness
Strategic Wall Thickness Design
After choosing the basic wall thickness for your printing method and material, certain areas of your model need special attention:
High-Stress Areas
- Mount points: Add 50% more thickness than your base walls.
- Screw holes: The Surrounding area should be 2-3 times the base thickness.
- Snap fits: Double the wall thickness around clip mechanisms.
- Living hinges: Reduce to 75% of base thickness for flexibility.
- Support ribs: Use 80% of the main wall thickness for efficient reinforcement.
Corner and Transition Design
- Add 1-2mm fillets to sharp internal corners.
- Use gradual thickness transitions (max 45° angle).
- Maintain a minimum 2:1 ratio between connected thick and thin sections.
- Avoid sudden thickness changes that could create weak points.
Print Time and Material Efficiency
Wall thickness drives material use directly, and the relationship is geometric rather than intuitive. The table below is a straight calculation for a hollow 100 × 100 × 100 mm cube — all six faces at the stated thickness, no infill, PLA at 1.24 g/cm³ — so the numbers can be checked rather than taken on trust.
| Wall thickness | Shell volume | Mass in PLA | Relative to a 2 mm wall |
|---|---|---|---|
| 0.8 mm (2 walls) | 47.2 cm³ | 58.6 g | 41% |
| 1.2 mm (3 walls) | 70.3 cm³ | 87.2 g | 61% |
| 1.6 mm (4 walls) | 93.0 cm³ | 115.3 g | 81% |
| 2.0 mm (5 walls) | 115.3 cm³ | 142.9 g | 100% |
| 2.4 mm (6 walls) | 137.2 cm³ | 170.1 g | 119% |
The useful conclusion is that going from 2.0 mm to 1.2 mm on this part saves about 56 g — over 5% of a 1 kg spool on a single print — and print time falls with it, because perimeters are printed more slowly than infill. That is why blanket-thickening a shell is an expensive way to add strength. Selective reinforcement is much cheaper:
- Replace thick walls with thin walls plus support ribs.
- Use honeycomb or triangular infill in wide flat areas.
- Add thickness only to load-bearing sections.
- Design self-supporting angles (>45°) to reduce support material.
Smart wall thickness choices lead to significant savings in both time and material while maintaining part strength. The right balance of thickness in different areas creates efficient, durable prints at lower costs. If material consumption is your main concern, the companion guide on reducing 3D print material works through the slicer side of the same problem, and the infill patterns and density guide covers what happens inside the shell.

Testing Methods to Verify 3D Printing Wall Thickness
Before making the end product, testing ensures that the wall thicknesses you selected are effective. Both digital and real tests are important for improving your design.
Digital Testing with CAD Software
CAD thickness analysis shows parts of your design that could be too thin or too thick. This early check helps stop printing problems and weak structures. The program looks at your whole model and points out parts that need changes.
Draft angle analysis looks for steep slopes and overhangs that might create issues with printing. These areas often need extra support or changes in design to be printed properly.
Advanced modeling tools help you understand how your part will perform in real situations. These tests show where stress happens, where things might change shape, and how heat affects them. This information helps make important choices about wall thickness for functional parts.
One check that costs nothing and catches most problems: slice the model and look at the preview before you print it. If a wall you designed at 1.0 mm renders as two perimeters with a visible gap between them, the slicer is telling you the wall does not divide evenly into your extrusion width. Adjust the CAD dimension, not the slicer.
Physical Test Prints
A small test piece at 25% scale provides practical insights about your design. This scaled-down version should include key features like joints, clips, or mounting points. The smaller size saves time and material while still validating your wall thickness choices.
Test prints help verify several aspects:
- Actual printed thickness matches design specifications.
- Layer adhesion quality in thin sections.
- Performance of functional features.
- Strength of thickness transitions.
Each test reveals opportunities for improvement. Thin areas might need reinforcement, while thick sections could potentially be reduced. This practical feedback helps refine your design efficiently. Note one limitation: a 25% scale model validates the geometry and the fit, but it does not validate the strength of the full-size part, for the scaling reasons covered above.
Common Mistakes in Wall Thickness Design
Poor wall thickness decisions can lead to print failures or part performance issues. Here are the most common mistakes and their solutions.
Inconsistent Wall Thickness
Sudden thickness changes in a model are a frequent error. For example, shifting from 2mm to 0.8mm causes:
- Poor layer bonding during printing.
- Stress concentration leading to cracks.
- Extrusion issues and print defects.
Solution: Design gradual transitions with thickness changes no steeper than 45 degrees. Limit changes to 0.2mm per 1mm of distance.
Excessive Wall Thickness
Walls that are too thick create several problems:
- Wasted material and longer print times.
- Warping from uneven cooling between inner and outer layers.
- Unnecessary part weight.
Solution: Add thickness only in load-bearing areas. Keep other regions at the recommended base thickness. Use support ribs to increase strength instead of simply making walls thicker.
Insufficient Wall Thickness
Walls that are too thin often result from prioritizing detail or trying to save material:
- Unable to handle normal use stresses.
- Prone to breakage or deformation during printing.
- Poor surface quality.
Solution: Follow the minimum wall thickness requirements for your printing technology. For decorative features, strengthen the supporting structure rather than compromising on minimum thickness.
Frequently Asked Questions
How thin can a 3D printer print?
On FDM, one extrusion — around 0.4 mm on a standard 0.4 mm nozzle, or 0.2 mm with a fine nozzle. On SLA and other resin processes, roughly 0.6 mm. Those are resolution limits, not design recommendations: a wall at the limit will print but has almost no mechanical margin. For anything functional, use at least two to three extrusions.
What is the minimum wall thickness for 3D printing?
It depends on process and purpose. As a working set of floors: FDM 0.8 mm for basic parts, 1.2 mm for standard parts and 2.0–2.4 mm for load-bearing ones; SLA and MultiJet 0.6 mm basic and 1.2–1.5 mm load-bearing; SLS 0.7 mm basic and 1.5–2.0 mm load-bearing. Add thickness for flexible materials — 0.4–0.6 mm extra for TPU.
How thick should the walls be on a 200 mm tall model?
Much thicker than the process minimum. For a hollow part at that scale, plan on 2–3 mm of wall regardless of whether you print it in resin or filament, because bending stress and self-weight both grow with size while the machine's minimum stays where it is. On a resin print, add drain holes so uncured resin cannot be sealed inside. On an FDM print, some infill and a few internal ribs are usually a better use of material than simply thickening the entire shell.
Is a thicker wall always stronger than more infill?
For bending and impact, yes — usually decisively. The material furthest from the centre of a section carries the most stress, so perimeters contribute disproportionately to stiffness. Going from two walls to four typically does more for a part than doubling infill density, and costs less material. Infill's real job is supporting the top surface and stopping the walls buckling inward.
Why does my 1 mm wall come out with a gap in the middle?
Because 1 mm is not a whole number of extrusions on a 0.4 mm nozzle. The slicer fits two perimeters (0.8 mm) and has 0.2 mm left over — too narrow to fill with another line. Redesign the wall to 0.8 mm or 1.2 mm and the gap disappears.
Does wall thickness affect water resistance?
Yes, indirectly. FDM parts leak through the seams between extrusions, not through the plastic, so more perimeters means more overlapping seams for water to negotiate. Three or four walls plus a material that bonds well between layers is the usual approach for a watertight FDM part; thickness alone does not guarantee it.
Which QIDI settings control this?
In the slicer, look for wall loop count (or "perimeters") under strength settings, and line width under quality settings. Both are documented in the walls and surfaces reference for this slicer family, and the perimeters documentation explains how a slicer decides how many walls fit in a given thickness. Broader design-for-FDM rules, including thin-feature limits, are collected in the design guide for FDM parts.
Design Your 3D Printing Wall Thickness Right!
The right wall thickness is important for efficient 3D printing. Use the suggested minimum width for your printing method and material, and then change it if necessary for your specific part. Design in whole multiples of your extrusion width, scale the wall with the part rather than leaving it at the machine minimum, and use online tests and small printed samples to check your design. By designing wall thickness carefully to avoid rapid changes and address stress points, you can make strong, efficient parts while saving time and materials. Consistent hardware helps here too — dimensional accuracy on thin walls depends on stable extrusion, which is what a machine like the QIDI Plus 5 and the rest of the QIDI 3D printer range are built to deliver.
- How Thin Can a 3D Printer Print? Start From the Nozzle
- Key Factors That Affect 3D Printing Wall Thickness
- 3D Printing Technology
- Material Properties
- End Use Requirements
- Recommended Wall Thickness for Different 3D Printing Methods
- Minimum Wall Thickness by Technology
- Material-Based Thickness Adjustments
- Special Applications
- Wall Thickness on Large Parts: Why the Minimums Stop Applying
- Design Considerations for 3D Printing Wall Thickness
- Strategic Wall Thickness Design
- Print Time and Material Efficiency
- Testing Methods to Verify 3D Printing Wall Thickness
- Digital Testing with CAD Software
- Physical Test Prints
- Common Mistakes in Wall Thickness Design
- Inconsistent Wall Thickness
- Excessive Wall Thickness
- Insufficient Wall Thickness
- Frequently Asked Questions
- How thin can a 3D printer print?
- What is the minimum wall thickness for 3D printing?
- How thick should the walls be on a 200 mm tall model?
- Is a thicker wall always stronger than more infill?
- Why does my 1 mm wall come out with a gap in the middle?
- Does wall thickness affect water resistance?
- Which QIDI settings control this?
- Design Your 3D Printing Wall Thickness Right!
Recommended products






