

 Q2
Q2
 QIDI Box
 Plus 4
 Q1 Pro
 X-Max 3


11 Tips for Successfully 3D Printing with ABS, ASA, and PC

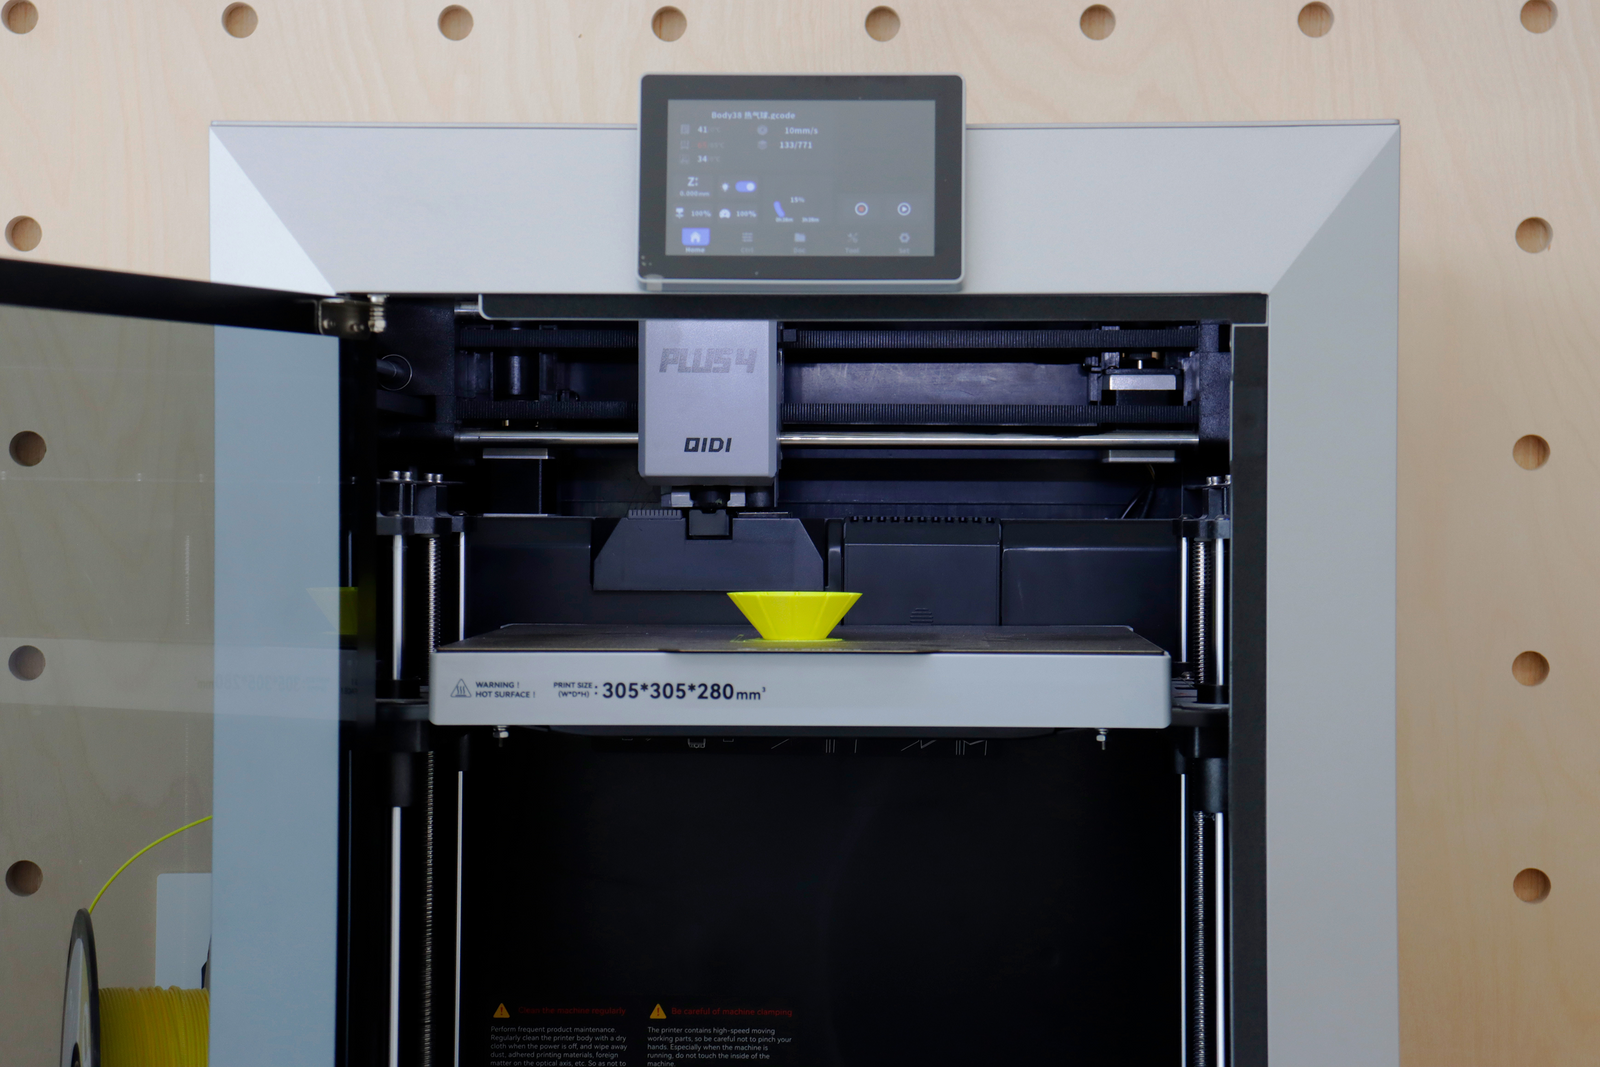
Printing ABS, ASA and PC successfully comes down to three controls: an all-metal hotend, a warm enclosed chamber, and bone-dry filament. ABS and ASA run at a 240–260 °C nozzle on a 100–110 °C bed; polycarbonate needs 270–310 °C and a 110–130 °C bed. Everything else on this list serves those three fundamentals.
What Makes ABS, ASA and PC Different From PLA?
ABS, ASA and PC are amorphous engineering thermoplastics with glass transition temperatures roughly 45–85 °C above PLA's, which is why they survive heat that softens PLA — and why they shrink hard as they cool. The glass transition temperature is the point at which an amorphous polymer changes from a rigid glassy state to a soft rubbery one; it is the practical ceiling for a load-bearing part.
Independent measurements of FFF-printed specimens give a useful baseline for how these three materials actually behave once printed rather than as pellets:
| Material (FFF-printed) | Tensile strength | Young's modulus | Glass transition | Extrusion temp used | Bed temp used |
|---|---|---|---|---|---|
| ASA | 31.7 ± 0.3 MPa | 1423 ± 46.1 MPa | 104 °C | 250 °C | 100 °C |
| PC | 57.1 ± 3.1 MPa | 1549 ± 132.7 MPa | 142.5 °C | 275 °C | 110 °C |
| PC-ABS | 31.43 ± 0.7 MPa | 1230 ± 44.3 MPa | 105.3 °C | 265 °C | 110 °C |
| Nylon 12 (for comparison) | 37 ± 0.2 MPa | 916 ± 16.9 MPa | 34.03 °C | 255 °C | 85 °C |
Those values come from a published characterisation of ASA, Nylon 12, PC and PC-ABS printed by FFF, using 0.254 mm layers at 100% infill with a 45°/−45° raster. Your own numbers will differ with geometry, infill and orientation, but the ranking holds: PC is the strongest and most heat-resistant of the three, and it is also the hardest to print.
Tip #1: Fit a High-Temperature All-Metal Hotend
You need an all-metal hotend because PTFE liners begin to degrade above roughly 240 °C, which is below the working temperature of all three materials. A lot of basic printers still run a PTFE tube into the melt zone. Past that threshold the tube breaks down, releasing fumes and clogging more often — exactly at the temperatures ABS, ASA and especially PC demand.
An all-metal hotend removes the PTFE from the heated zone, so the machine can hold the 270 °C that ABS and ASA want at the top of their range and the 300 °C or more that polycarbonate often needs. QIDI's current printers ship with 370 °C hotends as standard, which covers all three with headroom.
Tip #2: An Enclosure Is Non-Negotiable
ABS, ASA and PC all shrink measurably as they cool, and an enclosure is the most effective way to stop that shrinkage turning into warped corners and split layers. Delamination — layers separating from each other — happens when the previous layer has cooled below the temperature at which the new layer can fuse to it.
The mechanism is thermal gradient, not temperature as such. A simulation study of ambient temperature in extrusion printing found that raising the build environment from 50 °C to 120 °C reduced residual stress in the printed part, because slower, more uniform cooling leaves less locked-in strain. The same study found the warpage response differs between amorphous and semi-crystalline polymers, so an enclosure is not a universal fix — for the amorphous ABS/ASA/PC family, though, it is the single highest-value upgrade. Why a 3D printer enclosure matters covers the reasoning in more detail.

- For ABS/ASA: a simple box, bought or built from acrylic sheet, traps enough heat to prevent most warping and cracking.
- For polycarbonate: PC benefits from an actively heated chamber holding 50–70 °C, especially on larger parts. QIDI's Plus 4 and Max4 run an actively heated chamber up to 65 °C, which sits inside that window.
Tip #3: Select the Right Bed Surface and Keep It Hot
Run 100–110 °C for ABS and ASA and 110–130 °C for polycarbonate, on a PEI or Garolite surface. A hot bed keeps the base of the model above the temperature at which it would shrink and pull free.
- Bed temperatures are typically 100–110 °C for ABS and ASA.
- Polycarbonate usually requires higher, often 110–130 °C.
Surface choice matters as much as temperature. PEI (polyetherimide) sheets are the common default, available smooth or textured, gripping firmly when hot and releasing as they cool. Garolite (G-10) sheets offer excellent adhesion and durability for engineering-grade filaments. Glass with an adhesive works but is less consistent.
Tip #4: Keep Your Filament Bone-Dry
Dry ABS and ASA at around 65 °C and PC at 70–80 °C for at least 4–6 hours before printing. All three absorb moisture from the air; polycarbonate is the worst offender. Wet filament flashes to steam in the hotend, creating bubbles in the extrudate that show up as stringing, a rough surface, and weak, brittle parts.
| Material | Drying temperature | Drying time | Storage |
|---|---|---|---|
| ABS | ~65 °C | 4–6 h | Sealed box with desiccant |
| ASA | ~65 °C | 4–6 h | Sealed box with desiccant |
| PC | 70–80 °C | 4–6 h minimum | Print directly from the dryer |
| PC/ABS-FR | 70–80 °C | 4–6 h | Below 15% RH, sealed with desiccant |
The PC/ABS-FR figures are QIDI's published values for that filament, which also lists 2.10% water absorption — a reminder that a blend inherits polycarbonate's appetite for moisture. For sensitive materials, printing directly from the filament dryer is the reliable answer, since a spool left in open air re-absorbs moisture over a long print. Many high-performance filaments behave the same way.
Tip #5: Tame Warping With Brims and Rafts
Add a 10–20 line brim to any part with sharp corners or a small footprint, and use a raft for long thin parts that lift no matter what. Even inside a warm enclosure on a hot bed, geometry can defeat you.
- Brim: adds concentric lines around the model's base, increasing contact area and holding the edges down. Ten to twenty lines is a good starting point.
- Raft: a thick printed base under the whole model, giving it a stable foundation that absorbs the shrinkage instead of the part doing so.
Tip #6: Use a Temperature Tower to Dial In Settings
Print a temperature tower for every new spool: for ABS and ASA sweep 240–260 °C, and for polycarbonate sweep 270–310 °C. Manufacturers publish recommended ranges, but the optimum shifts between brands and even between colours of the same brand.
A temperature tower prints identical sections at descending temperatures so you can compare layer adhesion, surface quality and stringing side by side. You are looking for the highest temperature that still gives a clean surface, because layer bonding improves with heat while surface quality degrades.
Tip #7: Master the Cooling Fan — Usually by Turning It Off
Set the part cooling fan to 0% for most ABS, ASA and PC prints. Rapid localised cooling creates temperature differences within the part that separate layers and weaken the whole component — the opposite of what the fan does for PLA.
The enclosure from Tip #2 is doing the job the fan would do on PLA: controlling how the part solidifies. The exception is models with large overhangs or very short layer times, where a slow fan (10–25%) can prevent drooping. Treat that as a targeted override in the slicer, not a global setting.
Tip #8: Slow Down for Better Layer Adhesion
Print engineering materials at 30–60 mm/s. At that speed each layer stays molten long enough to fuse properly with the one below, which is what produces strength between layers rather than just within them. Speed is the wrong thing to optimise for a functional part; interlayer bonding is what fails first under load.
Tip #9: Let It Cool Down Slowly
When the print finishes, turn the heaters off but keep the enclosure closed and let the part reach room temperature inside it. Pulling a hot part into cool room air causes thermal shock and warping. Parts usually release from the plate on their own as they contract during a slow cool-down, which also saves you levering at a stuck model.
Tip #10: Handle Fumes Responsibly
ABS and ASA release styrene, a volatile organic compound, during printing, so ventilate or filter the enclosure. Volatile organic compounds are carbon-based chemicals that evaporate readily at room temperature; styrene has a strong odour and can be irritating.
- Best option: duct the enclosure air outside with a fan.
- Good alternative: run an activated carbon and HEPA filter inside the enclosure.
- Minimum: print in a well-ventilated room rather than a closed office or bedroom.
Tip #11: Consider Post-Print Annealing
Annealing ABS at around 105 °C for 4 hours has been measured to raise tensile strength by about 6%, and by nearly 13% for carbon-fiber-filled ABS. Annealing is a heat treatment that holds a part below its melting point and then cools it slowly, relieving the internal stress locked in during printing.
A study of annealed FDM specimens reported pure ABS improving from 24.7 MPa to 26.34 MPa after 4 hours at 105 °C, while 20 wt% recycled-carbon-fiber ABS improved from 29.59 MPa to 33.42 MPa under the same treatment. The same study found 4 hours at 125 °C made pure ABS slightly weaker — evidence that going hotter is not automatically better.
In practice: place the part in a convection oven on a bed of sand to support it, heat to just below the material's glass transition temperature for roughly an hour, then let it cool slowly in the oven. QIDI's own post-print processing notes cover the workflow, and you should always check the annealing temperature for your specific filament brand.

Annealing is not the only post-print step worth planning for with ABS. Vapour smoothing can close layer lines and seal a part in one pass, but it involves a flammable solvent and needs a proper setup — our step-by-step acetone vapour smoothing guide covers ventilation, exposure times and the mistakes that ruin dimensional accuracy.
ABS vs ASA vs PC: Which Should You Use?
Use ABS for indoor functional parts, ASA when the part lives outdoors, and PC when heat resistance or stiffness is the binding requirement. The three share a workflow but not an application.
| ABS | ASA | PC | |
|---|---|---|---|
| Nozzle temperature | 240–260 °C | 240–260 °C | 270–310 °C |
| Bed temperature | 100–110 °C | 100–110 °C | 110–130 °C |
| Chamber | Passive enclosure sufficient | Passive enclosure sufficient | Actively heated, 50–70 °C |
| Drying | 65 °C / 4–6 h | 65 °C / 4–6 h | 70–80 °C / 4–6 h |
| Part cooling fan | 0% (10–25% for overhangs) | 0% (10–25% for overhangs) | 0% |
| UV stability | Poor — yellows and embrittles | Good — the reason ASA exists | Moderate |
| Difficulty | Moderate | Moderate, slightly easier than ABS | Hard |
| Best for | Indoor brackets, enclosures, prototypes | Outdoor mounts, garden and automotive parts | Heat-exposed structural parts, light housings |
For ABS
ABS is usually the first advanced material people try. It is the most forgiving of the three on a PEI sheet and produces the most noticeable odour. For maximum adhesion on glass, some users brush on an "ABS slurry" made by dissolving scrap ABS filament in acetone.
For ASA
ASA (acrylonitrile styrene acrylate) is ABS with the butadiene rubber phase replaced by an acrylic ester elastomer, and that substitution is precisely what gives it UV stability. ASA warps slightly less than ABS and resists yellowing and embrittlement in sunlight, which makes it the default for any functional part that lives outdoors.
For PC
Polycarbonate is a different tier of difficulty and is not a beginner material. The single most important rule is to keep it dry — never skip the drying step. Print it in the hottest, most stable environment you can create; an actively heated chamber is close to mandatory for anything large. If a PEI sheet is not holding the first layer, a PC-specific bed adhesive is usually necessary.
Two decisions come up often enough to deserve their own walkthroughs. If the part will sit in direct sun, see ASA vs PETG for direct sunlight exposure, which compares UV stability and colour retention over a full season. If it has to survive heat from an appliance instead, PC vs ASA for high-heat appliance mounts works through the heat-deflection numbers that matter for brackets near ovens, dryers and motors.
FAQs About Printing ABS, ASA and PC
What temperature do you print ABS at?
ABS prints at a 240–260 °C nozzle temperature with a 100–110 °C bed. Run a temperature tower across that range for each new spool and pick the highest setting that still gives a clean surface, since layer bonding improves with heat.
Can you print ABS without an enclosure?
Small parts sometimes survive, but anything with a large footprint or sharp corners will warp or delaminate on an open frame. An enclosure traps bed heat and slows cooling, which is what prevents the internal stress that pulls corners off the plate.
Why does my ABS print keep cracking between layers?
Layer cracking is almost always uneven cooling. Close the enclosure, turn the part cooling fan to 0%, raise the nozzle temperature toward the top of the range, slow the print to 30–60 mm/s, and check the printer is not sitting in a draught.
Is ASA better than ABS?
ASA is better for outdoor parts because its acrylic ester rubber phase resists UV degradation, where ABS yellows and becomes brittle in sunlight. ASA also warps slightly less. For indoor parts the two are close enough that ABS's lower cost usually wins.
Do you have to dry PC filament?
Yes, without exception. Polycarbonate absorbs moisture faster than ABS or ASA, and wet PC prints as a weak, bubbled, stringy part. Dry at 70–80 °C for at least 4–6 hours and print directly from the dryer where possible.
What bed temperature does polycarbonate need?
Polycarbonate typically needs 110–130 °C, higher than the 100–110 °C used for ABS and ASA. Pair that with a PEI or Garolite surface, and add a PC-specific adhesive if the first layer still lifts.
Does annealing actually make ABS stronger?
Modestly, and only within a narrow temperature window. Published FDM testing measured about a 6% tensile gain for pure ABS after 4 hours at 105 °C, rising to roughly 13% for a 20 wt% carbon-fiber ABS, while the same 4-hour treatment at 125 °C slightly reduced strength. Anneal just below the glass transition temperature, not above it.
Print Advanced Filaments Successfully
ABS, ASA and polycarbonate ask for more setup than PLA, and the results justify it. The equipment list is short — an all-metal hotend, an enclosure, a bed that holds 100–130 °C, and a filament dryer — and the settings are well established: 240–260 °C for ABS and ASA, 270–310 °C for PC, fan off, 30–60 mm/s, slow cool-down. Get those right and you move from printing objects to printing parts that survive heat, sunlight and mechanical stress in the real world.
- What Makes ABS, ASA and PC Different From PLA?
- Tip #1: Fit a High-Temperature All-Metal Hotend
- Tip #2: An Enclosure Is Non-Negotiable
- Tip #3: Select the Right Bed Surface and Keep It Hot
- Tip #4: Keep Your Filament Bone-Dry
- Tip #5: Tame Warping With Brims and Rafts
- Tip #6: Use a Temperature Tower to Dial In Settings
- Tip #7: Master the Cooling Fan — Usually by Turning It Off
- Tip #8: Slow Down for Better Layer Adhesion
- Tip #9: Let It Cool Down Slowly
- Tip #10: Handle Fumes Responsibly
- Tip #11: Consider Post-Print Annealing
- ABS vs ASA vs PC: Which Should You Use?
- For ABS
- For ASA
- For PC
- FAQs About Printing ABS, ASA and PC
- What temperature do you print ABS at?
- Can you print ABS without an enclosure?
- Why does my ABS print keep cracking between layers?
- Is ASA better than ABS?
- Do you have to dry PC filament?
- What bed temperature does polycarbonate need?
- Does annealing actually make ABS stronger?
- Print Advanced Filaments Successfully
Recommended products






