 Q2
Q2


Как исправить 3D -печать первого слоя для идеального начала

Первый слой — это основа любой успешной 3D-печати. Если эта критически важная основа не будет заложена правильно, весь проект может развалиться. Как опытный энтузиаст 3D-печати, вы знаете, насколько важно правильно нанести первый слой для достижения стабильности, адгезии и качества печати. Это подробное руководство познакомит вас с наиболее распространёнными проблемами с первым слоем и предложит простые решения для их устранения. Сталкиваетесь ли вы с проблемами адгезии, деформацией или некрасивыми дефектами поверхности, вы научитесь готовить платформу для печати и оптимизировать настройки для идеального начала работы каждый раз.
Как подготовить печатную платформу для успеха
Прежде чем решать проблемы с первым слоем, крайне важно убедиться в правильной подготовке платформы. Это закладывает основу для успешной печати с самого начала.
1. Выровняйте платформу для печати
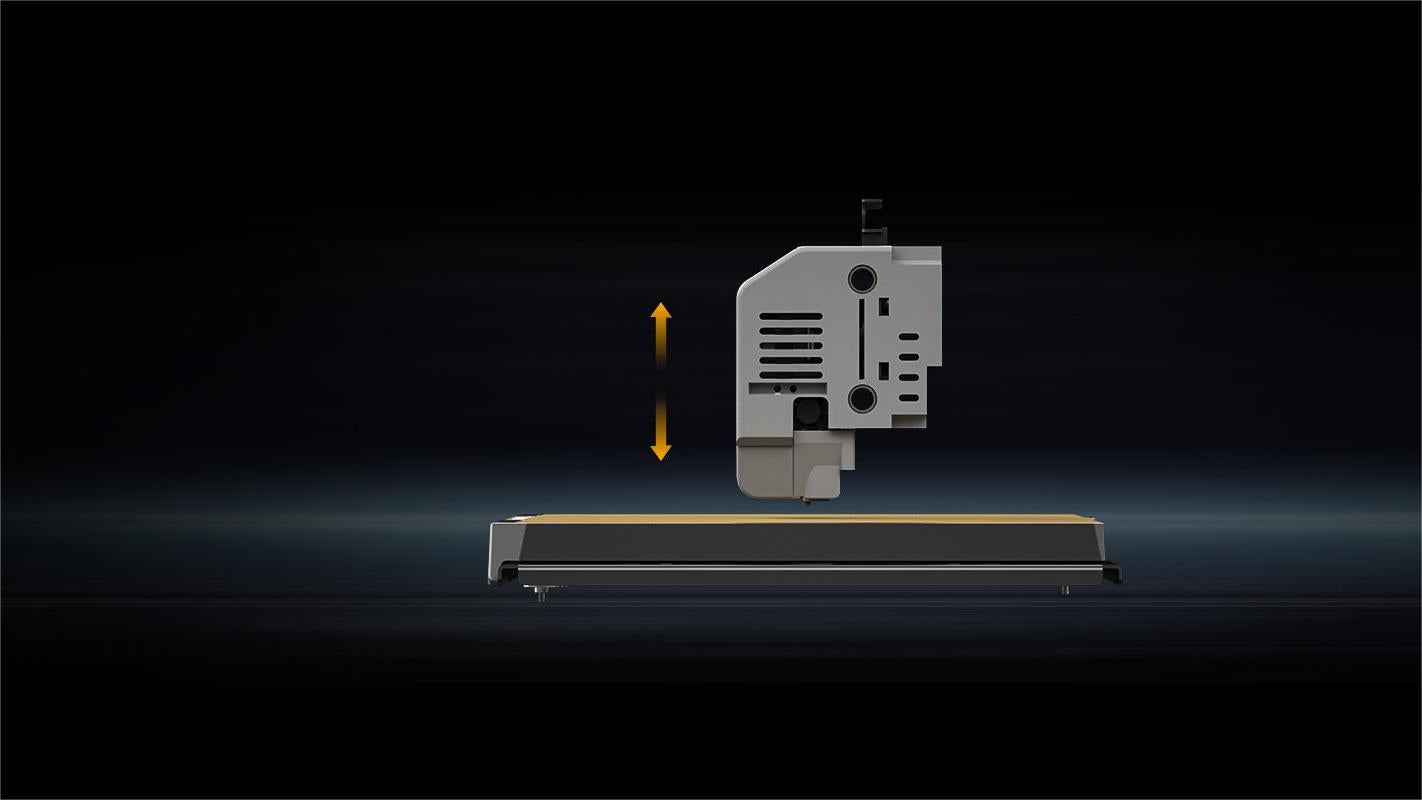
Идеально ровная платформа для печати крайне важна для хорошей адгезии первого слоя. Неровная платформа может привести к проблемам со стабильностью и адгезией по всей длине печати. К счастью, существуют простые способы выровнять кровать.
Автоматическое выравнивание, доступное на многих современные 3D-принтеры, использует датчики для обнаружения и компенсации неровностей. При ручной настройке можно добиться того же результата, аккуратно отрегулировав выравнивающие винты.
2. Очистите печатную платформу.
Чистота печатной платформы также влияет на адгезию первого слоя. Любая грязь, масло или мусор могут помешать правильному приклеиванию отпечатка, что приводит к его отслоению и появлению дефектов. Тщательная очистка платформы печати изопропиловым спиртом или специальным средством для очистки платформы перед каждой печатью крайне важна.

Пять распространенных проблем первого слоя при 3D-печати
Первый слой 3D-печати — это критически важный фундамент, закладывающий основу успеха всего проекта. К сожалению, этот начальный этап также подвержен множеству неприятных проблем, которые могут сорвать печать, если не решить проблему должным образом.
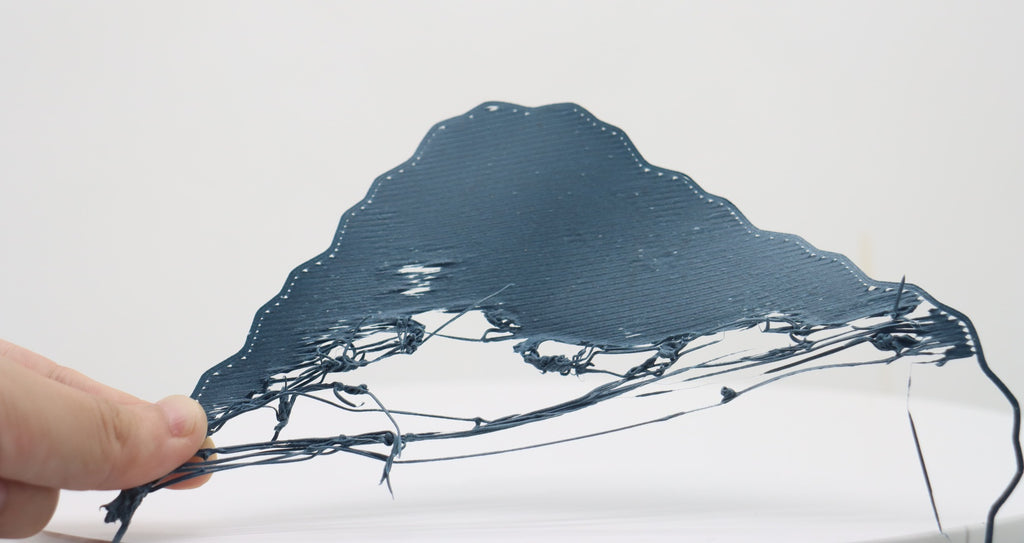
1. Грубый первый слой
Почему это происходит:
Неправильное расстояние между соплами, неправильный поток экструзии, высокая скорость печати, неровный печатный стол и неправильные настройки температуры — все это может привести к грубому, неровному первому слою.
Как это исправить:
Отрегулируйте расстояние между соплом и платформой, чтобы добиться оптимального зазора. Уменьшите скорость печати первого слоя, чтобы обеспечить надлежащее прилегание пластика. Тщательно выровняйте платформу, используя автоматический или ручной метод выравнивания. Установите подходящую температуру платформы и сопла для вашего типа пластика. Очистите сопло и платформу, чтобы удалить остатки материала и загрязнения.
2. Первый слой ряби
Почему это происходит:
Раннее включение охлаждающего вентилятора, неровная платформа для печати или слишком близкое расположение сопел, а также чрезмерное выдавливание нити могут привести к появлению волн на первом слое.
Как это исправить:
Не допускайте воздействия потоков воздуха на первый слой, которые могут вызвать преждевременное охлаждение. Уменьшите скорость печати первого слоя, чтобы пластик равномерно распределился. Отрегулируйте настройки платформы и сопла, чтобы обеспечить равномерное нанесение первого слоя.
3. Слоновья нога
Почему это происходит:
Чрезмерная экструзия нити и высокая температура стола могут привести к ужасным последствиям. эффект «слоновьей ноги», где первый слой распространяется наружу и создает выпуклость у основания отпечатка.
Как это исправить:
Снизьте температуру печатной платформы, чтобы предотвратить чрезмерное расширение первого слоя. Отрегулируйте скорость экструзии до оптимального значения для вашего филамента.Между слоями необходимо выдерживать достаточное время охлаждения, чтобы предотвратить растекание первого слоя.
4. Деформация
Почему это происходит:
Усадка нити, неравномерная температура платформы, высокая скорость печати и раннее включение вентилятора охлаждения могут способствовать загибанию краев первого слоя вверх, что приводит к деформация.
Как это исправить:
Используйте подогреваемую платформу для печати для поддержания постоянной температуры по всей поверхности. Оптимизируйте настройки температуры и скорости печати Чтобы минимизировать термическую нагрузку на первый слой, нанесите на рабочую пластину клей или другие средства, чтобы закрепить первый слой и предотвратить скручивание.
5. Печать не прилипает к платформе
Почему это происходит:
Грязная платформа, неправильные настройки температуры и высокая скорость печати могут помешать надлежащему прилеганию первого слоя к печатной платформе.
Как это исправить:
Тщательно очистить рабочую пластину Используя изопропиловый спирт или специальное чистящее средство для платформы. Используйте подходящие клеи, например, лак для волос, клей-карандаш или специальные покрытия для платформы, для улучшения адгезии первого слоя. Отрегулируйте температуру платформы и сопла, а также скорость печати первого слоя, чтобы обеспечить оптимальное сцепление пластика с рабочей платформой.
Сопутствующее руководство: Почему моя 3D-печать не прилипает к платформе?
Как оптимизировать 3D-принтер для получения идеального первого слоя
Для успешной 3D-печати решающее значение имеет получение идеального первого слоя. тонкая настройка параметров принтера а учитывая особые свойства вашей нити, вы можете обеспечить надежную основу для ваших отпечатков.

1. Идеальные настройки первого слоя
Для начала слегка увеличьте температуру печати и платформы для улучшения адгезии. Увеличение ширины линии первого слоя также может обеспечить большую площадь поверхности для сцепления нити. Чтобы компенсировать неровности выравнивания, поэкспериментируйте с чуть большей толщиной первого слоя. Кроме того, снижение начальной скорости печати способствует более равномерному распределению нити и её лучшему сцеплению.
Помимо этих основных параметров, использование вспомогательных элементов первого слоя, таких как плоты, юбки и борта, может дополнительно улучшить адгезию и устойчивость. Эти элементы действуют как каркас, обеспечивая дополнительные точки крепления для критически важного первого слоя.
2. Освойте методы, специфичные для конкретного материала
Тип нити накаливания Используемый вами материал может существенно повлиять на качество первого слоя. Некоторые материалы, такие как TPE и PETG, склонны к чрезмерной адгезии, что приводит к таким проблемам, как эффект «слоновьей ноги». В таких случаях применение разделительных составов, таких как лак для волос, малярный скотч или клей-карандаш, может помочь аккуратно отделить первый слой.
Напротив, для других филаментов, таких как ABS и ASA, могут потребоваться дополнительные меры для обеспечения достаточной адгезии. Нанесение клея на рабочую платформу или использование подогреваемого стола может существенно улучшить надёжность фиксации сложных первых слоёв. Важно отметить, что качество и возраст филамента также могут влиять на качество печати. Чтобы узнать больше о сроке службы и хранении филамента, ознакомьтесь с нашим руководством. Как долго служит нить для 3D-принтера?.
Освойте первый слой, выведите свои 3D-печати на новый уровень
Благодаря идеям и методам, изложенным в этом подробном руководстве, вы теперь обладаете знаниями, необходимыми для решения распространенных проблем, которые могут возникнуть при обработке первого важного слоя ваших 3D-печатных изделий.Тщательно подготовив печатную платформу, точно настроив параметры и адаптировав подход к уникальным свойствам выбранных филаментов, вы сможете создать надёжную основу для успешных и высококачественных отпечатков. Используйте этот опыт и овладейте искусством безупречного запуска 3D-печати. Начните применять эти стратегии на практике уже сегодня, чтобы повысить своё мастерство в 3D-печати.
Часто задаваемые вопросы о Проблемы первого слоя 3D-печати
1. Почему мой первый слой не работает?
Существует несколько распространённых причин, по которым первый слой 3D-печати может не схватиться должным образом. Одна из наиболее распространённых проблем — неправильное расстояние между соплом и платформой. Если зазор между соплом и платформой неоптимален, это может помешать хорошей адгезии. Неровная платформа также может привести к неравномерному прилипанию первого слоя к поверхности. Кроме того, неправильные настройки температуры, как платформы, так и сопла, могут не соответствовать типу используемой нити, что приводит к проблемам с адгезией. Наконец, загрязненная платформа, содержащая мусор, масла и другие загрязнения, может помешать правильному приклеиванию первого слоя к рабочей платформе. Слишком быстрая печать первого слоя также может помешать нити схватиться должным образом.
2. Как устранить зазор в первом слое?
Если вы заметили зазор или расслоение в первом слое, скорее всего, причиной является неровный печатный стол. Чтобы исправить это, начните с функции автоматического выравнивания вашего 3D-принтера, если она доступна. Она позволяет обнаружить и компенсировать любые неровности рабочей платформы. Если ваш принтер не поддерживает функцию автоматического выравнивания, вам потребуется вручную отрегулировать выравнивающие винты, опуская область с зазором, пока первый слой не ляжет ровно. Вы также можете попробовать немного увеличить высоту первого слоя, чтобы компенсировать небольшие неровности выравнивания. Наконец, убедитесь, что расстояние между соплом и столом установлено правильно, с оптимальным зазором.
3. Почему мой 3D-принтер не выдавливает первый слой?
Существует несколько возможных причин, по которым ваш 3D-принтер может некорректно выдавливать первый слой. Одна из распространённых проблем — засоренное или заблокированное сопло, что может препятствовать свободной подаче филамента. Неправильные настройки экструзии, такие как неправильный множитель экструзии или скорость потока, также могут вызвать проблемы с нанесением первого слоя. Чрезмерное втягивание иногда может привести к тому, что филамент не будет правильно выдавливаться в начале печати. Наконец, если первый слой неплотно прилегает к рабочей платформе, экструдер может не справиться с эффективной укладкой материала.
4. Почему первый слой моей 3D-печати скручивается?
Деформация, при которой края первого слоя загибаются вверх, обычно возникает по нескольким причинам. Усадка пластика, особенно при использовании таких материалов, как АБС, может привести к скручиванию при охлаждении и сжатии пластика. Неравномерная температура платформы также может способствовать возникновению этой проблемы, поскольку края платформы могут нагреваться неравномерно. Печать первого слоя на высокой скорости может привести к термическим напряжениям, вызывающим деформацию, как и преждевременное охлаждение потоками воздуха или преждевременное включение вентилятора охлаждения. Для решения этой проблемы используйте подогреваемую платформу, оптимизируйте настройки температуры и скорости, а также рассмотрите возможность нанесения клея на платформу.
5. Почему мой первый слой 3D-печати такой грубый?
Грубый, неровный первый слой может быть результатом ряда различных проблем. Неправильное расстояние между соплом и печатной платформой, при котором зазор между соплом и печатной площадкой неоптимален, может препятствовать равномерной укладке нити. Неправильная подача материала, при которой материал выдавливается неравномерно, также может способствовать образованию шероховатой поверхности.Печать первого слоя на высокой скорости может не дать филаменту достаточно времени для равномерного распределения и склеивания. Неровная платформа также приведёт к неравномерному наложению первого слоя. Кроме того, проблемы с температурой, будь то слишком высокая или слишком низкая для конкретного филамента, могут повлиять на качество первого слоя. Регулировка высоты сопла, снижение скорости печати первого слоя, выравнивание платформы и точная настройка температуры — всё это поможет сгладить неровный первый слой.
Читать далее
- Как подготовить печатную платформу для успеха
- 1. Выровняйте платформу для печати
- 2. Очистите печатную платформу.
- Пять распространенных проблем первого слоя при 3D-печати
- 1. Грубый первый слой
- 2. Первый слой ряби
- 3. Слоновья нога
- 4. Деформация
- 5. Печать не прилипает к платформе
- Как оптимизировать 3D-принтер для получения идеального первого слоя
- 1. Идеальные настройки первого слоя
- 2. Освойте методы, специфичные для конкретного материала
- Освойте первый слой, выведите свои 3D-печати на новый уровень
- Часто задаваемые вопросы о Проблемы первого слоя 3D-печати
- 1. Почему мой первый слой не работает?
- 2. Как устранить зазор в первом слое?
- 3. Почему мой 3D-принтер не выдавливает первый слой?
- 4. Почему первый слой моей 3D-печати скручивается?
- 5. Почему мой первый слой 3D-печати такой грубый?
- Читать далее
Рекомендуемые продукты


