 Q2
Q2
 QIDI Box
 Plus 4
 Q1 Pro
 X-Max 3


Fix Inconsistent Extrusion in 3D Printing in Minutes

Gaps on the top layer, wavy walls, and sudden rough patches can turn a long job into scrap. Most of these failures come from the same few causes. With a short, repeatable path, you can diagnose the issue, apply the right fix, and lock in stable 3D printing settings. Follow the steps below to bring your 3D printer back to clean, even lines.

What Does Inconsistent Extrusion Look Like in 3D Printing?
Inconsistent extrusion shows up in a small set of patterns. Match what you see on the part to the first action for your 3D printer.
- Top layers show pinholes or see-through streaks.
- External walls shift in thickness and look wavy.
- Corners bulge on entry or look thin on exit.
- Infill leaves random gaps after a few layers.
- The extruder clicks during fast moves.
Common 3D Printing Problems and First Fixes
| Symptom on part | Likely cause | First action | Pass or adjust threshold |
| Top layer has gaps | Flow too low or temperature too low | Raise extrusion multiplier 1–2 percent or raise nozzle temperature 5–10 °C | Top surface closes with no ridges |
| Corners look swollen | Pressure not compensated in motion | Tune pressure advance with a speed-ramp line | Corners equal width to straight lines |
| Walls vary in thickness | Flow off or partial blockage | Recalibrate flow, inspect nozzle and path | Wall thickness within ±0.05–0.10 mm of target |
| Sparse infill | Feeder drag or wet filament | Check tension and path, dry filament | Even infill with no random voids |
| Clicking at speed | Volumetric flow demand too high | Lower speed or layer height, confirm hotend capacity | No clicking during a steady wall |
How to Spot 3D Printing Extrusion Problems in Five Minutes
Run these four checks in order. Each gives a clear pass signal before you move on. This sequence fits a busy shop and home lab.
1. Flow Check With a Simple Square
Slice a 100 mm square, two or three top layers, at your normal 3D printing speed. If the top shows gaps, raise the extrusion multiplier by 1 percent and reprint. Pass when the top closes and looks smooth.
2. Pressure Advance Line
Print a single-wall line that ramps speed. Increase pressure advance in small steps until corners match straight sections. Stop at the first setting that removes bulges without thinning.
3. Manual Extrusion and Path Inspection
Heat to printing temperature. Command 100 mm of filament. Measure intake at the feeder. If the measured intake differs by over 5 percent, correct the steps or flow before any other tuning. Clean the drive gear, square the PTFE tube ends, and remove kinks.
4. Volumetric Flow Reality Check
Estimate demand with line width × layer height × speed. If the 3D printer starves at your target rate, reduce speed or layer height and retest. Keep a margin for long, continuous paths.
Key Slicer Settings to Fix Extrusion Problems First
Set parameters in this order so each change builds on a stable base. Test on a small square, then apply to the full model.
- Extrusion Multiplier or Flow: Move in 1–2 percent steps. A smooth, closed top surface confirms the baseline for your 3D printer.
- Pressure Advance or Similar Feature: Use the line test. Corners should look the same as straight walls. This control evens pressure during direction changes and reduces blobs.
- Nozzle Temperature: Adjust 5–10 °C at a time. Higher temperature improves flow at speed, and lower temperature reduces stringing. Recheck the top square after each change.
- Retraction, Coasting, Wipe, and Combing: Keep these modest until flow and pressure are stable. Add only what is needed to prevent scars in travel.
- Cooling Strategy: Balance part cooling with layer time. Excess airflow on thick perimeters can make beads look starved. Thin features may need more fan to hold sharp detail.
Which 3D Printer Hardware Checks Prevent Random Flow Swings?
A clean path matters as much as clean settings. Give your 3D printer a quick mechanical audit with objective thresholds.
- Nozzle Health: Replace a worn or scarred nozzle. Perform a cold pull when you see residue. Pass when extrusion starts smoothly and the tip is clean.
- Extruder Drive and Tension: The gear should leave a clear bite mark without grinding dust. If dust appears, reduce tension and clean the teeth. If marks are faint, add tension.
- Filament Path and Connectors: Trim PTFE tube ends square and seat fittings fully to avoid internal steps. Keep a large bend radius, 50 mm or more, to reduce drag.
- Hotend Stability: During steady extrusion, keep the nozzle reading within ±2 °C. Wider swings point to weak heat break cooling or a tired heater.
- Chamber and Airflow: An enclosed build space keeps conditions stable across layers. Confirm that ducts are clear and that part cooling hits the target area, not the heat block.

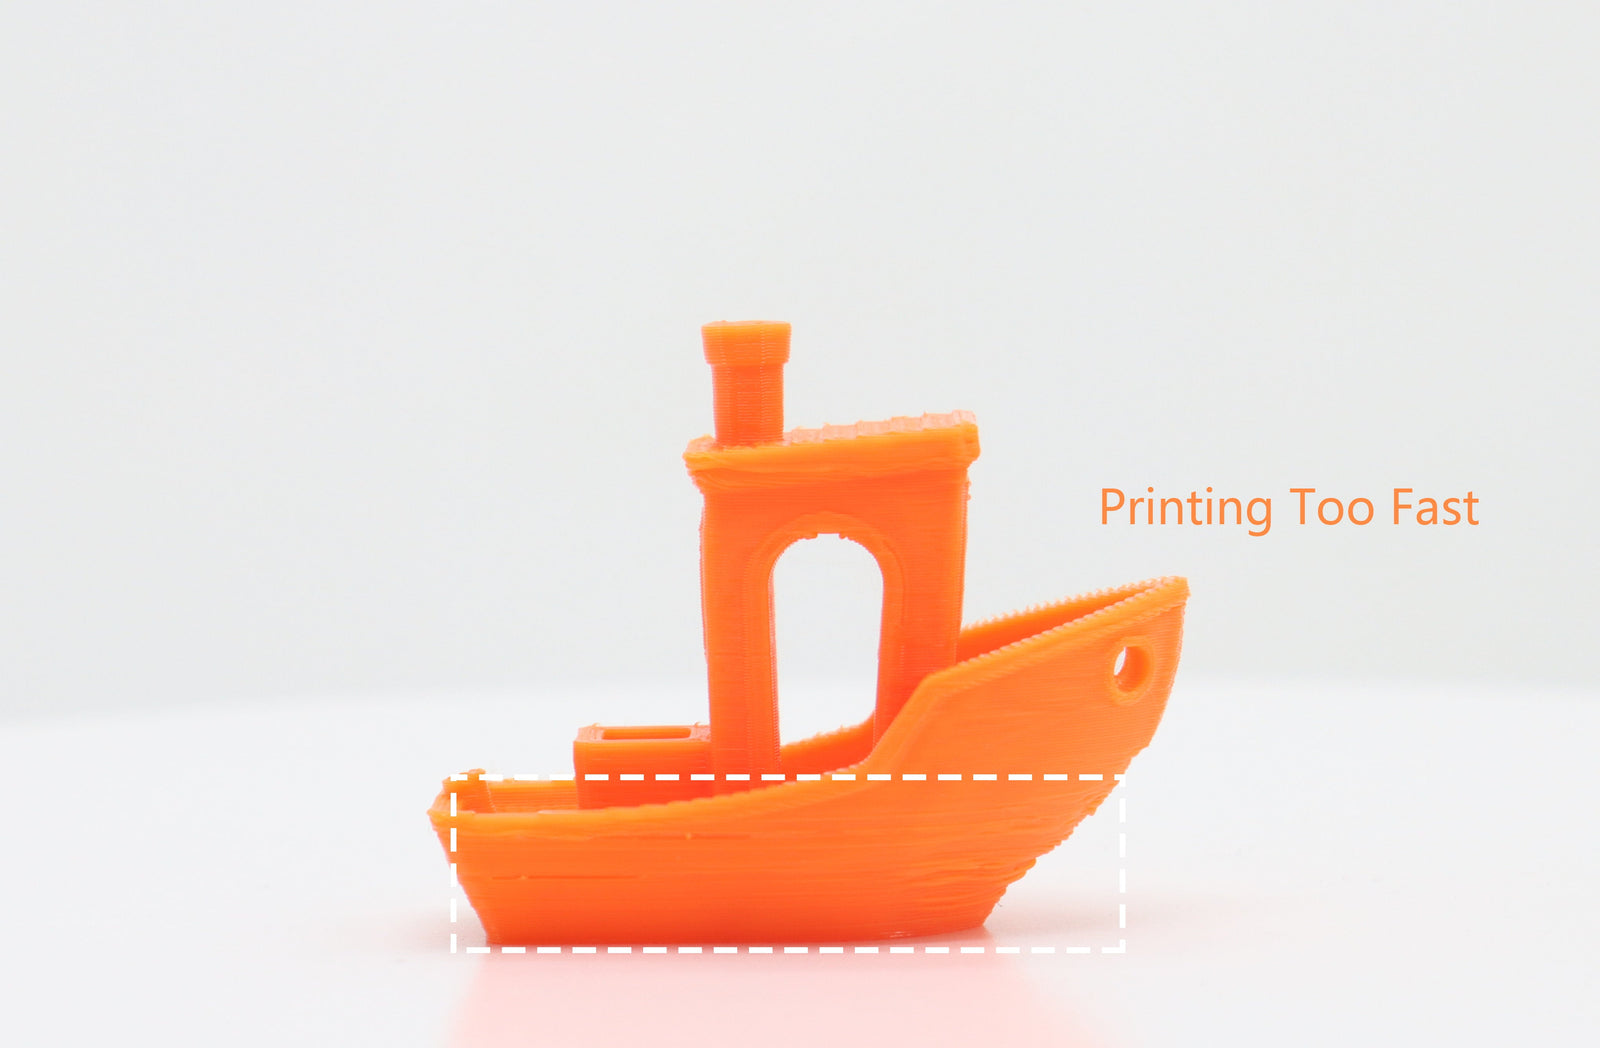
How Fast Can Your 3D Printer Go Before The Hotend Starves?
Tie the 3D printing speed to a number you can verify. Use volumetric flow to set a safe ceiling.
Volumetric flow demand: Flow (mm³/s) = line width (mm) × layer height (mm) × speed (mm/s)
Example:
- Line width 0.45 mm, layer height 0.20 mm, speed 120 mm/s.
- Flow = 0.45 × 0.20 × 120 = 10.8 mm³/s.
If the test wall looks clean and the extruder stays quiet, increase speed in small steps and watch for artifacts. After you find a clean limit, step back by 15–25 percent for real jobs. Long infill runs and dense perimeters sustain heat load and need a margin.
Handy Speed Reference For Everyday 3D Printing
| Line width | Layer height | Target flow (mm³/s) | Suggested speed (mm/s) |
| 0.42 | 0.16 | 8.0 | 119 |
| 0.45 | 0.20 | 10.0 | 111 |
| 0.48 | 0.24 | 12.0 | 104 |
Use the table as a starting point. Adjust one variable at a time and confirm results on a small cube before moving to a large model.
How to Maintain Filament for Consistent 3D Printing
Material condition strongly affects stability in 3D printing. Small habits prevent big swings.
- Dry Hygroscopic Grades: Nylon, PETG, PC, and flexible types take on moisture. Store with fresh desiccant. Dry when you hear pops or see micro bubbles.
- Clean Filament Before Changes: Wipe dust from filament feeds. Debris collects in the nozzle during long prints.
- Keep Records By Material: Log nozzle size, layer height, line width, speed, flow, pressure advance, and fan. Reuse the set next time and only change one item.
- Light Maintenance On A Schedule: Every few spools, clean the drive gear, check connectors, and confirm temperature readings. Frequent small checks prevent long outages.
Quick-Start Templates for 3D Printer Users
Use these two templates to keep 3D printing repeatable. Copy them into your notes app or shop wiki.
Parameter Log Template
| Material | Nozzle | Layer height | Line width | Speed | Flow | Pressure advance | Fan | Result notes |
| PLA | 0.4 mm | 0.20 | 0.45 | 110 | 1.00 | 0.04 | 40% | Clean top, even corners |
| PETG | 0.4 mm | 0.20 | 0.45 | 70 | 0.98 | 0.06 | 30% | Smooth walls, low stringing |
Troubleshooting Checklist
| Symptom | Action | Retest item | Expected result |
| Thin top skin | Flow +1% or temperature +5 °C | 100 mm square | Closed top with fine sheen |
| Corner blobs | Increase pressure advance | Speed-ramp line | Corners match straight lines |
| Clicking on fast walls | Reduce speed or layer height | Long perimeter | Quiet feed and even bead |
| Random pits in infill | Dry filament and check path | 3-layer infill sample | Infill bonds evenly |
Keeping Your 3D Prints Smooth and Reliable
Gaps on top layers, wavy walls, and rough patches usually come from a few common causes. Following a clear, step-by-step approach—checking slicer settings, hardware, material condition, and speed—helps your 3D printer produce smooth, even layers. Logging proven settings and reviewing key checkpoints ensures long prints finish reliably and look exactly as intended. Keep this routine, and consistent, high-quality 3D prints become the new standard.
- What Does Inconsistent Extrusion Look Like in 3D Printing?
- Common 3D Printing Problems and First Fixes
- How to Spot 3D Printing Extrusion Problems in Five Minutes
- 1. Flow Check With a Simple Square
- 2. Pressure Advance Line
- 3. Manual Extrusion and Path Inspection
- 4. Volumetric Flow Reality Check
- Key Slicer Settings to Fix Extrusion Problems First
- Which 3D Printer Hardware Checks Prevent Random Flow Swings?
- How Fast Can Your 3D Printer Go Before The Hotend Starves?
- Handy Speed Reference For Everyday 3D Printing
- How to Maintain Filament for Consistent 3D Printing
- Quick-Start Templates for 3D Printer Users
- Parameter Log Template
- Troubleshooting Checklist
- Keeping Your 3D Prints Smooth and Reliable
Recommended products


