 Q2
Q2


Слишком очевиден картинка слоя? Узнайте, чтобы легко справиться с этим

Из-за особенности послойного наложения, присущей технологии FDM, сложно избежать появления слоев на поверхности модели, однако «ступенчатые» слои, которые легко образуются на изогнутой поверхности, часто влияют на внешний вид модели.
Как добиться относительно гладкой поверхности печати модели? Помимо полировки и шлифовки как методов постпечатной обработки, в программе для нарезки можно также задать такие параметры, как высота слоя, порядок расположения стенок и скорость печати. В этом руководстве подробно объясняется, как задать высоту слоя.
Принципиальная схема
Первоначальная модель:

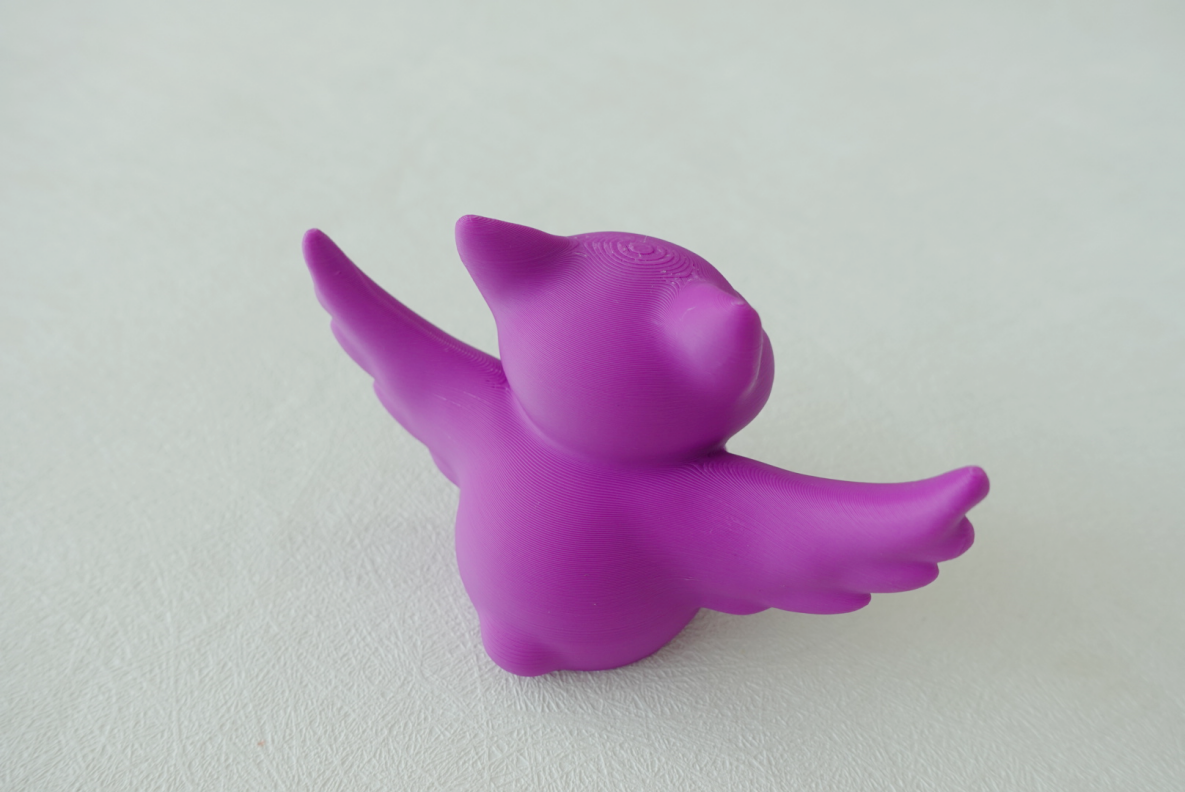
Скорректированная модель:

Если вы хотите добиться подобного эффекта, вы можете попробовать следующие методы.
Введение — Регулировка высоты слоя
Щелкните по срезу, и вы увидите, что текстура в верхней части модели по умолчанию более тяжелая.

В столбце «Процесс» можно выбрать различную высоту слоёв для печати. Число перед каждым параметром обозначает значение высоты слоя. Теоретически, чем меньше высота слоя, тем меньше зазор между слоями. В данном случае измените «0,20 мм (стандартная)» на «0,12 мм (тонкая)».


Повторное нарезание позволяет заметить, что общая текстура модели, особенно в верхней части, ослабла. В этом случае отпечатанная поверхность модели будет более гладкой. Однако после уменьшения высоты слоя время печати той же модели значительно увеличивается.


Как улучшить качество печати, сохранив при этом эффективность? Попробуйте использовать функцию «Изменяемая высота слоя».
Введение — переменная высота слоя
Щелкните по модели и найдите на панели инструментов опцию «Изменяемая высота пола».

Последовательно нажимайте «Адаптивный» и «Сглаживание». Вы можете нажимать «Сглаживание» несколько раз для отладки, делая переход между слоями более плавным. На рисунке ниже зелёная часть модели соответствует нижнему слою, а оранжевая — верхнему.

Помимо автоматической отладки, можно вручную задать положение, в котором необходимо изменить высоту слоя. В поле предварительного просмотра справа перетащите мышь, чтобы изменить высоту пола в различных положениях. Щелкните левой кнопкой мыши, чтобы уменьшить высоту слоя, и модель отобразится зелёным цветом; Щелкните правой кнопкой мыши, чтобы увеличить высоту слоя, и модель отобразится оранжевым цветом.

Кликните на фрагмент, и вы увидите, что текстура в верхней части модели значительно улучшилась по сравнению с тем, что было до модификации, при этом время печати увеличилось лишь незначительно.


Заключение
Регулируя высоту слоя печати в


