 Q2
Q2


Warum bleibt mein 3D -Druck nicht im Bett?


Viele 3D-Druck-Enthusiasten stehen vor einem frustrierenden Problem: Drucke, die nicht richtig auf der Bauplatte haften. In diesem Fall können sich die Drucke verziehen, aufrollen oder sich sogar mitten im Druckvorgang vollständig von der Platte lösen. Dies führt zu Fehldrucken, Materialverschwendung und viel Frust. In diesem Leitfaden untersuchen wir die Hauptgründe, warum Drucke nicht auf der Bauplatte haften, und bieten einfache, praktische Lösungen. Mit diesen Tipps stellen Sie sicher, dass Ihre 3D-Drucke von der ersten Schicht bis zum endgültigen, erfolgreichen Ergebnis fest auf der Bauplatte haften.
Warum eine gute Betthaftung beim 3D-Druck wichtig ist
Eine gute Betthaftung bedeutet, dass das Filamentmaterial fest an der Bauplatte haftet, insbesondere während der ersten Druckschichten. Diese ersten Schichten bilden eine wichtige Grundlage für das gesamte 3D-gedruckte Objekt. Eine schlechte Haftung kann schnell zu Problemen führen wie Verziehen (wo sich die Ränder des Drucks abheben), Schichttrennung (wo die Schichten nicht richtig zusammenkleben) und sogar komplette Druckfehler.
Stellen Sie sich den Bau eines Hauses vor: Wenn das Fundament nicht eben und sicher ist, wird die gesamte Struktur Probleme bereiten, egal wie gut Sie Wände und Dach bauen. Beim 3D-Druck ist es genauso. Die ersten Schichten eines Drucks müssen fest an der Baufläche haften. Ist dies nicht der Fall, treten im weiteren Druckverlauf unweigerlich Probleme und Unvollkommenheiten auf.
Häufige Ursachen für schlechte Betthaftung beim 3D-Druck
Falsche Betttemperatur
Die Temperatur spielt eine entscheidende Rolle für die Betthaftung. Wenn das Druckbett zu heiß oder zu kalt ist, kann es zu Problemen mit dem Filamentkleben kommen. Jedes Material hat seinen eigenen optimalen Temperaturbereich für die Betthaftung.
Zum Beispiel, PLA (Polymilchsäure) haftet typischerweise am besten zwischen 50°C und 60°C, während ABS (Acrylnitril-Butadien-Styrol) Für eine optimale Haftung ist möglicherweise eine Betttemperatur von etwa 100 °C bis 110 °C erforderlich. Beachten Sie die Empfehlungen Ihres Filamentherstellers oder experimentieren Sie, um die optimale Temperatur für Ihr spezielles Material zu finden.
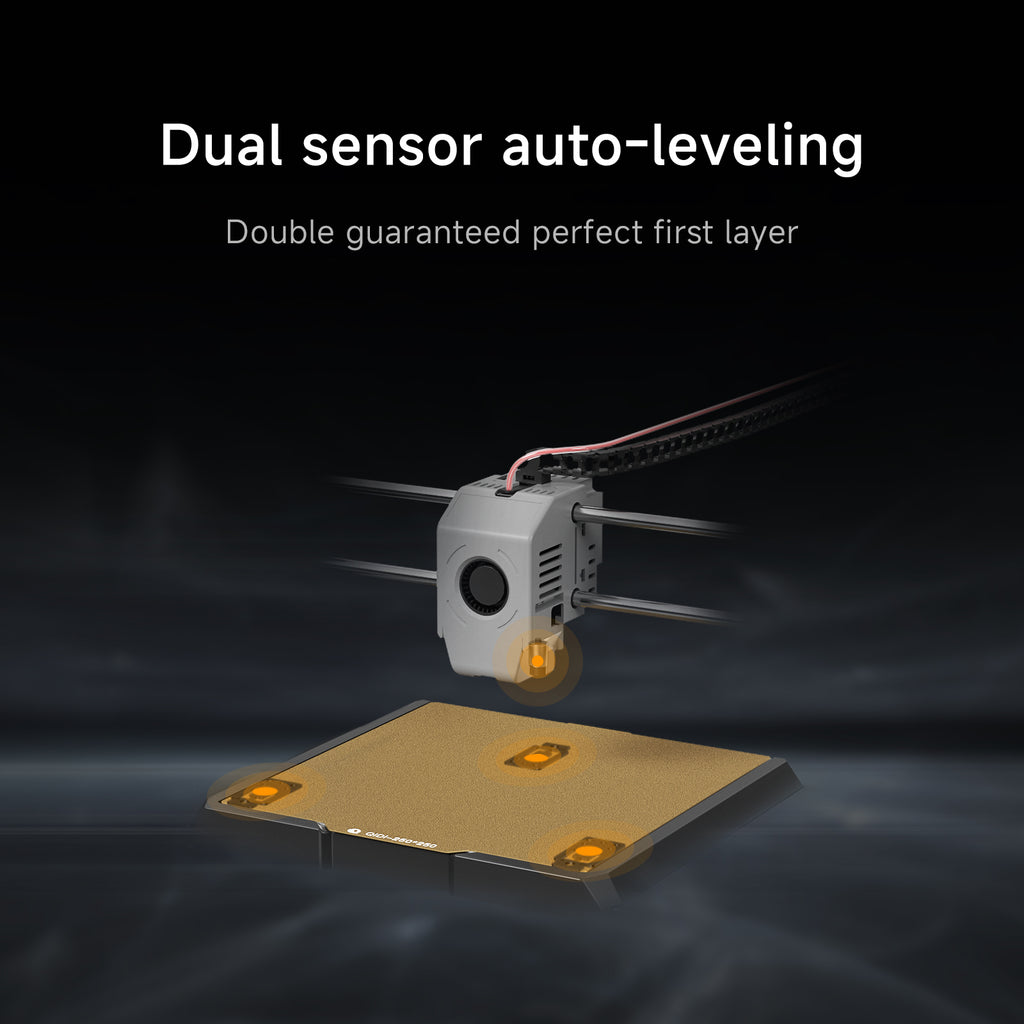
Ungleichmäßige Bettnivellierung
Ein unebenes Druckbett kann die Betthaftung erheblich beeinträchtigen. Wenn sich die Düse in einigen Bereichen zu nahe am Bett und in anderen zu weit entfernt befindet, haftet das Filament nicht gleichmäßig, was zu Verformungen und möglichen Druckfehlern führen kann.
Um eine korrekte Nivellierung des Druckbetts zu gewährleisten, befolgen Sie die Anweisungen Ihres Druckers sorgfältig. Viele Drucker verfügen über integrierte Nivellierungsassistenten oder erfordern eine manuelle Justierung des Druckbetts mithilfe eines Kalibrierungstools. Überspringen Sie diesen wichtigen Schritt nicht, denn er kann Ihnen später viel Ärger ersparen.
Schmutziges Druckbett
Ein sauberes Druckbett ist für eine gute Haftung unerlässlich. Öle, Staub und Rückstände von vorherigen Drucken können als Barriere wirken und verhindern, dass das Filament richtig haftet.
Vor jedem Druckvorgang ist darauf zu achten, Reinigen Sie Ihr Druckbett gründlich. Verwenden Sie Isopropylalkohol oder eine spezielle Reinigungslösung, um Schmutz und Verunreinigungen zu entfernen. Einige Benutzer empfehlen sogar, das Druckbett leicht anzuschleifen, um eine raue Oberfläche für eine bessere Haftung zu schaffen.
Haftungsanforderungen für verschiedene 3D-Druckmaterialien
Nicht alle Filamentmaterialien haben die gleichen Anforderungen an die Betthaftung. Jeder Typ hat einzigartige Eigenschaften, die sich darauf auswirken, wie gut er an der Bauoberfläche haftet.
- PLA (Polymilchsäure) ist eines der am einfachsten zu verarbeitenden Materialien. Es hat niedrigere Drucktemperaturen und minimale Verformung, wodurch es relativ gut auf einfachen Oberflächen wie Glas oder Malerband haftet. Allerdings Durch die Verwendung einer hochwertigen PEI-Bauplatte (Polyetherimid) kann die PLA-Haftung weiter verbessert werden.
- ABS-Kunststoff (Acrylnitril-Butadien-Styrol) ist aufgrund der höheren Drucktemperaturen und der Neigung zum Verziehen anspruchsvoller. Es erfordert normalerweise eine beheizte Bauplatte auf etwa 100–110 °C und eine kleberbeschichtete Oberfläche wie strukturiertes PEI oder spezielle Druckoberflächen für ABS.
- Flexible Filamente wie TPU (Thermoplastisches Polyurethan) Die größte Herausforderung bei der Haftung auf dem Druckbett kann die Verwendung von Klebstoffen wie Haarspray, Klebestiften oder sogar Klebeband darstellen. Spezielle flexible Druckoberflächen können ebenfalls hilfreich sein.
Um von Anfang an eine gute Haftung zu erzielen, ist es wichtig, die einzigartigen Eigenschaften des verwendeten Filaments zu verstehen und zu berücksichtigen.
Wie Druckgeschwindigkeit und Düsenhöhe die Betthaftung beeinflussen
Druckgeschwindigkeit
Die Druckgeschwindigkeit kann die Haftung auf dem Druckbett stark beeinflussen, insbesondere während der ersten Schichten. Wenn Sie zu schnell drucken, hat das Filament möglicherweise nicht genügend Zeit, um richtig an der Baufläche zu haften, bevor der Drucker mit dem Auftragen der nächsten Schicht beginnt.
Um die Haftung zu verbessern, Verwenden Sie für die ersten Schichten eine langsamere Druckgeschwindigkeit, normalerweise etwa 25–30 % Ihrer normalen Geschwindigkeit. Dieses langsamere Tempo gibt dem Filament Zeit, abzukühlen und eine starke Verbindung mit der Bauoberfläche einzugehen. Nachdem diese wichtigen ersten Schichten fertig sind, können Sie die Geschwindigkeit schrittweise auf Ihre bevorzugte Einstellung erhöhen.
Düsenhöhe
Die Düsenhöhe, die sich auf den Abstand zwischen der Düse des Druckers und der Baufläche bezieht, ist ein weiterer wichtiger Faktor für die Betthaftung. Wenn die Düse zu hoch über dem Bett positioniert ist, haftet das Filament möglicherweise nicht richtig. Befindet sich die Düse hingegen zu nahe am Bett, kann dies dazu führen, dass das Filament verschmiert oder eine unebene Oberfläche entsteht.
Um dieses Problem zu lösen, die meisten 3D-Drucker verfügen über eine Funktion, mit der Sie die Düsenhöhe kalibrieren können, oder Sie müssen den Abstand manuell mit einem Spezialwerkzeug anpassen. Befolgen Sie die Anweisungen Ihres Druckers genau und passen Sie die Düsenhöhe an, bis Sie eine perfekte erste Schicht erhalten – eine, die weder zu gequetscht noch zu locker ist.
So verwenden Sie Klebstoffe und spezielle Oberflächen für eine bessere Betthaftung beim 3D-Druck
Klebstofflösungen
Wenn Sie die zuvor genannten Methoden ausprobiert haben und weiterhin Probleme mit der Betthaftung haben, sollten Sie die Verwendung eines Klebstoffs in Betracht ziehen. Klebstoffe können dazu beitragen, eine stärkere Verbindung zwischen dem Filament und der Bauoberfläche herzustellen.
Haarspray ist eine beliebte Wahl. Tragen Sie vor dem Druck einfach eine dünne, gleichmäßige Schicht Haarspray auf das Druckbett auf. Das Haarspray wirkt als temporärer Klebstoff und sorgt dafür, dass das Filament haftet, bis es abkühlt und aushärtet.
Klebestifte sind eine weitere kostengünstige und effektive Option. Tragen Sie eine dünne Schicht Klebstoff auf das Druckbett auf und lassen Sie sie vor dem Drucken trocknen. Der Klebstoff sorgt für eine klebrigere Oberfläche, an der das Filament haften bleibt.
Sie können auch handelsübliche Klebstoffe finden, die speziell für den 3D-Druck hergestellt wurden, wie beispielsweise spezielle Haarsprays oder Bettklebstoffe. Diese Produkte können eine noch bessere Haftung bieten und sind oft für bestimmte Filamenttypen konzipiert.
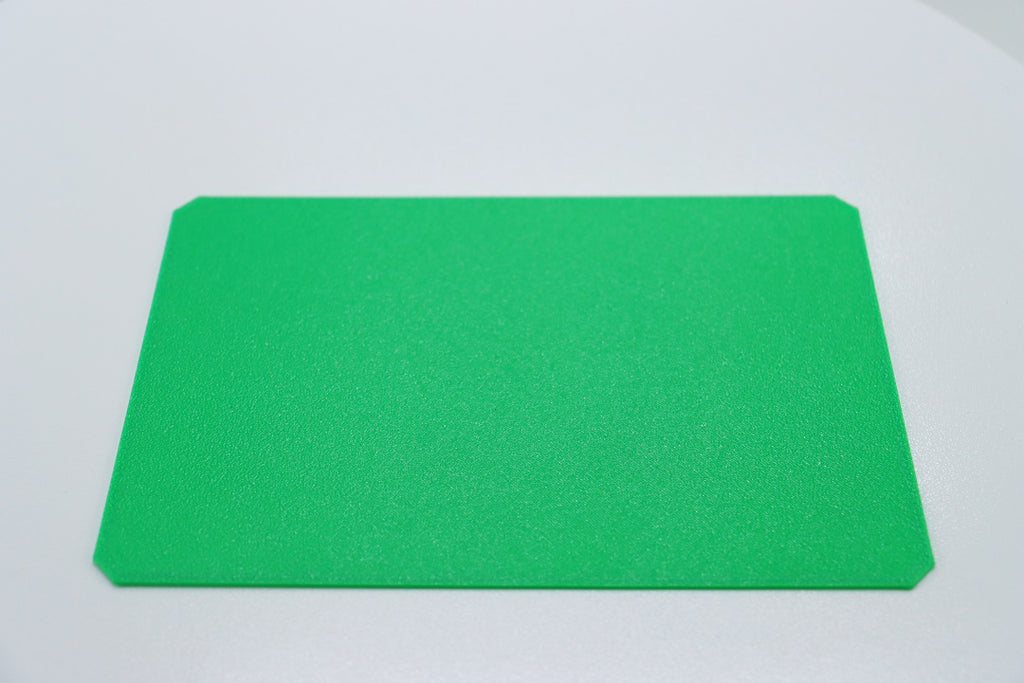
Oberflächenmaterialien bauen
Auch das Material Ihrer Baufläche kann die Betthaftung stark beeinflussen. Viele Drucker werden mit einer Standard-Baufläche geliefert, beispielsweise einer beheizten Glasplatte.
Jedoch, Für eine bessere Haftung sollten Sie ein Upgrade auf ein spezielleres Bauoberflächenmaterial in Betracht ziehen. Beispielsweise sind PEI-Platten (Polyetherimid) für ihre hervorragenden Hafteigenschaften bekannt, insbesondere für Materialien wie ABS und PETG.
Weitere Optionen sind strukturierte Bauoberflächen wie PEX (vernetztes Polyethylen) oder pulverbeschichtete Platten. Diese Oberflächen bieten eine rauere Textur, an der das Filament haften bleibt, was die Haftung verbessert.
Wie Ihre 3D-Druckumgebung die Betthaftung beeinflusst
Auch wenn Sie über die perfekte Betttemperatur, Nivellierung und Oberflächenvorbereitung verfügen, kann die Umgebung Ihres 3D-Druckers die Betthaftung beeinträchtigen.
Zugluft und Temperaturschwankungen
Zugluft und plötzliche Temperaturschwankungen können dazu führen, dass das Filament ungleichmäßig abkühlt, was zu Verformungen und schlechter Haftung führen kann. Um dies zu verhindern, ist es wichtig, Zugluft zu minimieren und eine stabile Temperatur rund um Ihren 3D-Drucker aufrechtzuerhalten.
Eine Lösung besteht darin, den Drucker einzuschließen oder ihn in einem speziellen Druckbereich abseits von Lüftungsschlitzen, Fenstern und Türen aufzustellen. Manche Benutzer entscheiden sich sogar für ein temperaturgeregeltes Gehäuse, um eine konstante Druckumgebung zu gewährleisten.
Luftfeuchtigkeit
Hohe Luftfeuchtigkeit kann die Haftung auf dem Druckbett beeinträchtigen, insbesondere bei feuchtigkeitsempfindlichen Filamenten wie Nylon oder bestimmten ABS-Typen. Bei zu hoher Luftfeuchtigkeit kann das Filament Wasser aufnehmen, was zu Blasenbildung, Verformungen und Haftungsproblemen führen kann.
Um Feuchtigkeitsproblemen entgegenzuwirken, Erwägen Sie die Anschaffung eines Luftentfeuchters oder Filament-Trocknungslösung. Sie können auch Lagern Sie Ihr Filament in luftdichten Behältern mit Trockenmittelbeuteln, die dabei helfen, Feuchtigkeit zu absorbieren und Ihr Filament trocken und bereit für optimalen Druck zu halten.
Schritt-für-Schritt-Anleitung zur Behebung von Problemen mit der Betthaftung beim 3D-Druck
Wenn Sie die oben genannten Methoden ausprobiert haben und weiterhin Probleme mit der Betthaftung haben, befolgen Sie diese Schritt-für-Schritt-Anleitung zur Fehlerbehebung.
Schritt 1: Überprüfen Sie die Temperatur und Nivellierung Ihres Bettes
Stellen Sie zunächst sicher, dass die Betttemperatur für den verwendeten Filamenttyp richtig eingestellt ist. Überprüfen Sie außerdem, ob Ihr Bett richtig nivelliert ist. Dies sind die häufigsten Gründe für eine schlechte Betthaftung. Daher ist es wichtig, diese Einstellungen vor dem nächsten Schritt zu überprüfen.
Schritt 2: Reinigen Sie Ihr Druckbett gründlich
Auch wenn Ihr Druckbett sauber aussieht, ist eine gründliche Reinigung mit Isopropylalkohol oder einer speziellen Reinigungslösung ratsam. Mit der Zeit können sich Öle und Rückstände auf der Oberfläche ablagern, die das Anhaften des Filaments erschweren.
Schritt 3: Passen Sie Ihre Druckgeschwindigkeit und Düsenhöhe an
Wenn die ersten Schichten nicht haften, reduzieren Sie die Druckgeschwindigkeit für die ersten Schichten. Sie können auch die Düsenhöhe optimieren, um die perfekte erste Schicht zu erhalten.
Schritt 4: Versuchen Sie es mit einer Klebelösung oder einer anderen Bauoberfläche
Wenn Sie alles andere versucht haben und immer noch Haftungsprobleme haben, sollten Sie die Verwendung einer Klebelösung oder ein Upgrade auf ein anderes Bauoberflächenmaterial in Betracht ziehen.
Schritt 5: Überprüfen Sie Ihre Druckumgebung
Werfen Sie abschließend einen Blick auf Ihre Druckumgebung. Achten Sie auf Zugluft, Temperaturschwankungen oder hohe Luftfeuchtigkeit. Nehmen Sie die erforderlichen Anpassungen vor, um optimale Druckbedingungen zu schaffen.
Tipps und Tricks von 3D-Druck-Experten
Manchmal können bestimmte Drucke auch nach Behebung aller gängigen Ursachen für eine schlechte Druckbetthaftung noch immer schwierig sein. In diesen Fällen ist es hilfreich, von den Erfahrungen erfahrener 3D-Drucker-Nutzer zu lernen.
Experimentieren und optimieren Sie Ihre Einstellungen
Scheuen Sie sich nicht, verschiedene Einstellungen, Materialien und Techniken auszuprobieren. Bedenken Sie, dass jede Drucker- und Filamentkombination einzigartig ist. Was für den einen Benutzer funktioniert, funktioniert für den anderen möglicherweise nicht.
Optimieren Sie während des Druckvorgangs kontinuierlich Ihre Einstellungen und behalten Sie Ihre Ergebnisse im Auge. Teilen Sie Ihre Erkenntnisse auch mit der 3D-Druck-Community. Mit der Zeit entwickeln Sie ein gutes Verständnis dafür, was für Ihr spezielles Setup am besten funktioniert.
Probieren Sie fortgeschrittene Techniken aus
Wenn Sie mehr Erfahrung mit dem 3D-Druck haben, möchten Sie möglicherweise einige fortgeschrittene Techniken ausprobieren, wie zum Beispiel:
- Verwendung eines Rands oder Floßes: Dabei handelt es sich um zusätzliche Schichten, die um oder unter Ihr Objekt gedruckt werden, wodurch die Oberfläche vergrößert und die Haftung bei anspruchsvollen Drucken verbessert wird.
- Anpassen des Extrusionsmultiplikators oder der Durchflussrate: Dies kann Ihnen dabei helfen, die perfekte erste Schicht zu erzielen, indem Sie die Menge des extrudierten Filaments feinabstimmen.
- Implementieren von benutzerdefinierten Start- und End-G-Code-Skripten: Mit diesen Skripten können Sie die Haftung und Druckqualität optimieren, indem Sie das Verhalten des Druckers zu Beginn und am Ende eines Drucks anpassen.
3D-Druck ist eine Kombination aus Kunst und Wissenschaft und die Beherrschung der Betthaftung ist ein wichtiger Teil des Lernprozesses.
Erreichen einer ausfallsicheren Betthaftung
Die Behebung einer schlechten Druckbetthaftung ist der Schlüssel zu konstant guten 3D-Drucken. Auch wenn es frustrierend sein kann, sorgt ein systematischer Ansatz unter Berücksichtigung von Faktoren wie Temperatur, Nivellierung, Oberflächenvorbereitung und Umgebung dafür, dass Ihre Drucke jedes Mal einwandfrei haften. Scheuen Sie sich nicht, zu experimentieren und holen Sie sich Rat in der 3D-Druck-Community. Mit Geduld und Ausdauer meistern Sie diesen entscheidenden Aspekt des 3D-Drucks schnell und stellen sicher, dass jedes Objekt perfekt auf der Bauplatte haftet. Wenden Sie diese Tipps und Techniken noch heute an, um Ihre 3D-Druckergebnisse auf das nächste Level zu heben!
Mehr lesen
- Warum eine gute Betthaftung beim 3D-Druck wichtig ist
- Häufige Ursachen für schlechte Betthaftung beim 3D-Druck
- Falsche Betttemperatur
- Ungleichmäßige Bettnivellierung
- Schmutziges Druckbett
- Haftungsanforderungen für verschiedene 3D-Druckmaterialien
- Wie Druckgeschwindigkeit und Düsenhöhe die Betthaftung beeinflussen
- Druckgeschwindigkeit
- Düsenhöhe
- So verwenden Sie Klebstoffe und spezielle Oberflächen für eine bessere Betthaftung beim 3D-Druck
- Klebstofflösungen
- Oberflächenmaterialien bauen
- Wie Ihre 3D-Druckumgebung die Betthaftung beeinflusst
- Zugluft und Temperaturschwankungen
- Luftfeuchtigkeit
- Schritt-für-Schritt-Anleitung zur Behebung von Problemen mit der Betthaftung beim 3D-Druck
- Schritt 1: Überprüfen Sie die Temperatur und Nivellierung Ihres Bettes
- Schritt 2: Reinigen Sie Ihr Druckbett gründlich
- Schritt 3: Passen Sie Ihre Druckgeschwindigkeit und Düsenhöhe an
- Schritt 4: Versuchen Sie es mit einer Klebelösung oder einer anderen Bauoberfläche
- Schritt 5: Überprüfen Sie Ihre Druckumgebung
- Tipps und Tricks von 3D-Druck-Experten
- Experimentieren und optimieren Sie Ihre Einstellungen
- Probieren Sie fortgeschrittene Techniken aus
- Erreichen einer ausfallsicheren Betthaftung
- Mehr lesen
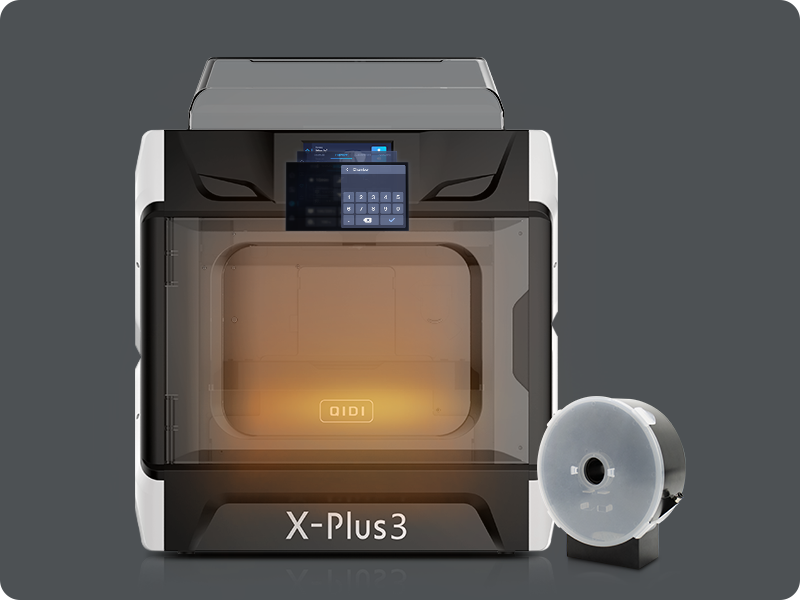
Empfohlene Produkte


