3D 프린팅의 최소 벽 두께는 얼마입니까?

Share this post
A high-performance 3D printer actually uses purple 3D printing consumables for printing work

3D 프린팅에서 벽 두께는 모델의 성공적인 출력 및 사용 내구성에 직접적인 영향을 미칩니다. 디자인은 충분히 두꺼워야 하지만, 재료 낭비나 출력 시간 초과를 초래할 정도로 두껍지 않아야 합니다. 3D 프린팅 방식에 따라 필요한 벽 두께는 다릅니다. FDM 프린터는 일반적으로 최소 0.8mm 두께의 벽이 필요하지만, 레진 프린터는 0.6mm 두께의 벽을 사용할 수 있습니다. 이 가이드에서는 3D 프린팅 프로젝트에서 벽 두께에 대해 알아야 할 중요한 사항을 설명합니다.

3D 프린팅 벽 두께에 영향을 미치는 주요 요소

성공적인 3D 프린팅에 필요한 최소 벽 두께는 여러 요인이 복합적으로 작용하여 결정됩니다. 적절한 두께는 프린터의 성능, 사용하는 재료, 그리고 부품의 용도에 따라 달라집니다.

3D 프린팅 기술

다양한 인쇄 방법 벽을 얼마나 얇게 만들 수 있는지에 따라 층을 다르게 쌓습니다.

1. FDM

FDM 3D 프린터 노즐 크기가 고정되어 있으며, 견고한 벽을 만들기 위해 여러 번 통과해야 합니다. 최소 벽 두께를 결정할 때 층간 접착 강도가 매우 중요합니다.

A high-performance FDM 3D printer is printing a yellow boat model.

2. 서비스 수준 계약(SLA)

SLA(광경화) 프린터는 레이저 정밀도를 활용하여 FDM보다 더욱 정교한 디테일을 구현합니다. 액상 레진의 품질에 따라 레이어 두께가 달라지므로, 작고 섬세한 형상을 제작하는 데 적합합니다.

3. 에스엘에스

SLS(선택적 레이저 소결)는 분말 재료를 사용하며, 입자 크기에 따라 세부 묘사의 크기가 달라집니다. 이 방식은 복잡한 형상을 처리할 수 있지만, 분말을 추가로 제거하면 벽 두께가 제한됩니다.

4. 멀티젯/폴리젯

멀티젯 및 폴리젯 프린터는 잉크젯 프린터와 마찬가지로 정확한 물방울 인쇄 방식을 사용합니다. 다양한 소재를 사용할 수 있지만, 각 소재마다 특정 너비가 필요합니다.

재료 특성

그만큼 3D 프린팅 소재의 종류 선택하는 재료는 최소 벽 두께에 상당한 영향을 미칩니다. 취성 3D 프린팅 재료는 균열 방지를 위해 더 두꺼운 벽이 필요한 반면, 유연한 재료는 형태를 유지하고 휘어짐을 방지하기 위해 더 두꺼운 벽이 필요합니다. 일반적으로 더 강한 재료를 사용하면 강도를 유지하면서 더 얇은 벽을 만들 수 있습니다.

소재마다 열에 대한 저항력이 다르기 때문에 인쇄 및 사용 시 성능에 영향을 미칩니다. 일부 소재는 너무 얇게 인쇄하면 휘거나 뒤틀릴 수 있으므로 필요한 최소 너비를 고려하는 것이 중요합니다.

최종 사용 요구 사항

구조적 고려 사항

인쇄된 부품의 목적에 따라 벽의 두께가 결정됩니다. 부품의 두께는 용도에 따라 달라집니다. 장식용 부품은 더 작을 수 있지만, 무게를 지탱하는 부품은 강도를 위해 더 두꺼워야 합니다. 움직이는 부품은 일정한 공간이 필요하며, 스냅핏 부품은 제대로 작동할 수 있을 만큼 유연해야 합니다.

환경적 요인

환경적 요인 또한 매우 중요합니다. 얇은 벽이 뜨거워지면 변형될 수 있습니다. 습기에 노출되면 시간이 지남에 따라 일부 재료가 약해질 수 있으므로, 강도를 위해 더 강한 벽이 필요합니다. 자외선 차단 및 접촉 저항성 또한 장기적인 안정성을 위해 필요한 재료의 두께에 영향을 미칩니다.

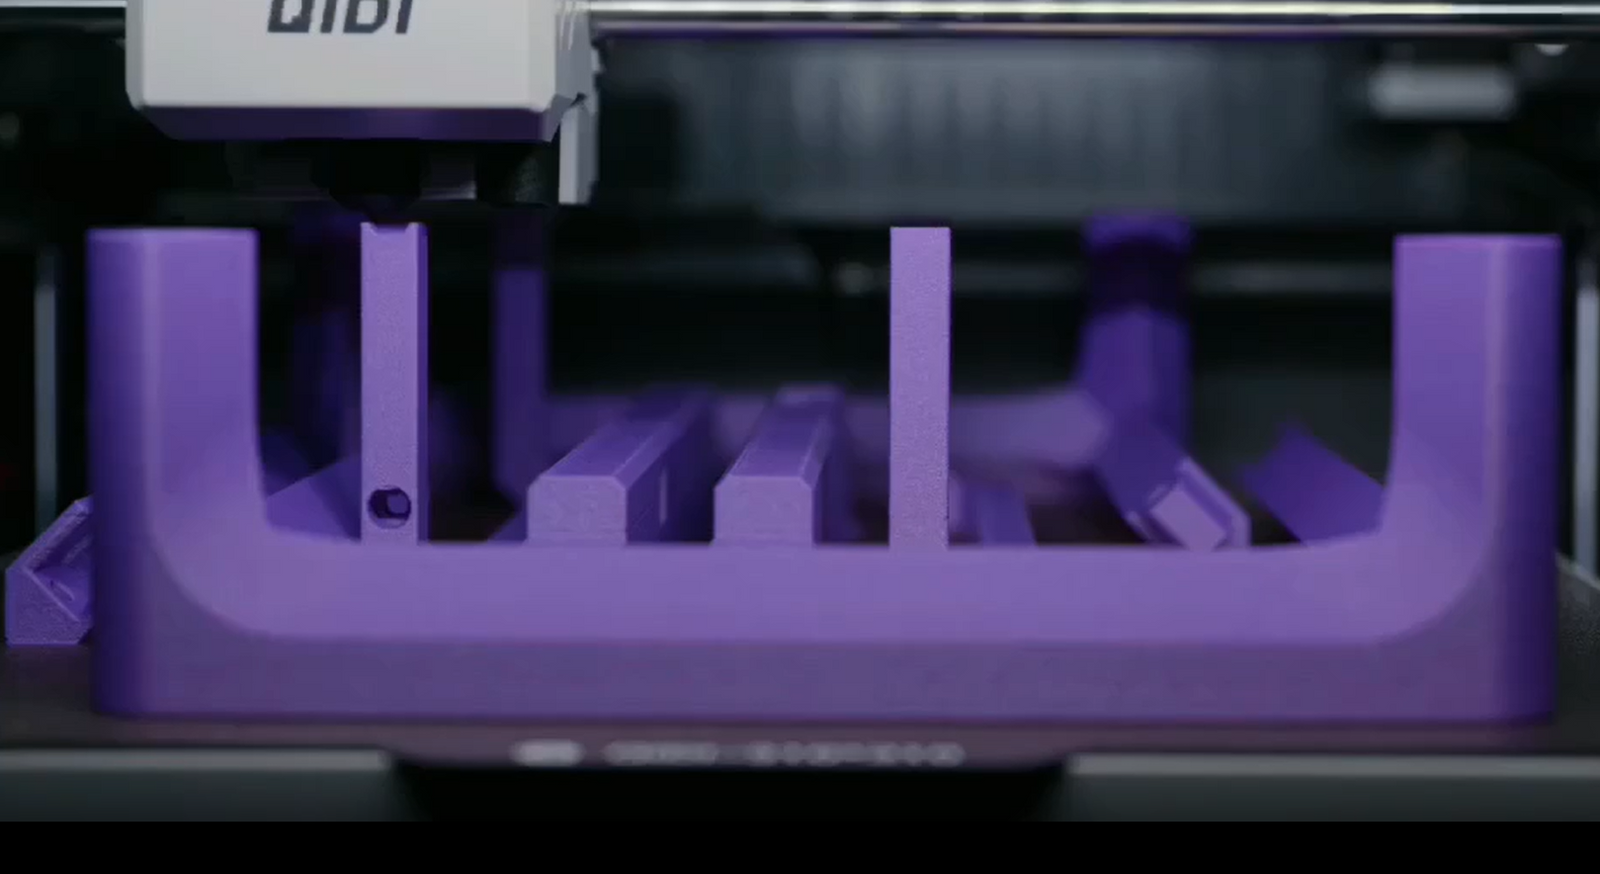
A high-performance 3D printer actually uses purple 3D printing consumables for printing work

다양한 3D 프린팅 방법에 권장되는 벽 두께

최소 벽 두께는 프린팅 방식과 소재에 따라 다릅니다. 3D 프린팅 프로젝트에 대한 자세한 권장 사항은 다음과 같습니다.

기술별 최소 벽 두께

인쇄 유형 기본 부품 표준 부품 하중 지지 부품 자세한 기능
FDM 0.8mm 1.2mm 2.0~2.4mm 1.0mm
SLA 0.6mm 0.8mm 1.2~1.5mm 0.6mm
에스엘에스 0.7mm 1.0mm 1.5~2.0mm 0.8mm
멀티젯 0.6mm 0.8mm 1.2~1.5mm 0.6mm

재료 기반 두께 조정

재료 유형 추가 두께 필요
표준 PLA 조정이 필요 없습니다
ABS/ASA +0.2mm
탄소 섬유 +0.1mm
소프트 TPU +0.4mm
매우 부드러운 TPU +0.6mm
탄성 수지 +0.3mm

특수 응용 분야

애플리케이션 권장 두께
지지 구조 1.0~1.6mm
움직이는 부품 1.2~1.5mm
스냅핏 1.2~2.0mm
투명 부품 0.8~1.0mm
곰팡이 1.2~2.0mm

이러한 측정값은 일반적인 적용 분야의 시작점을 제공합니다. 최종 벽 두께는 프린터의 특정 성능과 부품의 용도를 고려하여 결정해야 합니다.

3D 프린팅 벽 두께에 대한 설계 고려 사항

전략적 벽 두께 설계

인쇄 방법에 대한 기본 벽 두께를 선택한 후 재료모델의 특정 영역에는 특별한 주의가 필요합니다.

스트레스가 많은 지역

  • 마운트 포인트: 기본 벽보다 50% 더 두껍게 만듭니다.
  • 나사 구멍: 주변 면적은 바닥 두께의 2~3배가 되어야 합니다.
  • 스냅핏: 클립 메커니즘 주변의 벽 두께를 두 배로 늘립니다.
  • 리빙 힌지: 유연성을 위해 기본 두께의 75%로 줄입니다.
  • 갈비뼈를 지지하다: 효율적인 보강을 위해 주벽 두께의 80%를 사용합니다.

코너 및 전환 디자인

  • 날카로운 내부 모서리에 1~2mm 필렛을 추가합니다.
  • 점진적인 두께 전환을 사용합니다(최대 45° 각도).
  • 최소 2를 유지하세요:1 연결된 두꺼운 부분과 얇은 부분 사이의 비율입니다.
  • 약점이 생길 수 있는 급격한 두께 변화는 피하세요.

인쇄 시간 및 재료 효율성

벽 두께는 자원 사용에 직접적인 영향을 미칩니다. 다양한 벽 디자인이 일반적인 100mm x 100mm x 100mm 부품에 미치는 영향은 다음과 같습니다.

디자인 접근 방식 재료 사용 인쇄 시간 상대적 비용
균일한 두꺼운 벽(2mm) 200g 5시간 100%
최적화된 가변 벽(1.2-2mm) 140g 3.5시간 70%
강화된 얇은 벽(1.2mm + 리브) 120g 3시간 60%

다음과 같은 여러 가지 설계 방식을 사용하면 재료 사용량과 인쇄 시간을 줄일 수 있습니다.

  • 두꺼운 벽을 얇은 벽과 지지대 늑골로 교체합니다.
  • 넓고 평평한 곳에는 벌집이나 삼각형 모양의 충전재를 사용하세요.
  • 하중을 지지하는 부분에만 두께를 추가합니다.
  • 자립형 각도 설계 (&지지 재료를 줄이기 위해 gt;45°)를 사용합니다.

스마트한 벽 두께 선택은 부품 강도를 유지하면서 시간과 재료를 크게 절약할 수 있습니다. 각 부위의 두께 균형을 적절히 조절하면 더 저렴한 비용으로 효율적이고 내구성 있는 출력물을 얻을 수 있습니다.

Wall thickness in 3D printing directly affects whether your model will print successfully and hold up during use. Your design should have walls that are thick enough to be strong, but not so thick that they waste materials or take too long to print. Different 3D printing methods require different wall widths. FDM printers usually need walls that are at least 0.8mm thick, while resin printers can use walls as thin as 0.6mm. This guide explains important things to know about wall thickness for your 3D printing projects.  Key Factors That Affect 3D Printing Wall Thickness  The minimum wall thickness needed for successful 3D printing relies on multiple factors working together. The right thickness depends on your printer's skills, the material you're using, and how the part will be used.  3D Printing Technology  Different printing methods build layers differently, which affects how thin your walls can be.  1. FDM  FDM 3D printers have a fixed nozzle size and require multiple passes to build robust walls. The adhesion strength between layers is crucial when determining the minimum wall thickness.  2. SLA  SLA (Stereolithography) printers use laser precision to make finer details than FDM. The liquid resin's qualities affect how thin the layers can be, which makes these printers great for creating small, detailed shapes.  3. SLS  SLS (Selective Laser Sintering) uses powdered materials, and the size of the particles affects how small the details can be. This method can handle complicated shapes, but removing extra powder limits how thin the walls can be.  4. MultiJet/PolyJet  MultiJet and PolyJet printers use accurate droplet printing, much like how inkjet printers work. They can work with different materials, but each material needs a specific width.  Material Properties  The type of 3D printing material you choose significantly impacts the minimum wall thickness. Brittle 3D printing materials require thicker walls to prevent cracking, whereas flexible materials need additional thickness to maintain their shape and avoid bending. Stronger materials can typically be used to create thinner walls without sacrificing strength.  Different materials can handle heat differently, which influences how they perform during printing and when in use. Some materials can bend or warp if printed too thin, so it's important to think about the minimum width needed.  End Use Requirements Structural Considerations  The aim of your printed part decides how thick the walls need to be. The thickness of items depends on their purpose. Decorative items can be smaller, but parts that support weight need to be thicker for strength. Moving parts need certain spaces, and snap-fit pieces must be flexible enough to function correctly.  Environmental Factors  Environmental factors are also very important. Thin walls that get hot may become misshapen. Exposure to moisture can weaken some materials over time, so stronger walls are needed for strength. The need for UV light protection and resistance to contact also affects how thick materials must be for long-term stability.  Recommended Wall Thickness for Different 3D Printing Methods  The specific minimum wall thickness varies by printing method and material. Here are detailed recommendations for your 3D printing projects.  Minimum Wall Thickness by Technology Print Type	Basic Parts	Standard Parts	Load-Bearing Parts	Detailed Features FDM	0.8mm	1.2mm	2.0 - 2.4mm	1.0mm SLA	0.6mm	0.8mm	1.2 - 1.5mm	0.6mm SLS	0.7mm	1.0mm	1.5 - 2.0mm	0.8mm MultiJet	0.6mm	0.8mm	1.2 - 1.5mm	0.6mm Material-Based Thickness Adjustments Material Type	Additional Thickness Needed Standard PLA	No adjustment needed ABS/ASA	+0.2mm Carbon Fiber	+0.1mm Soft TPU	+0.4mm Very Soft TPU	+0.6mm Elastic Resin	+0.3mm Special Applications Application	Recommended Thickness Support Structures	1.0 - 1.6mm Moving Parts	1.2 - 1.5mm Snap Fits	1.2 - 2.0mm Clear Parts	0.8 - 1.0mm Molds	1.2 - 2.0mm  These measurements provide starting points for common applications. The final wall thickness should account for your specific printer's capabilities and the part's intended use.  Design Considerations for 3D Printing Wall Thickness Strategic Wall Thickness Design  After choosing the basic wall thickness for your printing method and material, certain areas of your model need special attention:  High-Stress Areas Mount points: Add 50% more thickness than your base walls Screw holes: Surrounding area should be 2-3 times the base thickness Snap fits: Double the wall thickness around clip mechanisms Living hinges: Reduce to 75% of base thickness for flexibility Support ribs: Use 80% of main wall thickness for efficient reinforcement Corner and Transition Design Add 1-2mm fillets to sharp internal corners Use gradual thickness transitions (max 45° angle) Maintain minimum 2:1 ratio between connected thick and thin sections Avoid sudden thickness changes that could create weak points Print Time and Material Efficiency  Wall thickness directly impacts resource use. Here's how different wall designs affect a typical 100mm × 100mm × 100mm part:  Design Approach	Material Use	Print Time	Relative Cost Uniform Thick Walls (2mm)	200g	5 hrs	100% Optimized Variable Walls (1.2-2mm)	140g	3.5 hrs	70% Reinforced Thin Walls (1.2mm + ribs)	120g	3 hrs	60%  Several design approaches can reduce material use and print time:  Replace thick walls with thin walls plus support ribs Use honeycomb or triangular infill in wide flat areas Add thickness only to load-bearing sections Design self-supporting angles (>45°) to reduce support material  Smart wall thickness choices lead to significant savings in both time and material while maintaining part strength. The right balance of thickness in different areas creates efficient, durable prints at lower costs.  Testing Methods to Verify 3D Printing Wall Thickness  Before making the end product, testing ensures that the wall thicknesses you selected are effective. Both digital and real tests are important for improving your design.  Digital Testing with CAD Software  CAD thickness analysis shows parts of your design that could be too thin or too thick. This early check helps stop printing problems and weak structures. The program looks at your whole model and points out parts that need changes.  Draft angle analysis looks for steep slopes and overhangs that might create issues with printing. These areas often need extra support or changes in design to be printed properly.  Advanced modeling tools help you understand how your part will perform in real situations. These tests show where stress happens, where things might change shape, and how heat affects them. This information helps make important choices about wall thickness for functional parts.  Physical Test Prints  A small test piece at 25% scale provides practical insights about your design. This scaled-down version should include key features like joints, clips, or mounting points. The smaller size saves time and material while still validating your wall thickness choices.  Test prints help verify several aspects:  Actual printed thickness matches design specifications Layer adhesion quality in thin sections Performance of functional features Strength of thickness transitions  Each test reveals opportunities for improvement. Thin areas might need reinforcement, while thick sections could potentially be reduced. This practical feedback helps refine your design efficiently.  Common Mistakes in Wall Thickness Design  Poor wall thickness decisions can lead to print failures or part performance issues. Here are the most common mistakes and their solutions.  Inconsistent Wall Thickness  Sudden thickness changes in a model are a frequent error. For example, shifting from 2mm to 0.8mm causes:  Poor layer bonding during printing Stress concentration leading to cracks Extrusion issues and print defects  Solution: Design gradual transitions with thickness changes no steeper than 45 degrees. Limit changes to 0.2mm per 1mm of distance.  Excessive Wall Thickness  Walls that are too thick create several problems:  Wasted material and longer print times Warping from uneven cooling between inner and outer layers Unnecessary part weight  Solution: Add thickness only in load-bearing areas. Keep other regions at recommended base thickness. Use support ribs to increase strength instead of simply making walls thicker.  Insufficient Wall Thickness  Walls that are too thin often result from prioritizing detail or trying to save material:  Unable to handle normal use stresses Prone to breakage or deformation during printing Poor surface quality  Solution: Follow minimum wall thickness requirements for your printing technology. For decorative features, strengthen the supporting structure rather than compromising on minimum thickness.  Design Your 3D Printing Wall Thickness Right!  The right wall thickness is important for efficient 3D printing. Use the suggested minimum width for your printing method and material, and then change it if necessary for your specific part. Use online tests and small printed samples to check your design. By designing wall thickness carefully to avoid rapid changes and address stress points, you can make strong, efficient parts while saving time and materials.

3D 프린팅 벽 두께 검증을 위한 테스트 방법

최종 제품을 제작하기 전에 테스트를 통해 선택한 벽 두께가 효과적인지 확인합니다. 디지털 테스트와 실제 테스트 모두 설계 개선에 중요합니다.

CAD 소프트웨어를 사용한 디지털 테스트

CAD 두께 분석은 설계에서 너무 얇거나 두꺼운 부분을 보여줍니다. 이러한 조기 점검을 통해 인쇄 문제 및 취약한 구조를 방지할 수 있습니다. 이 프로그램은 전체 모델을 검토하여 수정이 필요한 부분을 파악합니다.

구배 각도 분석은 인쇄에 문제를 일으킬 수 있는 가파른 경사면과 돌출부를 찾아냅니다. 이러한 부분은 제대로 인쇄되려면 추가 지지대나 디자인 변경이 필요한 경우가 많습니다.

고급 모델링 도구는 실제 상황에서 부품의 성능을 이해하는 데 도움이 됩니다. 이러한 테스트는 응력이 발생하는 위치, 형상이 변하는 위치, 그리고 열이 부품에 미치는 영향을 보여줍니다. 이 정보는 기능성 부품의 벽 두께를 결정하는 데 중요한 역할을 합니다.

물리적 테스트 인쇄

25% 크기의 작은 시험편은 설계에 대한 실질적인 통찰력을 제공합니다. 이 축소된 버전에는 접합부, 클립, 또는 장착 지점과 같은 주요 기능이 포함되어야 합니다. 크기가 작을수록 시간과 재료를 절약하는 동시에 벽 두께 선택을 검증할 수 있습니다.

테스트 인쇄는 다음과 같은 여러 측면을 확인하는 데 도움이 됩니다.

  • 실제 인쇄된 두께는 디자인 사양과 일치합니다.
  • 얇은 부분에서의 층 접착 품질.
  • 기능적 특성의 성능.
  • 두께 전환의 강도.

각 테스트를 통해 개선의 여지가 있음을 알 수 있습니다. 얇은 부분은 보강이 필요할 수 있고, 두꺼운 부분은 잠재적으로 줄일 수 있습니다. 이러한 실질적인 피드백을 통해 디자인을 효율적으로 개선하는 데 도움이 됩니다.

벽 두께 설계의 일반적인 실수

벽 두께를 잘못 선택하면 인쇄 실패나 부품 성능 문제가 발생할 수 있습니다. 가장 흔한 실수와 그 해결책을 소개합니다.

일관되지 않은 벽 두께

모델에서 갑작스러운 두께 변경은 빈번한 오류입니다. 예를 들어, 2mm에서 0.8mm로 두께를 변경하면 다음과 같은 오류가 발생합니다.

  • 인쇄 중 레이어 결합이 불량합니다.
  • 균열을 유발하는 응력 집중.
  • 압출 문제 및 인쇄 결함.

해결책: 두께 변화가 45도 이하로 점진적으로 이루어지도록 설계하세요. 1mm 간격당 0.2mm로 변경을 제한하세요.

과도한 벽 두께

너무 두꺼운 벽은 여러 가지 문제를 야기합니다.

  • 재료 낭비와 인쇄 시간 연장.
  • 워핑 내부와 외부 층 사이의 불균일한 냉각으로 인해 발생합니다.
  • 불필요한 부품 무게.

해결책: 하중을 받는 부분에만 두께를 두껍게 하십시오. 다른 부분은 권장되는 바닥 두께를 유지하십시오. 단순히 벽을 두껍게 하는 대신 지지대를 사용하여 강도를 높이십시오.

벽 두께가 부족함

너무 얇은 벽은 종종 세부 사항을 우선시하거나 재료를 절약하려고 시도하는 데서 발생합니다.

  • 일반적인 사용 스트레스를 처리할 수 없습니다.
  • 인쇄 중에 파손이나 변형이 발생하기 쉽습니다.
  • 표면 품질이 좋지 않음.

해결책: 인쇄 기술에 따른 최소 벽 두께 요건을 준수하십시오. 장식적인 기능을 위해 최소 두께를 낮추는 대신 지지 구조를 강화하십시오.

3D 프린팅 벽 두께를 적절하게 설계하세요!

효율적인 3D 프린팅을 위해서는 적절한 벽 두께가 중요합니다. 프린팅 방식과 재료에 따라 권장되는 최소 너비를 사용하고, 필요한 경우 특정 부품에 맞게 변경하십시오. 온라인 테스트와 소량 인쇄 샘플을 사용하여 설계를 확인하십시오. 급격한 변화를 피하고 응력 지점을 해결하기 위해 벽 두께를 신중하게 설계하면 시간과 재료를 절약하면서 튼튼하고 효율적인 부품을 제작할 수 있습니다.

Table of contents

FAQ

당사의 3D 프린팅 장비와 서비스에 대한 가장 궁금한 질문에 대한 답변을 찾아보세요.

3D 프린팅은 디지털 파일로부터 3차원 물체를 제작하는 과정입니다. 플라스틱이나 금속과 같은 재료를 겹겹이 쌓아 최종 제품을 제작합니다. 이 혁신적인 기술은 맞춤형 제작과 신속한 프로토타입 제작을 가능하게 합니다.

저희는 모든 제품에 대해 빠르고 안정적인 배송 옵션을 제공합니다. 주문이 접수되면 배송 진행 상황을 확인할 수 있는 추적 번호를 보내드립니다. 배송 시간은 지역에 따라 달라질 수 있습니다.

저희 3D 프린터는 제조 결함에 대한 1년 보증을 제공합니다. 연장 보증 옵션을 구매하실 수 있습니다. 자세한 내용은 보증 정책을 참조하세요.

네, 저희는 번거로움 없는 반품 정책을 시행하고 있습니다. 구매하신 상품에 만족하지 못하시면 30일 이내에 반품하시면 전액 환불해 드립니다. 상품이 원래 상태 그대로인지 확인해 주세요.

물론입니다! 저희 전담 지원팀이 모든 질문과 문제를 도와드립니다. 이메일이나 전화로 연락하시면 신속한 지원을 받으실 수 있습니다. 또한, 다양한 정보를 제공하는 온라인 리소스 센터도 운영하고 있습니다.

여전히 질문이 있습니까?

문의사항이 있으시면 언제든지 연락주세요.