ما هو الحد الأدنى لسمك الجدار للطباعة ثلاثية الأبعاد؟

Share this post
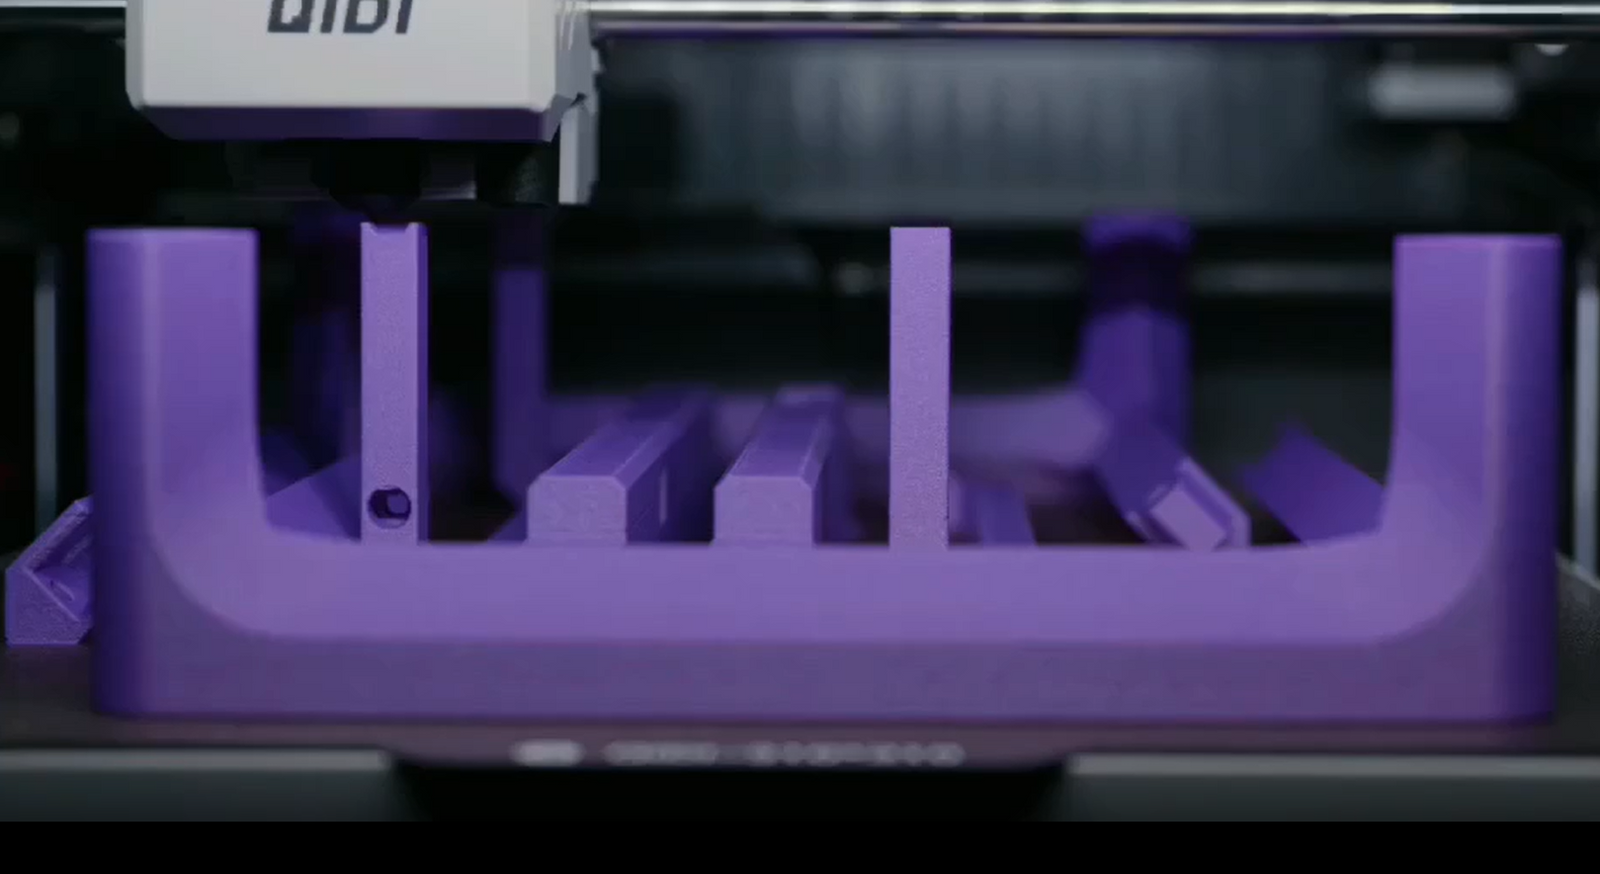
A high-performance 3D printer actually uses purple 3D printing consumables for printing work

يؤثر سُمك الجدران في الطباعة ثلاثية الأبعاد بشكل مباشر على نجاح طباعة نموذجك وقدرته على الصمود أثناء الاستخدام. يجب أن تكون جدران تصميمك سميكة بما يكفي لتكون متينة، ولكن ليس لدرجة إهدار المواد أو استغراق وقت طويل في الطباعة. تتطلب طرق الطباعة ثلاثية الأبعاد المختلفة عرض جدران مختلفًا. عادةً ما تحتاج طابعات FDM إلى جدران بسمك 0.8 مم على الأقل، بينما يمكن لطابعات الراتنج استخدام جدران بسمك 0.6 مم. يشرح هذا الدليل معلومات مهمة حول سمك الجدار لمشاريع الطباعة ثلاثية الأبعاد الخاصة بك.

العوامل الرئيسية التي تؤثر على سمك جدار الطباعة ثلاثية الأبعاد

الحد الأدنى لسمك الجدار يعتمد نجاح الطباعة ثلاثية الأبعاد على تضافر عدة عوامل. يعتمد السُمك المناسب على مهارة طابعتك، والمادة المستخدمة، وكيفية استخدام القطعة.

تقنية الطباعة ثلاثية الأبعاد

تؤدي طرق الطباعة المختلفة إلى بناء طبقات مختلفة، مما يؤثر على مدى رقة جدرانك.

1. FDM

طابعات FDM ثلاثية الأبعاد تتميز هذه المواد بحجم فوهة ثابت وتتطلب تمريرات متعددة لبناء جدران متينة. وتُعدّ قوة الالتصاق بين الطبقات عاملاً حاسماً في تحديد الحد الأدنى لسمك الجدار.

A high-performance FDM 3D printer is printing a yellow boat model.

2. اتفاقية مستوى الخدمة

طابعات SLA (الطباعة المجسمة) تستخدم هذه الطابعات دقة الليزر لإنتاج تفاصيل أدق من تقنية FDM. تؤثر خصائص الراتنج السائل على مدى رقة الطبقات، مما يجعل هذه الطابعات مثالية لإنشاء أشكال صغيرة ومفصلة.

3. إس إل إس

SLS (التلبيد الانتقائي بالليزر) تستخدم مواد مسحوقة، ويؤثر حجم الجسيمات على مدى صغر التفاصيل. يمكن لهذه الطريقة التعامل مع الأشكال المعقدة، لكن إزالة المسحوق الزائد يحد من سماكة الجدران.

4. متعدد النفث/بولي نفث

طابعات MultiJet وPolyJet استخدم طباعة دقيقة بالقطرات، تشبه إلى حد كبير طابعات نفث الحبر. تعمل هذه الطابعات على مواد مختلفة، لكن لكل مادة عرض محدد.

خصائص المواد

ال نوع مادة الطباعة ثلاثية الأبعاد يؤثر اختيارك بشكل كبير على الحد الأدنى لسمك الجدار. تتطلب مواد الطباعة ثلاثية الأبعاد الهشة جدرانًا أكثر سمكًا لمنع التشقق، بينما تحتاج المواد المرنة إلى سماكة إضافية للحفاظ على شكلها وتجنب الانحناء. عادةً ما يمكن استخدام مواد أقوى لإنشاء جدران أرق دون التضحية بالقوة.

تختلف المواد المختلفة في تحملها للحرارة، مما يؤثر على أدائها أثناء الطباعة واستخدامها. بعض المواد قد تنحني أو تتشوه إذا طُبعت بسماكة رقيقة جدًا، لذا من المهم مراعاة الحد الأدنى للعرض المطلوب.

متطلبات الاستخدام النهائي

الاعتبارات الهيكلية

يُحدد هدف القطعة المطبوعة سُمك الجدران المطلوب. ويعتمد سُمك القطع على الغرض منها. يُمكن أن تكون القطع الزخرفية أصغر حجمًا، ولكن يجب أن تكون القطع التي تتحمل الوزن أكثر سُمكًا لضمان المتانة. تحتاج الأجزاء المتحركة إلى مساحات مُحددة، ويجب أن تكون القطع المُثبتة بسرعة مرنة بما يكفي لتعمل بشكل صحيح.

العوامل البيئية

العوامل البيئية مهمة جدًا أيضًا. فالجدران الرقيقة التي تسخن قد تتشوه. كما أن التعرض للرطوبة قد يُضعف بعض المواد بمرور الوقت، لذا يلزم جدران أقوى لضمان المتانة. كما أن الحاجة إلى الحماية من الأشعة فوق البنفسجية ومقاومة التلامس تؤثر على سمك المواد اللازم لضمان ثباتها على المدى الطويل.

A high-performance 3D printer actually uses purple 3D printing consumables for printing work

سمك الجدار الموصى به لطرق الطباعة ثلاثية الأبعاد المختلفة

يختلف الحد الأدنى لسمك الجدار باختلاف طريقة الطباعة والمادة. إليك توصيات مفصلة لـ مشاريع الطباعة ثلاثية الأبعاد.

الحد الأدنى لسمك الجدار حسب التكنولوجيا

نوع الطباعة الأجزاء الأساسية قطع غيار قياسية الأجزاء الحاملة للحمل الميزات التفصيلية
FDM 0.8 ملم 1.2 ملم 2.0 - 2.4 مم 1.0 مم
اتفاقية مستوى الخدمة 0.6 ملم 0.8 ملم 1.2 - 1.5 ملم 0.6 ملم
إس إل إس 0.7 ملم 1.0 مم 1.5 - 2.0 مم 0.8 ملم
متعدد الطائرات النفاثة 0.6 ملم 0.8 ملم 1.2 - 1.5 ملم 0.6 ملم

تعديلات السُمك بناءً على المواد

نوع المادة سمك إضافي مطلوب
PLA القياسي لا حاجة للتعديل
ABS/ASA +0.2 مم
ألياف الكربون +0.1 ملم
مادة TPU الناعمة +0.4 ملم
TPU ناعم جدًا +0.6 ملم
راتنج مرن +0.3 ملم

التطبيقات الخاصة

طلب السمك الموصى به
الهياكل الداعمة 1.0 - 1.6 مم
الأجزاء المتحركة 1.2 - 1.5 ملم
سناب فيتس 1.2 - 2.0 مم
قطع غيار واضحة 0.8 - 1.0 مم
قوالب 1.2 - 2.0 مم

تُمثّل هذه القياسات نقاط انطلاق للتطبيقات الشائعة. يجب أن يُراعي السُمك النهائي للجدار إمكانيات طابعتك الخاصة والاستخدام المُراد للقطعة.

اعتبارات التصميم لسمك جدار الطباعة ثلاثية الأبعاد

تصميم سمك الجدار الاستراتيجي

بعد اختيار سمك الجدار الأساسي لطريقة الطباعة والمادة الخاصة بك، هناك مناطق معينة من النموذج الخاص بك تحتاج إلى اهتمام خاص:

المناطق عالية التوتر

  • نقاط التثبيت:أضف 50% من السُمك إلى جدرانك الأساسية
  • ثقوب البراغي:يجب أن تكون المنطقة المحيطة 2-3 أضعاف سمك القاعدة
  • ملاءمة سريعة:ضعف سمك الجدار حول آليات المشابك
  • مفصلات حية:تقليل إلى 75% من سمك القاعدة لتحقيق المرونة
  • أضلاع الدعم:استخدم 80% من سمك الجدار الرئيسي للحصول على تقوية فعالة

تصميم الزاوية والانتقال

  • أضف شرائح بسمك 1-2 مم إلى الزوايا الداخلية الحادة
  • استخدم انتقالات سمك تدريجية (زاوية 45 درجة كحد أقصى)
  • الحفاظ على الحد الأدنى 2:1 نسبة بين المقاطع السميكة والرقيقة المتصلة
  • تجنب التغييرات المفاجئة في السُمك التي قد تؤدي إلى خلق نقاط ضعف

كفاءة وقت الطباعة والمواد

يؤثر سُمك الجدار بشكل مباشر على استخدام الموارد. إليك كيفية تأثير تصاميم الجدران المختلفة على قطعة نموذجية بأبعاد 100 مم × 100 مم × 100 مم:

نهج التصميم استخدام المواد وقت الطباعة التكلفة النسبية
جدران سميكة موحدة (2 مم) 200 جرام 5 ساعات 100%
الجدران المتغيرة المُحسّنة (1.2-2 مم) 140 جرام 3.5 ساعات 70%
جدران رقيقة مقواة (1.2 مم + أضلاع) 120 جرام 3 ساعات 60%

يمكن لعدة طرق تصميمية أن تقلل من استخدام المواد ووقت الطباعة:

  • استبدال الجدران السميكة بجدران رقيقة بالإضافة إلى الأضلاع الداعمة
  • استخدم حشوة على شكل قرص العسل أو مثلثة الشكل في المساحات المسطحة الواسعة
  • أضف السُمك فقط إلى الأقسام الحاملة للحمل
  • تصميم زوايا داعمة ذاتيًا (>45 درجة) لتقليل مادة الدعم

يؤدي اختيار سمك الجدار الذكي إلى توفير كبير في الوقت والمواد مع الحفاظ على متانة الأجزاء. يُنتج التوازن الصحيح في سمك الجدران في مختلف المناطق مطبوعات فعّالة ومتينة بتكلفة أقل.

Wall thickness in 3D printing directly affects whether your model will print successfully and hold up during use. Your design should have walls that are thick enough to be strong, but not so thick that they waste materials or take too long to print. Different 3D printing methods require different wall widths. FDM printers usually need walls that are at least 0.8mm thick, while resin printers can use walls as thin as 0.6mm. This guide explains important things to know about wall thickness for your 3D printing projects.  Key Factors That Affect 3D Printing Wall Thickness  The minimum wall thickness needed for successful 3D printing relies on multiple factors working together. The right thickness depends on your printer's skills, the material you're using, and how the part will be used.  3D Printing Technology  Different printing methods build layers differently, which affects how thin your walls can be.  1. FDM  FDM 3D printers have a fixed nozzle size and require multiple passes to build robust walls. The adhesion strength between layers is crucial when determining the minimum wall thickness.  2. SLA  SLA (Stereolithography) printers use laser precision to make finer details than FDM. The liquid resin's qualities affect how thin the layers can be, which makes these printers great for creating small, detailed shapes.  3. SLS  SLS (Selective Laser Sintering) uses powdered materials, and the size of the particles affects how small the details can be. This method can handle complicated shapes, but removing extra powder limits how thin the walls can be.  4. MultiJet/PolyJet  MultiJet and PolyJet printers use accurate droplet printing, much like how inkjet printers work. They can work with different materials, but each material needs a specific width.  Material Properties  The type of 3D printing material you choose significantly impacts the minimum wall thickness. Brittle 3D printing materials require thicker walls to prevent cracking, whereas flexible materials need additional thickness to maintain their shape and avoid bending. Stronger materials can typically be used to create thinner walls without sacrificing strength.  Different materials can handle heat differently, which influences how they perform during printing and when in use. Some materials can bend or warp if printed too thin, so it's important to think about the minimum width needed.  End Use Requirements Structural Considerations  The aim of your printed part decides how thick the walls need to be. The thickness of items depends on their purpose. Decorative items can be smaller, but parts that support weight need to be thicker for strength. Moving parts need certain spaces, and snap-fit pieces must be flexible enough to function correctly.  Environmental Factors  Environmental factors are also very important. Thin walls that get hot may become misshapen. Exposure to moisture can weaken some materials over time, so stronger walls are needed for strength. The need for UV light protection and resistance to contact also affects how thick materials must be for long-term stability.  Recommended Wall Thickness for Different 3D Printing Methods  The specific minimum wall thickness varies by printing method and material. Here are detailed recommendations for your 3D printing projects.  Minimum Wall Thickness by Technology Print Type	Basic Parts	Standard Parts	Load-Bearing Parts	Detailed Features FDM	0.8mm	1.2mm	2.0 - 2.4mm	1.0mm SLA	0.6mm	0.8mm	1.2 - 1.5mm	0.6mm SLS	0.7mm	1.0mm	1.5 - 2.0mm	0.8mm MultiJet	0.6mm	0.8mm	1.2 - 1.5mm	0.6mm Material-Based Thickness Adjustments Material Type	Additional Thickness Needed Standard PLA	No adjustment needed ABS/ASA	+0.2mm Carbon Fiber	+0.1mm Soft TPU	+0.4mm Very Soft TPU	+0.6mm Elastic Resin	+0.3mm Special Applications Application	Recommended Thickness Support Structures	1.0 - 1.6mm Moving Parts	1.2 - 1.5mm Snap Fits	1.2 - 2.0mm Clear Parts	0.8 - 1.0mm Molds	1.2 - 2.0mm  These measurements provide starting points for common applications. The final wall thickness should account for your specific printer's capabilities and the part's intended use.  Design Considerations for 3D Printing Wall Thickness Strategic Wall Thickness Design  After choosing the basic wall thickness for your printing method and material, certain areas of your model need special attention:  High-Stress Areas Mount points: Add 50% more thickness than your base walls Screw holes: Surrounding area should be 2-3 times the base thickness Snap fits: Double the wall thickness around clip mechanisms Living hinges: Reduce to 75% of base thickness for flexibility Support ribs: Use 80% of main wall thickness for efficient reinforcement Corner and Transition Design Add 1-2mm fillets to sharp internal corners Use gradual thickness transitions (max 45° angle) Maintain minimum 2:1 ratio between connected thick and thin sections Avoid sudden thickness changes that could create weak points Print Time and Material Efficiency  Wall thickness directly impacts resource use. Here's how different wall designs affect a typical 100mm × 100mm × 100mm part:  Design Approach	Material Use	Print Time	Relative Cost Uniform Thick Walls (2mm)	200g	5 hrs	100% Optimized Variable Walls (1.2-2mm)	140g	3.5 hrs	70% Reinforced Thin Walls (1.2mm + ribs)	120g	3 hrs	60%  Several design approaches can reduce material use and print time:  Replace thick walls with thin walls plus support ribs Use honeycomb or triangular infill in wide flat areas Add thickness only to load-bearing sections Design self-supporting angles (>45°) to reduce support material  Smart wall thickness choices lead to significant savings in both time and material while maintaining part strength. The right balance of thickness in different areas creates efficient, durable prints at lower costs.  Testing Methods to Verify 3D Printing Wall Thickness  Before making the end product, testing ensures that the wall thicknesses you selected are effective. Both digital and real tests are important for improving your design.  Digital Testing with CAD Software  CAD thickness analysis shows parts of your design that could be too thin or too thick. This early check helps stop printing problems and weak structures. The program looks at your whole model and points out parts that need changes.  Draft angle analysis looks for steep slopes and overhangs that might create issues with printing. These areas often need extra support or changes in design to be printed properly.  Advanced modeling tools help you understand how your part will perform in real situations. These tests show where stress happens, where things might change shape, and how heat affects them. This information helps make important choices about wall thickness for functional parts.  Physical Test Prints  A small test piece at 25% scale provides practical insights about your design. This scaled-down version should include key features like joints, clips, or mounting points. The smaller size saves time and material while still validating your wall thickness choices.  Test prints help verify several aspects:  Actual printed thickness matches design specifications Layer adhesion quality in thin sections Performance of functional features Strength of thickness transitions  Each test reveals opportunities for improvement. Thin areas might need reinforcement, while thick sections could potentially be reduced. This practical feedback helps refine your design efficiently.  Common Mistakes in Wall Thickness Design  Poor wall thickness decisions can lead to print failures or part performance issues. Here are the most common mistakes and their solutions.  Inconsistent Wall Thickness  Sudden thickness changes in a model are a frequent error. For example, shifting from 2mm to 0.8mm causes:  Poor layer bonding during printing Stress concentration leading to cracks Extrusion issues and print defects  Solution: Design gradual transitions with thickness changes no steeper than 45 degrees. Limit changes to 0.2mm per 1mm of distance.  Excessive Wall Thickness  Walls that are too thick create several problems:  Wasted material and longer print times Warping from uneven cooling between inner and outer layers Unnecessary part weight  Solution: Add thickness only in load-bearing areas. Keep other regions at recommended base thickness. Use support ribs to increase strength instead of simply making walls thicker.  Insufficient Wall Thickness  Walls that are too thin often result from prioritizing detail or trying to save material:  Unable to handle normal use stresses Prone to breakage or deformation during printing Poor surface quality  Solution: Follow minimum wall thickness requirements for your printing technology. For decorative features, strengthen the supporting structure rather than compromising on minimum thickness.  Design Your 3D Printing Wall Thickness Right!  The right wall thickness is important for efficient 3D printing. Use the suggested minimum width for your printing method and material, and then change it if necessary for your specific part. Use online tests and small printed samples to check your design. By designing wall thickness carefully to avoid rapid changes and address stress points, you can make strong, efficient parts while saving time and materials.

طرق الاختبار للتحقق من سمك جدار الطباعة ثلاثية الأبعاد

قبل تصنيع المنتج النهائي، يُجرى اختبار للتأكد من فعالية سُمك الجدران الذي اخترته. الاختبارات الرقمية والحقيقية مهمة لتحسين تصميمك.

الاختبار الرقمي باستخدام برنامج CAD

تحليل سمك CAD يُظهر أجزاءً من تصميمك قد تكون رقيقةً جدًا أو سميكةً جدًا. يُساعد هذا الفحص المُبكر على تجنّب مشاكل الطباعة والهياكل الضعيفة. يُلقي البرنامج نظرةً على نموذجك بالكامل ويُشير إلى الأجزاء التي تحتاج إلى تعديل.

يبحث تحليل زاوية المسودة عن المنحدرات الحادة والنتوءات التي قد تُسبب مشاكل في الطباعة. غالبًا ما تحتاج هذه المناطق إلى دعم إضافي أو تعديلات في التصميم لطباعتها بشكل صحيح.

تساعدك أدوات النمذجة المتقدمة على فهم أداء قطعتك في الظروف الواقعية. تُظهر هذه الاختبارات أماكن حدوث الإجهاد، والأماكن التي قد يتغير فيها شكل الأشياء، وكيف تؤثر الحرارة عليها. تساعد هذه المعلومات في اتخاذ قرارات مهمة بشأن سُمك جدار القطع الوظيفية.

مطبوعات الاختبار البدني

قطعة اختبار صغيرة بمقياس ٢٥٪ تُقدم رؤى عملية حول تصميمك. يجب أن تتضمن هذه النسخة المُصغّرة ميزات رئيسية مثل الوصلات والمشابك ونقاط التثبيت. يُوفر الحجم الأصغر الوقت والمواد، مع الحفاظ على صحة اختياراتك لسمك الجدار.

تساعد المطبوعات الاختبارية في التحقق من عدة جوانب:

  • سمك الطباعة الفعلي يطابق مواصفات التصميم
  • جودة التصاق الطبقة في المقاطع الرقيقة
  • أداء الميزات الوظيفية
  • قوة انتقالات السُمك

يكشف كل اختبار عن فرص للتحسين. قد تحتاج المناطق الرقيقة إلى تعزيز، بينما يُمكن تقليل الأجزاء السميكة. تُساعد هذه الملاحظات العملية على تحسين تصميمك بكفاءة.

الأخطاء الشائعة في تصميم سمك الجدار

قد يؤدي سوء اختيار سمك الجدار إلى فشل الطباعة أو مشاكل في أداء الأجزاء. إليك أكثر الأخطاء شيوعًا وحلولها.

سمك الجدار غير متناسق

التغييرات المفاجئة في سمك النموذج خطأ شائع. على سبيل المثال، يؤدي الانتقال من ٢ مم إلى ٠.٨ مم إلى:

  • ضعف التصاق الطبقات أثناء الطباعة
  • تركيز الإجهاد يؤدي إلى الشقوق
  • مشاكل البثق وعيوب الطباعة

حل: صمّم انتقالات تدريجية مع تغيرات في السُمك لا تتجاوز 45 درجة. حدّ التغييرات إلى 0.2 مم لكل 1 مم من المسافة.

سمك الجدار الزائد

إن الجدران السميكة جدًا تسبب العديد من المشاكل:

  • المواد المهدرة وأوقات الطباعة الأطول
  • الانحناء الناتج عن التبريد غير المتساوي بين الطبقات الداخلية والخارجية
  • وزن الجزء غير الضروري

حل: أضف السُمك فقط في المناطق الحاملة للأحمال. حافظ على السُمك الأساسي الموصى به في المناطق الأخرى. استخدم أضلاع الدعم لزيادة القوة بدلاً من مجرد زيادة سُمك الجدران.

سمك الجدار غير كافٍ

غالبًا ما تكون الجدران رقيقة جدًا نتيجة لإعطاء الأولوية للتفاصيل أو محاولة توفير المواد:

  • غير قادر على التعامل مع ضغوط الاستخدام العادية
  • عرضة للكسر أو التشوه أثناء الطباعة
  • جودة السطح رديئة

حل: التزم بمتطلبات الحد الأدنى لسُمك الجدار لتقنية الطباعة الخاصة بك. للميزات الزخرفية، عزز الهيكل الداعم بدلاً من التضحية بالحد الأدنى للسُمك.

صمم سمك جدار الطباعة ثلاثية الأبعاد الخاص بك بشكل صحيح!

سمك الجدار المناسب مهم لـ الطباعة ثلاثية الأبعاد الفعالةاستخدم الحد الأدنى للعرض المقترح لطريقة الطباعة والمواد، ثم غيّره إذا لزم الأمر لقطعتك المحددة. استخدم الاختبارات عبر الإنترنت والعينات المطبوعة الصغيرة للتحقق من تصميمك. من خلال تصميم سُمك الجدار بعناية لتجنب التغييرات السريعة ومعالجة نقاط الضغط، يمكنك صنع قطع قوية وفعالة مع توفير الوقت والمواد.

Table of contents

الأسئلة الشائعة

ابحث عن إجابات لأسئلتك الأكثر إلحاحًا حول آلات الطباعة ثلاثية الأبعاد وخدماتنا.

الطباعة ثلاثية الأبعاد هي عملية إنشاء أجسام ثلاثية الأبعاد من ملف رقمي. تتضمن هذه العملية وضع طبقات من مواد، مثل البلاستيك أو المعدن، لبناء المنتج النهائي. تتيح هذه التقنية المبتكرة التخصيص والنمذجة الأولية السريعة.

نقدم خيارات شحن سريعة وموثوقة لجميع منتجاتنا. بمجرد تقديم طلبك، ستتلقى رقم تتبع لمتابعة سير عملية الشحن. قد تختلف أوقات الشحن حسب موقعك.

طابعاتنا ثلاثية الأبعاد تأتي مع ضمان لمدة عام واحد يغطي عيوب التصنيع. تتوفر خيارات ضمان ممتد للشراء. يُرجى مراجعة سياسة الضمان لمزيد من التفاصيل.

نعم، لدينا سياسة إرجاع سهلة. إذا لم تكن راضيًا عن مشترياتك، يمكنك إرجاعها خلال 30 يومًا لاسترداد أموالك بالكامل. يُرجى التأكد من أن المنتج في حالته الأصلية.

بالتأكيد! فريق الدعم لدينا جاهز لمساعدتك في أي استفسار أو مشكلة. يمكنك التواصل معنا عبر البريد الإلكتروني أو الهاتف للحصول على مساعدة فورية. كما نوفر مركز موارد شاملًا عبر الإنترنت.

لا يزال لديك أسئلة؟

نحن هنا لمساعدتك في أي استفسار.