 س 2
س 2


كيفية تحسين طبقات النموذج في QIDI استوديو؟
بالإضافة إلى وضع المزهرية الحلزونية، يجب أن يكون لكل مسار دائري خارجي تمر به الفوهة أثناء الطباعة ثلاثية الأبعاد نقطة بداية ونقطة نهاية، والتي ستشكل خطًا على جانب الكائن ويؤثر بشكل كبير على المظهر (كما هو موضح في الشكل أدناه).

من أجل تحسين الملمس العام ودقة الطباعة للنموذج،
مثال
قبل استخدام أداة طلاء اللحامات، يمكننا أن نرى أن اللحامات تقع على الجزء الأمامي من القناع، مما يؤثر بشكل كبير على المظهر.

بعد طلاء اللحامات، يمكننا أن نرى أن اللحامات تقع على الجزء الخلفي من القناع ولا تؤثر على الأداء.

يتم تحقيق تأثير النموذج الموضح في الشكل أعلاه عن طريق طلاء اللحامات. للحصول على تأثير مماثل، يمكنك اتباع الخطوات التالية.
خطوات
1. حدد النموذج، وانقر فوق "رسم اللحامات" في القائمة، وأدخل واجهة رسم اللحامات.

2. قم بطلاء اللحامات في الموضع المناسب للنموذج.

3. انقر فوق "لوحة الشريحة" ويمكنك العثور على التماس يظهر حيث قمنا برسمه.
إعدادات موضع التماس
هناك أربعة أنواع من مواضع التماس للاختيار من بينها
بالنسبة لمبادئ العمل وتعبيرات الخوارزميات المتعلقة بأوضاع التماس الأربعة هذه، يرجى الرجوع إلى
https://wiki.qidi3d.com/en/software/qidi-slicer/print-settings/seam-position
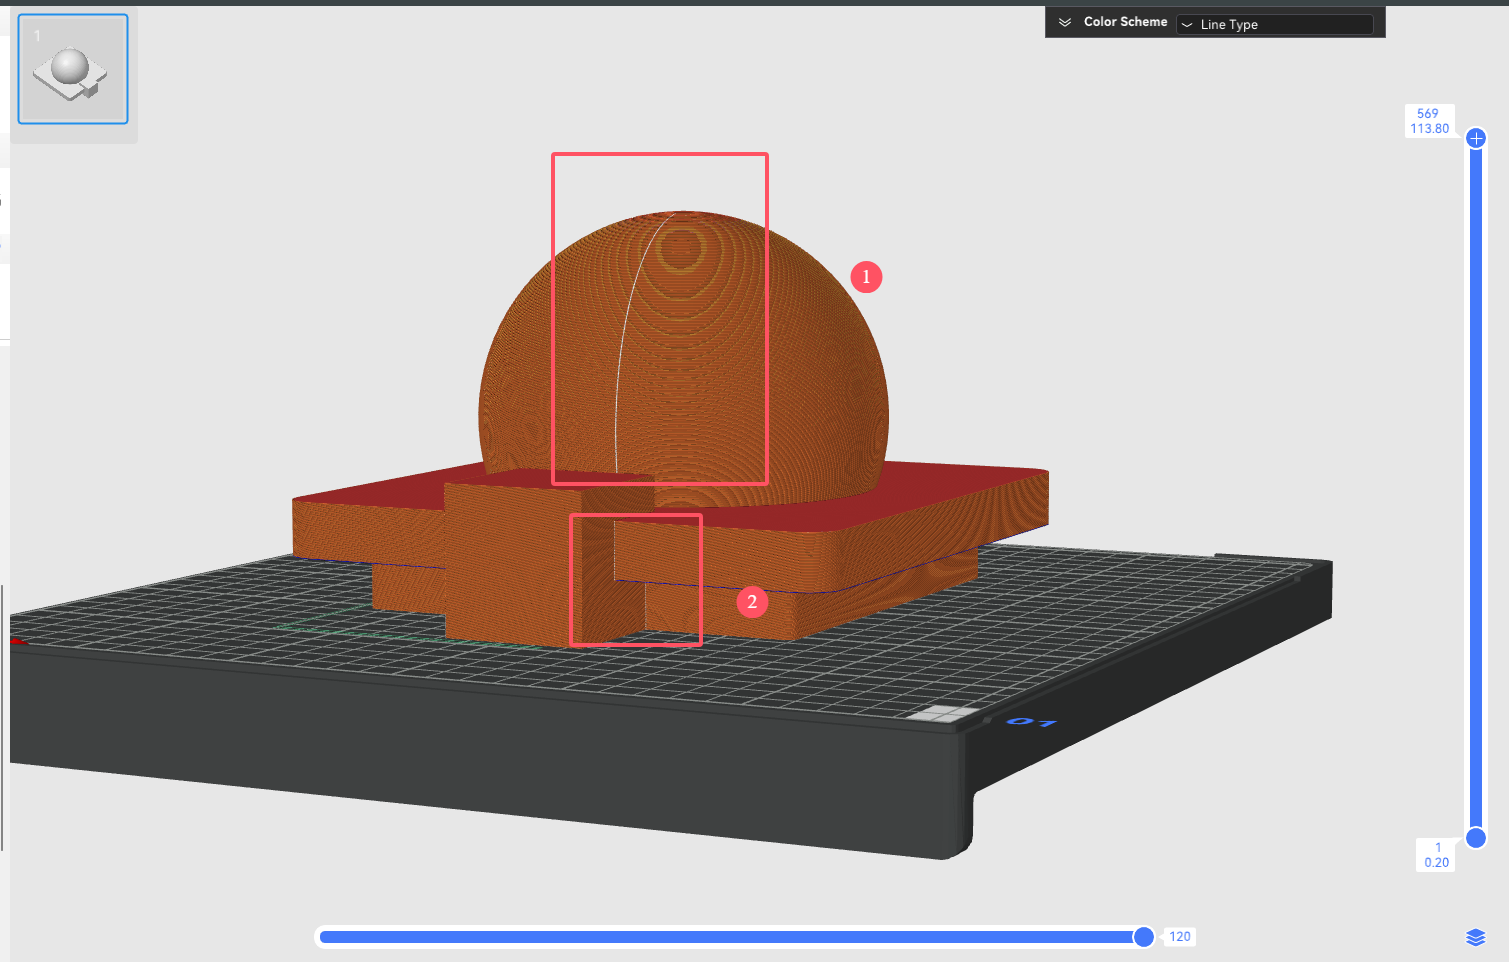
مثال على تحسين موضع التماس:

تحليل المشكلة: كما هو موضح في الشكل أعلاه، بعد استخدام "محاذاة" وضع التماس، يتم توزيع التماسات في هذا النموذج بشكل أساسي في الجزأين 1 و2.
الجزء الأول: يقع التماس في الجزء الأمامي من النموذج، مما يؤثر على الأداء ويجب تحسينه في الجزء الخلفي منه.
الجزء الثاني: تم إخفاء اللحامات بالفعل على الرؤوس المقعرة وتعمل بشكل جيد، لذا لا يلزم إجراء أي تحسين.

خطوات التحسين: استخدم أداة رسم الدرزات لرسم الدرزات على ظهر الكرة، ثم قصّها. لاحظ اختفاء الدرزات على مقدمة النموذج.


في النهاية
من خلال البرامج التعليمية والمقدمات المذكورة أعلاه، يمكنك تحسين طبقات النموذج ومظهره بشكل فعال
اقرأ المزيد
كيفية إضافة التعديلات في

